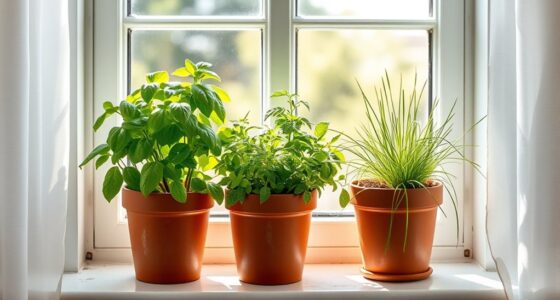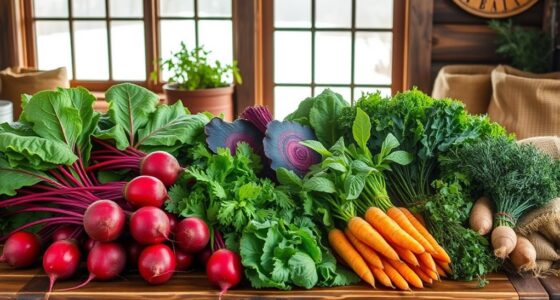
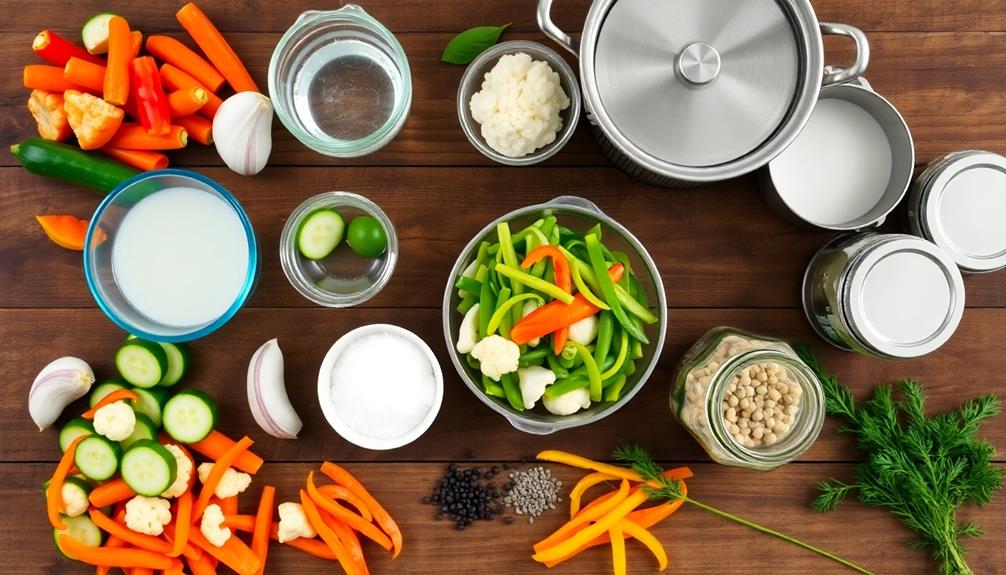
Pickling seasonal vegetables is a great way to preserve your harvest and enjoy fresh flavors all year. You'll need fresh veggies, a brine of vinegar, water, salt, and sugar, plus some spices for extra flavor. Start by preparing your brine and cutting your vegetables into uniform pieces. Pack the veggies tightly into clean jars, then pour the warm brine over them. Seal the jars and refrigerate for at least 24 hours before eating. Your pickles will keep for about a month in the fridge. With this simple technique, you can create tasty pickles from cucumbers, carrots, peppers, and more. Discover the endless possibilities of pickling!
Key Takeaways
- Pickling preserves seasonal vegetables, allowing year-round enjoyment of garden or market produce.
- Basic brine for pickling consists of vinegar, water, salt, and sugar, customizable with various spices.
- Quick pickles are ready in 24 hours, but flavor develops over time in the refrigerator.
- Proper jar preparation and sealing are crucial for food safety and longevity of pickled vegetables.
- Pickling reduces food waste, provides homemade gifts, and allows for flavor experimentation with different vegetables and spices.
Top picks for "pickl seasonal vegetabl"
Open Amazon search results for this keyword.
As an affiliate, we earn on qualifying purchases.
History
Pickling, an ancient preservation technique, dates back thousands of years. You'll find evidence of pickled foods in ancient civilizations like Mesopotamia and China. People discovered that soaking vegetables in salt water or vinegar could keep them edible for longer periods.
As you explore the history of pickling, you'll learn that it became essential for long sea voyages and in regions with harsh winters. Sailors and explorers relied on pickled vegetables to prevent scurvy, a disease caused by lack of vitamin C. In many cultures, pickling wasn't just about preservation; it was also a way to add flavor and variety to diets.
You'll notice that different regions developed their own pickling styles. In Europe, you might've encountered pickled cabbage (sauerkraut) or cucumbers. In Asia, you'd find pickled radishes, carrots, and other vegetables common to the area.
As trade routes expanded, pickling techniques and recipes spread across the globe. Today, you can enjoy a wide variety of pickled seasonal vegetables from many cultures, each with its unique flavors and traditions.
Recipe
Pickling seasonal vegetables is a fantastic way to preserve the bounty of your garden or local farmer's market. This versatile method allows you to enjoy the flavors of summer and fall throughout the year, adding a tangy and crisp element to your meals. Additionally, incorporating seeds such as chia seeds in gluten-free diets can enhance the nutritional value of your dishes, making them even more satisfying. For example, pickling zucchini, carrots, and cauliflower can provide delicious, tangy additions to salads and sandwiches. Another delightful way to enjoy pickled vegetables is to use them as a filling for delicious stuffed squash blossoms. The possibilities are endless when it comes to incorporating pickled vegetables into your meals, and they provide a nutritious and flavorful addition to any dish.
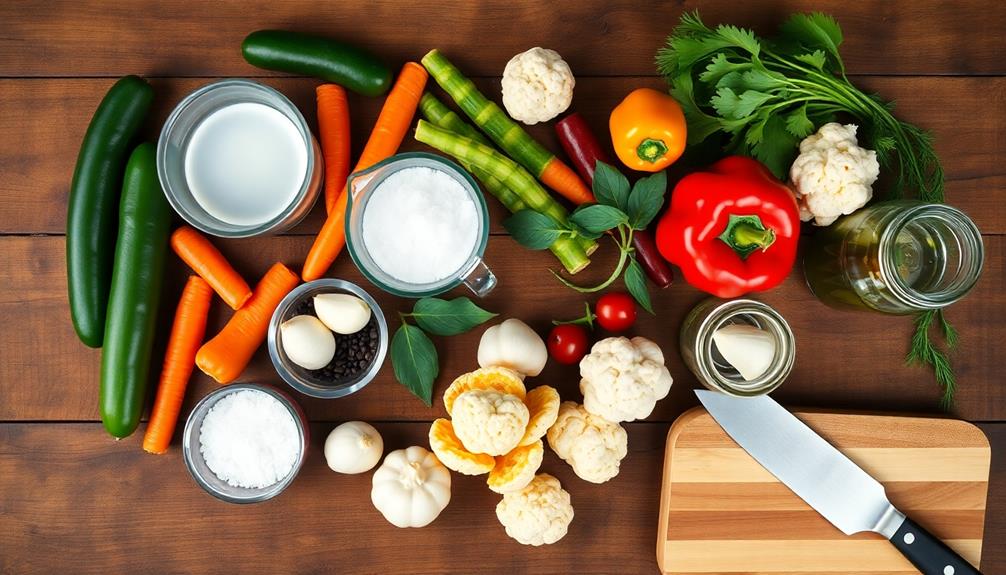
This recipe for pickled seasonal vegetables is highly adaptable, allowing you to use whatever produce is currently in season. From cucumber and carrots to cauliflower and bell peppers, almost any vegetable can be transformed into a delicious pickled treat. The brine, a combination of vinegar, water, salt, and sugar, can be customized with various spices and herbs to suit your taste preferences.
- 4 cups mixed seasonal vegetables, cut into bite-sized pieces
- 2 cups white vinegar
- 2 cups water
- 2 tablespoons kosher salt
- 2 tablespoons granulated sugar
- 2 cloves garlic, peeled and lightly crushed
- 1 tablespoon whole black peppercorns
- 1 bay leaf
- 1 teaspoon mustard seeds
- 1 teaspoon coriander seeds
- 2 sprigs fresh dill (optional)
Begin by washing and preparing your chosen vegetables, cutting them into uniform pieces for even pickling. In a medium saucepan, combine the vinegar, water, salt, and sugar. Bring this mixture to a boil, stirring until the salt and sugar have dissolved.
Meanwhile, pack the prepared vegetables into clean, sterilized jars along with the garlic, peppercorns, bay leaf, mustard seeds, coriander seeds, and dill (if using). Carefully pour the hot brine over the vegetables, ensuring they're completely covered. Allow the jars to cool to room temperature before sealing and refrigerating. The pickles will be ready to eat after 24 hours but will develop more flavor over time.
For best results, use fresh, crisp vegetables and avoid overcooked or soft produce. Experiment with different vinegars, such as apple cider or rice vinegar, to create unique flavor profiles. These quick pickles will keep in the refrigerator for up to one month. For longer storage, consider using a water bath canning method to create shelf-stable pickles that can be stored at room temperature for up to a year.
Cooking Steps
You're ready to start the pickling process!
First, you'll prepare the brine solution and clean and cut your chosen vegetables.
Next, you'll pack the veggies into jars, pour the brine over them, and seal the containers tightly.
Step 1. Prepare Brine Solution
Crafting the perfect brine is crucial for delicious pickled vegetables. You'll need to combine water, vinegar, salt, and sugar in the right proportions. Start by measuring out 2 cups of water and 2 cups of vinegar. Pour these into a large pot on the stove.
Next, add 2 tablespoons of salt and 2 tablespoons of sugar to the liquid. Turn on the heat to medium-high and stir the mixture until the salt and sugar dissolve completely.
While the brine is heating, you can add extra flavors if you'd like. Try tossing in some whole peppercorns, mustard seeds, or a bay leaf. These spices will infuse your pickles with extra taste.
Keep stirring the brine as it comes to a boil. Once it's boiling, reduce the heat and let it simmer for about 5 minutes. This helps the flavors blend together.
After simmering, turn off the heat and let the brine cool down a bit. It should be warm, not hot, when you pour it over your vegetables. Now you're ready to pickle!
Step 2. Clean and Cut Vegetables
Begin by thoroughly washing your chosen vegetables under cool running water. Use a soft brush to gently scrub away any dirt or debris. Once clean, pat them dry with a clean towel.
Next, it's time to cut your veggies. Grab a sharp knife and a cutting board. For cucumbers, slice them into spears or rounds, about 1/4 inch thick. If you're using carrots, peel them first, then cut into sticks or thin rounds. Bell peppers should be seeded and sliced into strips.
For onions, remove the outer skin and cut into thin rings or wedges. When cutting cauliflower or broccoli, break them into small, bite-sized florets. Green beans and asparagus can be left whole or cut in half.
Remember, you want your vegetables to fit easily into your jars. As you cut, keep the pieces uniform in size so they'll pickle evenly. If you're using different types of vegetables, keep them separated. This way, you can arrange them neatly in the jars later.
Don't forget to compost or save any veggie scraps for stock!
Step 3. Pack Vegetables Into Jars
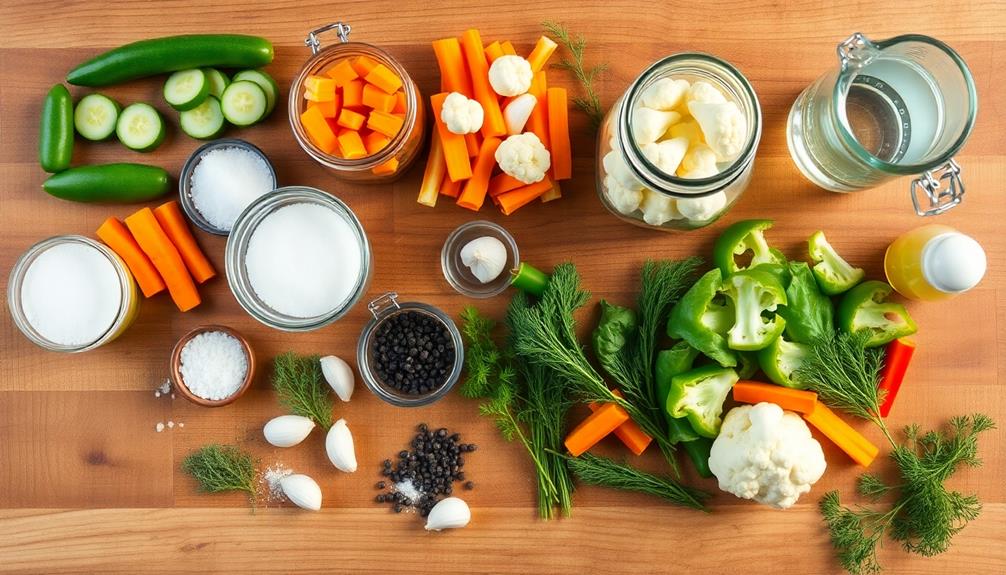
Now that your vegetables are prepped, it's time to pack them into jars. Start by selecting clean, sterilized jars with tight-fitting lids. You'll want to choose jars that are the right size for your needs. Make sure you have enough jars ready for all your veggies.
Begin filling each jar with your cut vegetables. Pack them in tightly, but don't crush them. You want to leave about an inch of space at the top of the jar. This is called headspace, and it's important for the pickling process.
As you pack, try to arrange the vegetables neatly. This will make your jars look more attractive. If you're using different types of vegetables, you can layer them for a pretty effect. Add any whole spices or herbs you're using between the layers. These will add flavor and visual interest to your pickles.
Don't worry if you can't fit all your vegetables into the jars. It's better to have extra than to overfill them. Once you've packed all your jars, you're ready for the next step in the pickling process.
Step 4. Pour Brine Over Vegetables

The brine is the heart of your pickled vegetables, infusing them with flavor and preserving them.
It's time to carefully pour this flavorful liquid over your packed jars of veggies. First, make sure your brine is hot but not boiling. Using a ladle or a funnel, slowly pour the brine into each jar, leaving about 1/2 inch of space at the top. This headspace is important for proper sealing.
As you pour, you'll notice the brine seeping into all the nooks and crannies between the vegetables. Don't worry if you see some air bubbles rising – that's normal.
Once you've filled all the jars, use a clean knife or chopstick to gently press down on the vegetables and release any trapped air bubbles. If needed, add more brine to maintain the 1/2 inch headspace.
Step 5. Seal and Refrigerate Jars
Sealing and refrigerating your jars is the final crucial step in the pickling process. Once you've poured the hot brine over your vegetables, it's time to secure the lids.
Make sure the jar rims are clean and dry, then place the lids on top. Screw on the bands until they're finger-tight, but don't overtighten them. This allows air to escape during the cooling process.
Let the jars cool at room temperature for about an hour. You might hear popping sounds as the lids seal – that's a good sign!
After cooling, check the seals by pressing down on the center of each lid. If it doesn't flex, it's sealed properly. If any lids aren't sealed, don't worry. Just put those jars in the fridge and use them first.
Once all your jars are sealed, it's time to refrigerate. Store them in the back of your fridge where it's coldest.
Your pickled vegetables will need at least 24 hours to develop their flavors, but they'll be even better after a week. Remember to label your jars with the date you made them.
Enjoy your homemade pickles within 2-3 months for the best taste and texture!
Final Thoughts
With pickling, you've unlocked a world of flavor and preservation. You've learned how to turn seasonal vegetables into delicious, long-lasting treats.
Remember, the key to great pickles is using fresh, high-quality produce and following the recipe closely. Don't be afraid to experiment with different spices and herbs to create your own unique flavors.
As you continue your pickling journey, always prioritize food safety. Make sure your jars and tools are clean and sterilized. Keep an eye on your pickles as they age, and if you notice any signs of spoilage, like mold or off-smells, it's best to discard them.
Pickling is a fantastic way to reduce food waste and enjoy your favorite vegetables year-round. It's also a fun activity to share with friends and family. You can even give your homemade pickles as gifts!
With practice, you'll become more confident in your pickling skills and may find yourself eagerly awaiting each season's bounty to preserve. Happy pickling!
Frequently Asked Questions
Can Pickled Vegetables Be Frozen for Long-Term Storage?
You shouldn't freeze pickled vegetables for long-term storage. It'll change their texture and flavor. Instead, keep them in their brine in a cool, dark place. They'll last for months in the refrigerator when properly sealed.
How Long Do Homemade Pickled Vegetables Last in the Refrigerator?
You'll find that homemade pickled vegetables typically last 2-3 months in the fridge. They're safe to eat longer, but their quality may decline. Always check for signs of spoilage before consuming, and enjoy them while they're fresh!
Are Pickled Vegetables Safe for Pregnant Women to Consume?
If you're pregnant, you can safely eat most pickled vegetables. They're a great source of probiotics and nutrients. However, you'll want to ensure they're properly prepared and stored. Always consult your doctor for personalized advice.
Can I Reuse the Pickling Brine for Multiple Batches?
You can reuse pickling brine, but it's not recommended. The brine loses acidity and flavor with each use, potentially compromising food safety. If you do reuse it, only do so once and add extra vinegar to maintain acidity.
What Are the Best Containers for Storing Pickled Vegetables?
You'll want to use glass jars for storing pickled vegetables. They're non-reactive and won't affect the flavor. Mason jars work great, but any clean, airtight glass container will do. Avoid plastic or metal containers.