Vietnamese sesame balls, or "bánh rán," are amazing treats you'll love! These crispy and chewy delights have a golden-brown coating, thanks to frying, and they're filled with sweet surprises like red bean paste or mung beans. Made from glutinous rice flour, they represent happiness and prosperity, making them perfect for celebrations like the Lunar New Year. You can enjoy sesame balls at special events or even as a cozy snack after school. Their unique texture and delicious taste make them a hit! Want to discover how to make these tasty treats at home? Get ready to find out! Making these tasty delights is simpler than you might think! To get started on your own homemade batch, search for a Vietnamese sesame ball recipe that guides you through the steps of preparing the dough, filling, and perfecting that crispy golden texture. Once you’ve mastered the technique, you’ll have a delicious treat to share with family and friends, adding a touch of joy to any occasion!
Key Takeaways
- Vietnamese sesame balls, or "bánh rán," symbolize prosperity and are traditionally served during celebrations, particularly Lunar New Year.
- Made from glutinous rice flour, they have a chewy texture with a crispy outer layer from frying.
- Common fillings include sweet red bean paste or mung beans, enhancing the flavor profile.
- The preparation process can be a communal activity, promoting family bonds and social interactions.
- They offer a unique sensory experience with contrasting textures and delightful aromas, perfect for various occasions.
Top picks for "vietnamese sesame ball"
Open Amazon search results for this keyword.
As an affiliate, we earn on qualifying purchases.
History
Vietnamese sesame balls, or "bánh rán," are often enjoyed during celebrations and family gatherings, showcasing their deep-rooted cultural significance.
These delightful treats have a rich history that traces back centuries in Vietnam. You might be surprised to learn that they're not just tasty snacks; they symbolize prosperity and happiness. Many families serve them during the Lunar New Year, believing that eating bánh rán brings good luck for the coming year.
The process of making these balls involves a blend of sticky rice flour and sesame seeds, which gives them a unique texture and flavor. Over time, they've evolved, with different regions adding their special touches. In some areas, you'll find sweet fillings made from red bean paste or mung beans, while others might offer a savory twist.
As you enjoy these crispy and chewy treats, you're also partaking in a tradition that celebrates community and family. Whether you're munching on them at a festival or helping your parents prepare them at home, each bite connects you to Vietnam's vibrant culture.
Cooking Steps
To make delicious sesame balls, you'll need to follow a series of straightforward steps that ensure they come out perfectly golden and crispy.
First, gather your ingredients: glutinous rice flour, water, sugar, and sweet red bean paste. In a bowl, mix the rice flour and sugar, then gradually add water until you get a smooth dough.
Next, divide the dough into small balls, about the size of a golf ball. Don't forget to flatten each ball slightly and place a little bean paste in the center. Gently fold the dough around the filling, rolling it into a perfect sphere.
Now it's time to coat your balls with sesame seeds. Roll each ball in sesame seeds until they're fully covered.
Heat oil in a pan until it's hot but not smoking. Carefully drop the sesame balls into the oil and fry them until they turn golden brown. Remember to turn them, so they cook evenly on all sides!
Once done, let them cool on a paper towel. Enjoy your crispy, chewy treats with a sweet filling! You've just made Vietnamese sesame balls, and they're sure to impress!
Step 1. Prepare Glutinous Rice Flour
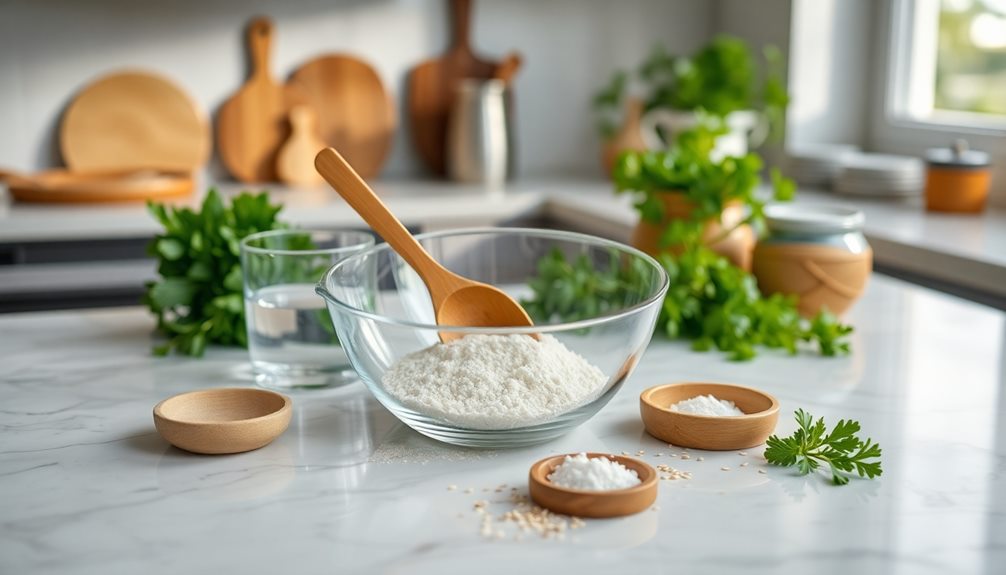
For perfecting your Vietnamese sesame balls, you'll need to start with the right glutinous rice flour. This special flour is what gives your treats that delightful chewy texture everyone loves. You can find glutinous rice flour at most Asian grocery stores, and it's usually labeled as "sweet rice flour." Make sure you grab the right kind!
Once you've got your flour, measure out about two cups. It's best to use a dry measuring cup, so you get the right amount. If you're feeling adventurous, you can sift it to make sure there are no lumps. This step isn't necessary, but it helps the flour mix better later on!
Now that you have your flour ready, you can set it aside for when you need it. Keep it in a cool, dry place until you're ready to make your sesame balls.
Remember, this flour is the foundation of your delicious treats, so treat it with care! You're one step closer to making those crispy and chewy delights that will wow your family and friends.
Get excited because soon, you'll be enjoying your homemade Vietnamese sesame balls!
Step 2. Mix in Warm Water
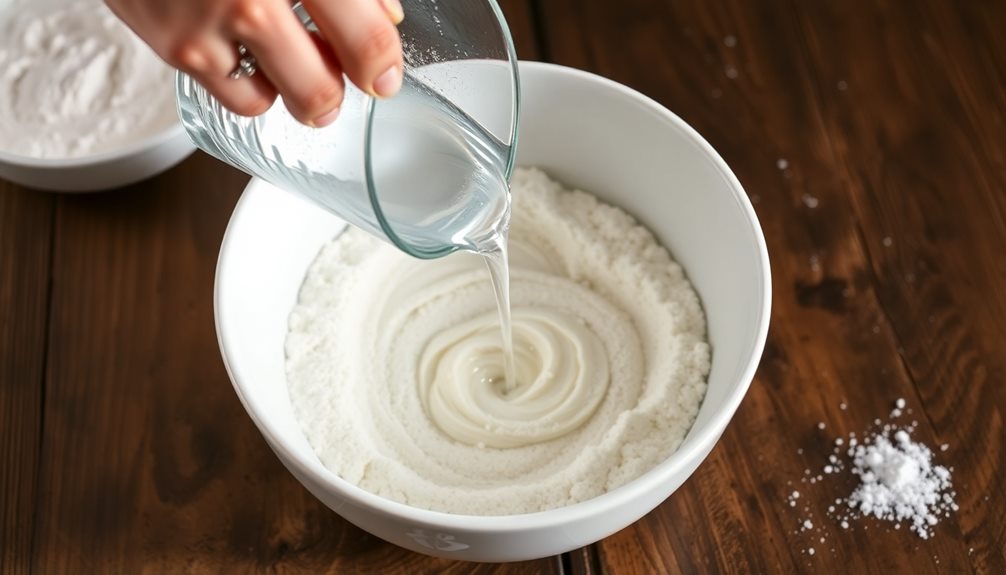
Now that you've got your glutinous rice flour ready, it's time to mix in warm water. Grab a bowl and pour in your flour.
Next, heat some water until it's warm, but not boiling. You want it to be just right, so it feels nice when you touch it. Slowly add the warm water to the flour, a little at a time. As you pour, use a spoon or your hands to mix everything together.
Keep mixing until the flour absorbs the water and forms a soft, slightly sticky dough. Don't worry if it feels a bit sticky; that's a good sign! If it's too dry, add a tiny bit more warm water. You might need to use your hands to knead the dough gently, making sure it's smooth and well-combined.
Once you've got the right texture, let the dough rest for about 10 minutes. This helps it become even more pliable.
You're almost there! The smell of the warm flour mixed with water is delightful, and soon you'll be shaping these tasty treats. So, keep that excitement going; you're doing great!
Step 3. Shape Into Small Balls

With your dough ready, it's time to shape it into small balls. Start by dusting your hands with a little cornstarch or flour to keep the dough from sticking.
Grab a small piece of dough, about the size of a golf ball, and roll it gently between your palms. You want it to be smooth and round, just like a little marble!
Once you've shaped one ball, set it aside on a plate. Keep going until you've shaped all the dough into small balls. Remember, the size is important; if they're too big, they mightn't cook evenly, and if they're too small, they won't hold enough filling.
Speaking of filling, if you've got some sweet red bean paste or any other tasty filling, now's the time to think about how you want to add it. You can flatten each ball slightly, place a little filling in the center, and then wrap the dough around it, sealing it tightly.
This way, you've got a lovely surprise waiting inside! Keep your workspace neat, and soon you'll have a whole plate of these delightful treats ready for the next step!
Step 4. Fry Until Golden Brown

After shaping your dough balls and filling them, it's time to heat up the oil for frying.
Grab a deep pot and pour in enough oil to cover the sesame balls. Turn on the heat to medium-high, and keep an eye on it. You want the oil to get hot, but not too hot—about 350°F is perfect. To test if it's ready, drop a small piece of dough in. If it sizzles and bubbles, you're all set!
Carefully add your dough balls to the oil, but don't overcrowd the pot. This way, they can fry evenly and get that lovely golden color we're after. Fry them for about 5 to 7 minutes, gently turning them with a slotted spoon. This helps them brown nicely all around.
As they cook, you'll notice how they puff up and turn a beautiful golden brown!
Once they look perfectly crispy, it's time to take them out. Remember, the key is to keep a close watch so they don't burn. You're just a few steps away from enjoying these delicious treats!
Step 5. Drain on Paper Towels

Carefully lift the fried sesame balls from the hot oil using a slotted spoon, allowing any excess oil to drip off. This is a crucial step because nobody wants greasy treats!
Next, gently place the sesame balls on a plate lined with paper towels. The paper towels will help soak up any leftover oil, making your delicious snacks light and crispy.
While you're arranging them, make sure the balls aren't touching each other. This way, they'll cool evenly and stay nice and crispy. You'll see the beautiful golden color shining as they rest.
After a few minutes, check to see if they're cool enough to handle. The smell will be mouth-watering, and your family or friends will be eager to try them!
If you have any extra sesame balls, feel free to store them in an airtight container. Just remember, they taste best fresh!
Now that you've drained them properly, it's time to enjoy your amazing Vietnamese sesame balls. Dip them in your favorite sauce or eat them plain; either way, you're in for a treat!
Enjoy the chewy texture and sweet filling—you've earned it!
Final Thoughts
When it comes to Vietnamese sesame balls, you can't underestimate their charm and flavor. These delightful treats aren't just delicious; they also bring people together.
Imagine sharing a plate of warm, crispy sesame balls with your friends and family. Everyone's faces light up as they take their first bite, savoring the delightful combination of crunchiness and chewiness. The sweet filling surprises them, making each bite a little adventure!
Making sesame balls at home can be a fun and rewarding experience. You'll learn about the ingredients, like glutinous rice flour and sesame seeds, while mastering a new cooking skill.
Plus, you get to enjoy the tasty results of your hard work!
Don't forget, these treats are perfect for celebrations or just a cozy snack after school. So, whether you're making them for a special occasion or just for yourself, remember to enjoy the process.
In the end, Vietnamese sesame balls are more than just food; they're a way to create memories and enjoy the simple pleasures of life.
Frequently Asked Questions
Are Vietnamese Sesame Balls Gluten-Free?
You'll find that traditional Vietnamese sesame balls aren't gluten-free, as they often use glutinous rice flour. However, some variations may substitute with gluten-free ingredients, so it's best to check specific recipes or products.
How Long Do Sesame Balls Stay Fresh?
Sesame balls stay fresh for about one to three days when stored in an airtight container at room temperature. If you refrigerate them, they'll last a bit longer, but reheat for the best texture.
Can I Freeze Vietnamese Sesame Balls?
Yes, you can freeze sesame balls! Just ensure they're fully cooled, place them in an airtight container, and freeze. When you're ready to enjoy, thaw and reheat for the best texture and flavor.
What Is the Best Way to Reheat Them?
To reheat them, preheat your oven to 350°F. Place the treats on a baking sheet and heat for about 10-15 minutes until they're warm and crispy again. Avoid using the microwave to maintain texture.
Are There Any Common Variations of Sesame Balls?
Yes, there are several common variations of sesame balls. You might find fillings like red bean paste, lotus seed paste, or even savory options. Each variation offers a unique taste that's worth trying!