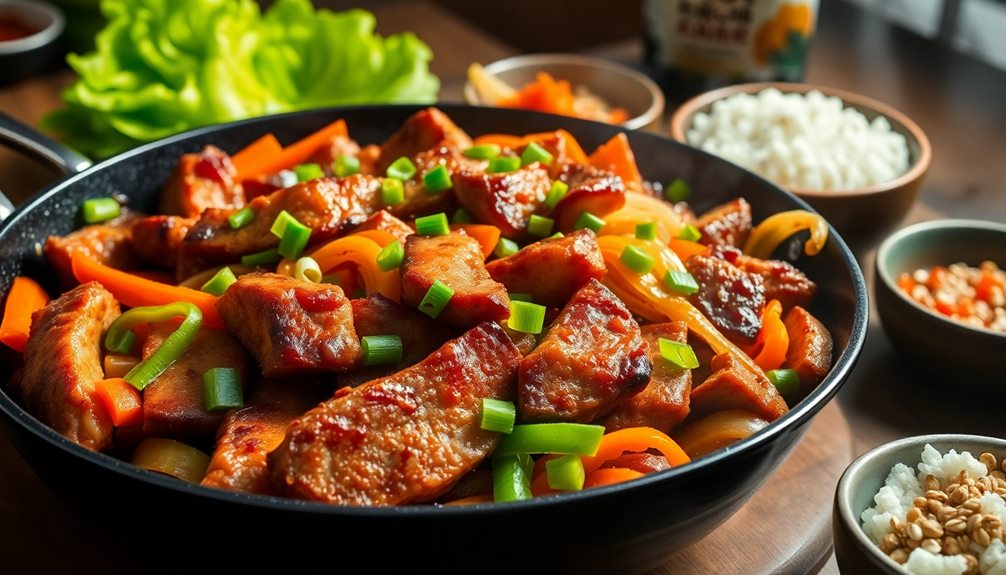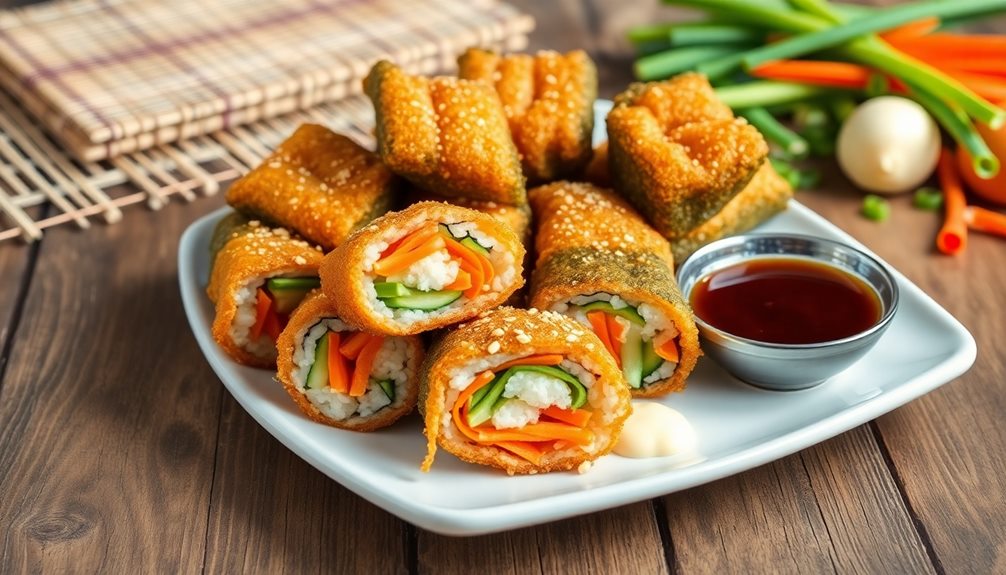
Fried seaweed rolls are a crispy Korean snack you'll absolutely love! With their crunchy outer layer and flavorful seasoned rice inside, each bite is a delightful adventure. You can make these tasty treats easily at home by wrapping seasoned rice in toasted seaweed, rolling it tightly, and then frying until golden brown. The various fillings, from veggies to shrimp, add a fun twist to every roll. Perfect for sharing at parties or enjoying after school, these snacks turn any meal into a festive moment. Want to know more about their fun history and cooking tips? Stick around for more delicious details! In fact, the Korean fried seaweed roll recipe has been passed down through generations, evolving with different variations in fillings and techniques. Whether you’re a fan of keeping things simple with just rice or prefer packing in vibrant flavors like kimchi or beef, this dish is endlessly customizable. Don’t forget to serve it with a tangy dipping sauce to elevate the experience even more!
Key Takeaways
- Fried seaweed rolls combine crispy seaweed with flavorful fillings, creating a delightful texture and taste experience.
- These rolls are easy to customize with various ingredients like shrimp, vegetables, and spicy tuna.
- They offer a healthy snacking option, rich in nutrients from seaweed and protein from seafood fillings.
- Perfect for sharing, they enhance social gatherings and encourage interaction among friends and family.
- Quick to prepare, they make for ideal appetizers or main dishes for various occasions.
Top picks for "seawe roll crispy"
Open Amazon search results for this keyword.
As an affiliate, we earn on qualifying purchases.
History
The history of the fried seaweed roll traces back to various Asian culinary traditions, where the use of seaweed has been celebrated for centuries. You might be surprised to learn that seaweed isn't just a snack; it's a vital part of many cultures! In countries like Korea and Japan, seaweed has been enjoyed in many forms, often seen as a healthy food packed with nutrients.
Long ago, people discovered that wrapping ingredients in seaweed not only added flavor but also made meals easier to eat. Imagine munching on a tasty roll filled with rice and vegetables, all held together by that crispy seaweed!
Over time, cooks became creative, experimenting with different fillings and cooking methods. Frying the rolls became a popular way to make them extra crunchy and delicious.
As the fried seaweed roll traveled beyond its origins, it gained fans all over the world. Today, you can find it in many restaurants and homes, bringing the joy of Asian flavors to everyone.
Cooking Steps
To create a delicious fried seaweed roll, you'll first need to gather all your ingredients and tools. You'll need sheets of seaweed, cooked rice, your favorite veggies, and some oil for frying. Don't forget a cutting board and a frying pan!
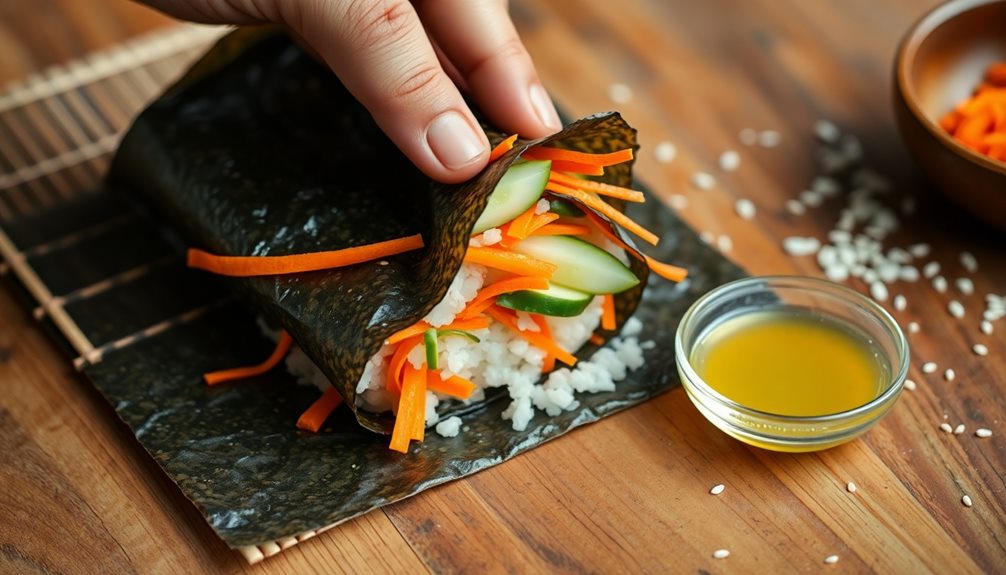
Start by laying a sheet of seaweed on the cutting board. Spread a thin layer of cooked rice over it, leaving some space at the edges.
Now, it's time to add your veggies! You can use cucumber, carrots, or even avocado. Be creative and mix up your fillings!
Next, carefully roll up the seaweed tight, starting from the side closest to you. Make sure it's snug but not too tight, or the fillings might spill out. Once rolled, you can slice it into bite-sized pieces.
Heat up some oil in the frying pan over medium heat. Gently place your rolls in the pan and fry them until they're golden brown and crispy, which should take about 3-4 minutes.
Flip them halfway through to cook evenly. Finally, let them cool for a moment, then enjoy your tasty fried seaweed rolls!
Step 1. Prepare Seaweed Sheets

Preparing seaweed sheets is a straightforward process that sets the foundation for your fried seaweed roll. First, gather your ingredients and tools. You'll need dried seaweed sheets, scissors, and a clean cutting board. Make sure your workspace is tidy, so you can enjoy the fun!
Now, take a sheet of dried seaweed and lay it flat on the cutting board. If the sheets are too large for your rolls, don't worry! Just use your scissors to cut them into smaller, manageable squares or rectangles. You want them to be about the size of your palm, which makes rolling easier later on.
Next, it's important to check the seaweed for any broken pieces. If you find any, set them aside—no one wants a lumpy roll!
Once you've prepared the sheets, you might want to lightly toast them. Just hold them over a low flame for a few seconds until they become crisp and fragrant. This step adds a delicious flavor and crunch to your rolls.
With your seaweed sheets ready, you're all set to move on to the exciting part: filling them with seasoned rice! Enjoy the process, and let your creativity shine!
Step 2. Fill With Seasoned Rice

Rolling your fried seaweed roll starts with filling it with seasoned rice, which is key to achieving the perfect flavor and texture.
First, you'll want to cook some short-grain rice, as it sticks together nicely. Once the rice is done, let it cool for a bit. In a bowl, mix the rice with a splash of rice vinegar, a pinch of salt, and a little sugar. This combo gives your rice a tangy-sweet flavor that's absolutely delicious!
Now, take a seaweed sheet and place it shiny side down on a clean surface. Grab a handful of your seasoned rice and spread it evenly across the seaweed, leaving about an inch of space at the top. Make sure to press it down gently so it stays in place but don't squash it too hard. You can even add some veggies or fish to the rice if you want to get creative!
Once you've got your rice spread out, take a moment to admire your handiwork. It's colorful and inviting!
Now, you're ready to roll your seaweed roll, but that's a step for later. Enjoy the deliciousness of your seasoned rice!
Step 3. Roll and Seal Tightly
Now that your seasoned rice is perfectly spread out, it's time to roll and seal your fried seaweed roll tightly.
Start by gently lifting the edge of the seaweed closest to you. You want to make sure you're rolling it over the rice and any fillings you've added. As you roll, keep the pressure even but not too tight; you don't want to squish everything out!
Once you've rolled it about halfway, tuck the filling in with your fingers. This step helps keep everything snug and secure.
Keep rolling until you reach the far edge of the seaweed. If you're using a little water or a dab of rice to seal the edge, now's the time! Just moisten the edge and press it down to stick.
Congratulations! You've just made your first fried seaweed roll.
Repeat this process with the remaining ingredients, and soon you'll have a whole platter of these tasty snacks. Remember, practice makes perfect, so don't worry if your first roll isn't perfect—it'll still taste amazing!
Your crispy, delicious treat is almost ready to fry. How exciting is that?
Step 4. Heat Oil for Frying
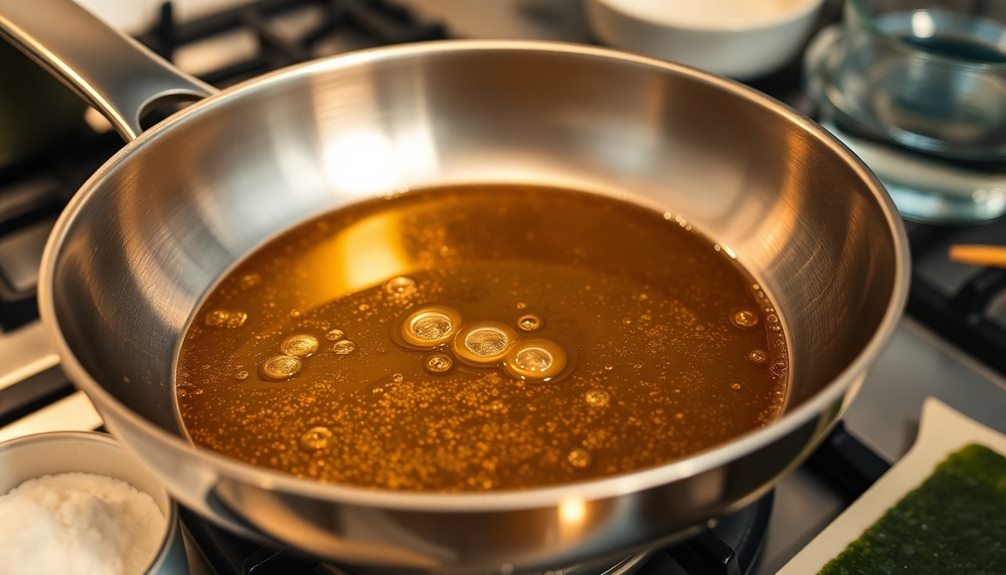
With your fried seaweed rolls ready to go, it's time to heat the oil for frying. First, grab a deep pot or a frying pan. You want something that can hold enough oil to cover your rolls. Pour in about two inches of vegetable oil. This is important because it helps your rolls fry evenly and get that crispy texture you love!
Additionally, a well-organized kitchen space can enhance your cooking experience, allowing you to focus on the task at hand and reduce stress levels, promoting a sense of calm in the kitchen. efficient storage strategies can make a significant difference in your cooking process.
Now, turn on the heat to medium-high. While you wait for the oil to heat up, you can prepare a few things. Grab a pair of tongs or a slotted spoon, which will help you safely place your rolls into the hot oil. You should also have a plate lined with paper towels nearby. This is where your fried rolls will rest after frying, soaking up any extra oil.
To check if the oil is ready, you can drop a tiny bit of batter in. If it sizzles and bubbles, you're good to go! Remember, don't rush this step. It's super important to get the oil hot enough, so your fried seaweed rolls turn out perfectly crispy and delicious.
Now, you're almost ready to fry!
Step 5. Fry Until Golden Brown

Fry the seaweed rolls in the hot oil for about 3 to 5 minutes, or until they turn a beautiful golden brown. As you watch them sizzle, you'll feel excitement bubbling up inside!
Make sure to turn them gently with a pair of tongs so they cook evenly on all sides. If you have a lot of rolls, fry them in batches to avoid crowding the pan. This way, each roll gets enough room to crisp up perfectly.
While they're frying, keep an eye on the color. You don't want them to get too dark, or they might taste burnt. Just imagine the delightful crunch and flavor when they're done!
Once they've reached that lovely golden hue, carefully lift them out of the oil and place them on a plate lined with paper towels. This helps soak up any extra oil, keeping your snack crispy and not greasy.
Now, take a moment to appreciate your hard work! The aroma will fill the air, making everyone around you curious to try a bite.
Get ready to enjoy your delicious fried seaweed rolls—crispy, golden, and oh-so-tasty!
Final Thoughts
When you take a moment to savor a fried seaweed roll, you'll discover a delightful blend of flavors and textures that can elevate any meal.
These crispy treats aren't just snacks; they're a fun experience! The crunchy outer layer gives way to a soft, savory filling, making each bite a little adventure for your taste buds.
You can whip these up for a quick after-school snack, or serve them at a family gathering to impress your friends and loved ones. They're easy to make, and you can customize the filling to suit your tastes, whether you prefer shrimp, veggies, or even spicy tuna.
Plus, fried seaweed rolls are perfect for sharing, turning any occasion into a festive event. Imagine friends gathered around, enjoying these tasty bites while chatting and laughing. It's a recipe for joy!
Frequently Asked Questions
What Are the Health Benefits of Fried Seaweed Rolls?
Fried seaweed rolls offer various health benefits. They're rich in vitamins and minerals, promote digestion, and support thyroid function. Plus, their healthy fats can enhance heart health while satisfying your cravings for a crispy snack.
Can I Use Different Fillings for Fried Seaweed Rolls?
Absolutely, you can use different fillings for fried seaweed rolls! Get creative with ingredients like vegetables, meats, or even cheese. Just ensure they're well-seasoned to enhance the overall flavor of your delicious creation.
Are Fried Seaweed Rolls Gluten-Free?
Yes, fried seaweed rolls can be gluten-free! Just make sure you're using gluten-free ingredients like rice and appropriate fillings. Always check labels to ensure none of the components contain gluten. Enjoy your crispy treat!
How Should I Store Leftover Fried Seaweed Rolls?
To store leftover fried seaweed rolls, let them cool completely, then place them in an airtight container. Keep them in the fridge and consume them within a couple of days for the best taste and texture.
Where Can I Buy Pre-Made Fried Seaweed Rolls?
You can buy pre-made fried seaweed rolls at Asian grocery stores, specialty food shops, or online retailers. Check local markets or websites like Amazon for convenient options that suit your taste and budget.