Vietnamese Cuisine
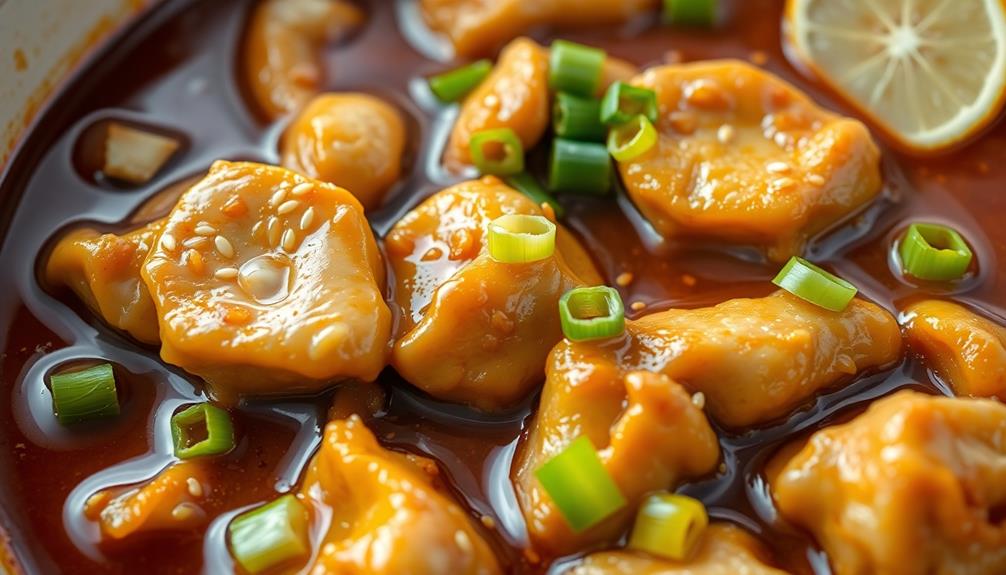
Ga Kho Gung: Vietnamese Braised Chicken With Ginger
Unlock the mouthwatering secrets of Ga Kho Gung, a beloved Vietnamese braised chicken dish that’s been delighting families for centuries.
Get ready to savor the vibrant flavors of Ga Kho Gung, a beloved Vietnamese braised chicken dish that's been delighting families for centuries! This comforting meal combines savory soy sauce, sweet brown sugar, and the warm, aromatic notes of fresh ginger, creating a rich, mouthwatering sauce that perfectly complements the tender, fall-off-the-bone chicken. With simple preparation and minimal active cooking time, Ga Kho Gung is ideal for weeknight dinners or special occasions. Dive in and experience the essence of Vietnamese cuisine – a perfect balance of flavors that's sure to satisfy your taste buds.
Key Takeaways
- Ga Kho Gung is a beloved Vietnamese dish with roots stretching back centuries, known for its savory soy sauce, sweet brown sugar, and aromatic ginger.
- The dish combines chicken, soy sauce, brown sugar, rice vinegar, garlic, and ginger to create a comforting and satisfying meal.
- The braising cooking method ensures the chicken is tender and juicy, with the flavors melding beautifully over the slow cooking process.
- Ga Kho Gung is a versatile dish that can be served with a variety of rice options and accompaniments, making it suitable for various occasions.
- The dish offers nutritional benefits, with the chicken providing a good source of protein and the ginger known for its anti-inflammatory properties.
History
When did Vietnamese braised chicken with ginger emerge as a beloved dish? This delightful recipe has roots that stretch back centuries, reflecting the rich culinary traditions of Vietnam.
Ga kho gung, as it's known in Vietnamese, likely originated as a simple, nourishing meal that farm families would prepare using locally-sourced ingredients.
Over time, the dish evolved, with regional variations emerging across Vietnam. In the north, the chicken might be simmered with daikon radish, while southern versions often incorporate palm sugar for a touch of sweetness.
Regardless of the specifics, ga kho gung has become a beloved comfort food, a warm hug on a chilly day.
Today, this dish remains a staple in Vietnamese homes and restaurants, a cherished part of the country's vibrant food culture.
Whether served for a family gathering or a festive celebration, ga kho gung continues to delight the senses and nourish the soul, one delicious bite at a time.
Recipe
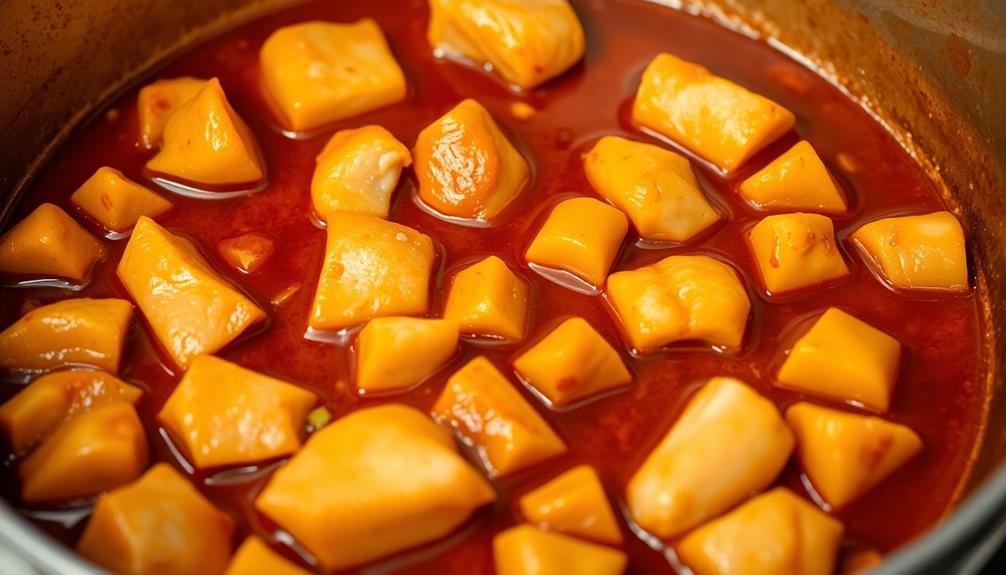
Vietnamese Braised Chicken With Ginger
Braised chicken is a comforting and flavorful dish that's a staple in Vietnamese cuisine. The combination of savory soy sauce, sweet brown sugar, and aromatic ginger creates a rich, caramelized sauce that perfectly complements the tender chicken. This dish is simple to prepare but delivers big on flavor, making it a great choice for a weeknight dinner or a special occasion.
The key to this dish is to let the chicken simmer slowly in the sauce, allowing the flavors to meld together and the meat to become fall-off-the-bone tender. The addition of ginger provides a subtle heat and earthiness that balances the sweetness of the sauce.
Ingredients:
- 1.5 lbs boneless, skinless chicken thighs, cut into bite-sized pieces
- 2 tbsp vegetable oil
- 1/4 cup soy sauce
- 1/4 cup brown sugar
- 2 tbsp rice vinegar
- 2 cloves garlic, minced
- 1 tbsp grated fresh ginger
- 1 tsp ground black pepper
- 2 green onions, sliced
- Cooked jasmine rice, for serving
In a large skillet or Dutch oven, heat the vegetable oil over medium-high heat. Add the chicken and cook, stirring occasionally, until lightly browned, about 5 minutes.
Add the soy sauce, brown sugar, rice vinegar, garlic, ginger, and black pepper. Stir to combine.
Bring the mixture to a simmer, then reduce the heat to low, cover, and let the chicken braise for 30-40 minutes, or until the chicken is cooked through and the sauce has thickened. Stir in the green onions during the last 5 minutes of cooking.
Serve the braised chicken immediately over steamed jasmine rice. The dish can be made ahead and reheated, as the flavors will only improve over time. Enjoy this comforting and flavorful Vietnamese dish!
Cooking Steps
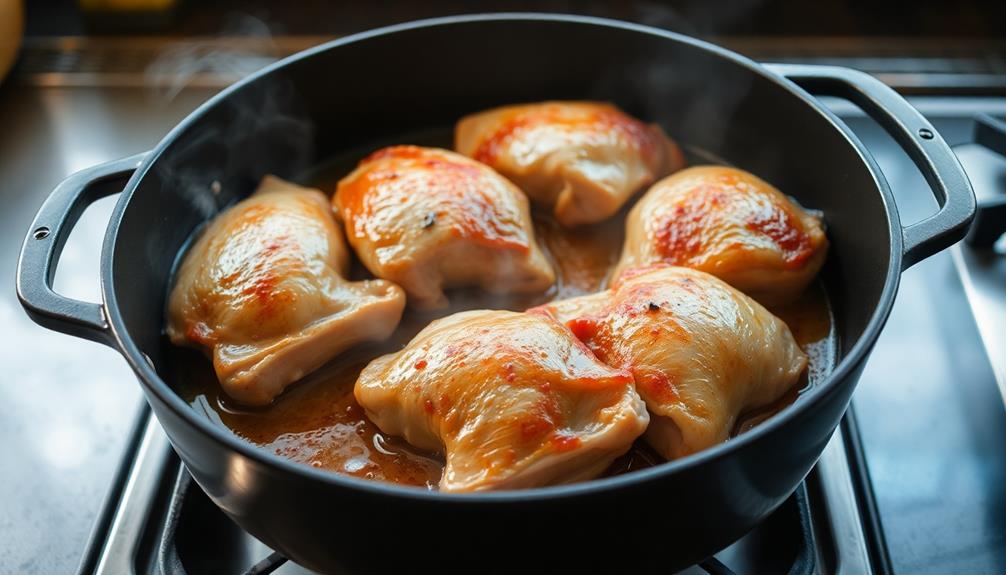
First, season the chicken with a sprinkle of salt and pepper.
Then, sear the chicken on both sides until it's nicely browned.
Next, add the chopped ginger, soy sauce, and chicken broth, and let it all simmer until the chicken is tender and flavorful.
Step 1. Season Chicken With Salt and Pepper
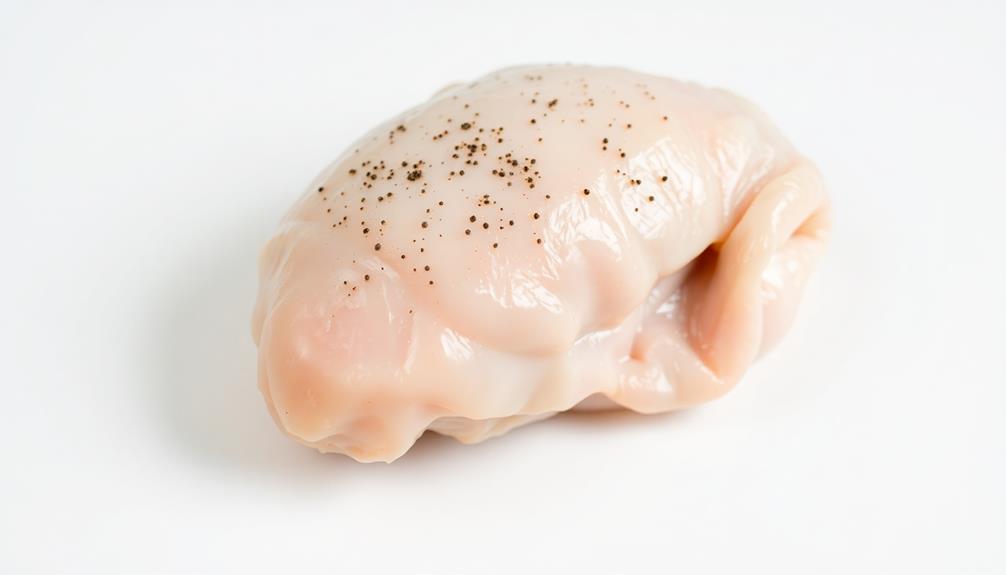
Seasoning the chicken with a simple salt-and-pepper blend lays the foundation for the dish's savory flavors.
Grab a pinch of salt and a few grinds of fresh black pepper, then sprinkle them evenly all over the chicken pieces. Use your fingers to gently rub the seasoning into the skin, making sure every nook and cranny is covered.
This simple step packs a punch of flavor that will permeate the meat as it braises. The salt enhances the natural juices, while the pepper adds a subtle warmth and complexity.
Don't be shy – you want a generous coating to really bring out the best in the chicken. Once the seasoning is evenly distributed, your chicken is ready for the next step in this Vietnamese braising journey.
Get excited, because the aroma of ginger, garlic, and soy is about to fill your kitchen!
Step 2. Sear Chicken on Both Sides
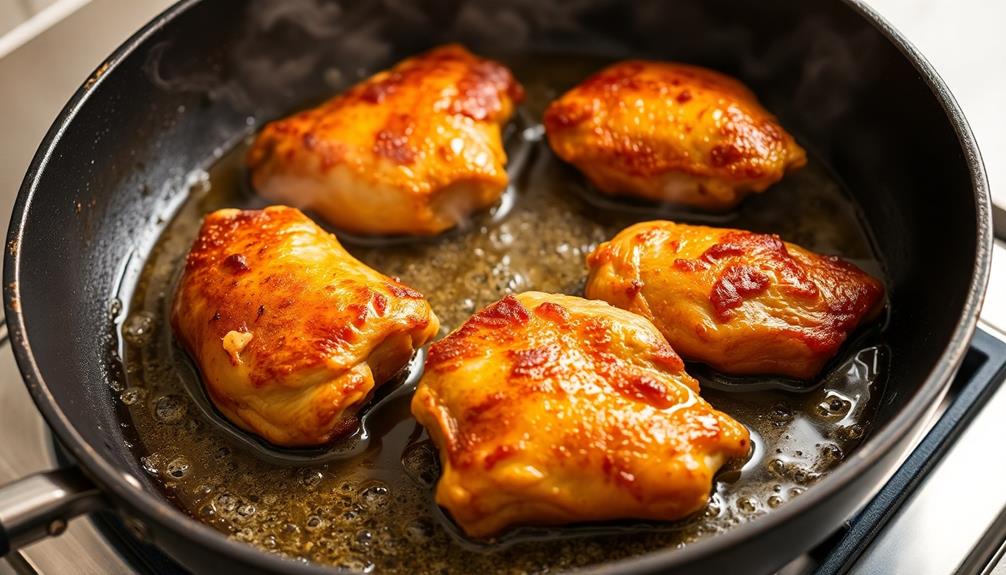
After seasoning the chicken, heat a large skillet or Dutch oven over medium-high heat.
Once the pan is nice and hot, you'll want to add a bit of oil – just enough to lightly coat the bottom.
Now, carefully place the chicken skin-side down into the pan. You'll hear that satisfying sizzle as the chicken hits the hot surface!
Let the chicken sear for about 4-5 minutes, until the skin is golden and crispy.
Don't be tempted to move it around – just let it do its thing.
Once the first side is nicely browned, use some tongs to flip the chicken over and sear the other side for another 3-4 minutes.
The goal is to get a beautiful, even sear on both sides of the chicken.
This won't only make the skin extra crispy, but it'll also help seal in all those delicious juices.
Keep an eye on the chicken, adjusting the heat as needed, until both sides are perfectly browned.
Step 3. Add Chopped Ginger
Once the chicken has been seared on both sides, you'll want to add a generous amount of chopped ginger to the pan. The fragrant, spicy-sweet ginger will infuse the chicken with its bold, tantalizing flavor.
Chop the ginger into thin slices or small matchsticks, so it can quickly release its essence into the dish. As the ginger hits the hot pan, you'll hear it sizzle and smell its aroma fill the air.
Stir the ginger around, letting it cook for about a minute until it becomes fragrant. This short cooking time will preserve the ginger's bright, vibrant flavor, without making it overpowering.
The ginger's warmth and zing will complement the savory chicken beautifully, creating a harmonious blend of tastes and textures.
Get ready for your kitchen to be filled with the mouthwatering scents of this Vietnamese classic!
Step 4. Add Soy Sauce and Chicken Broth
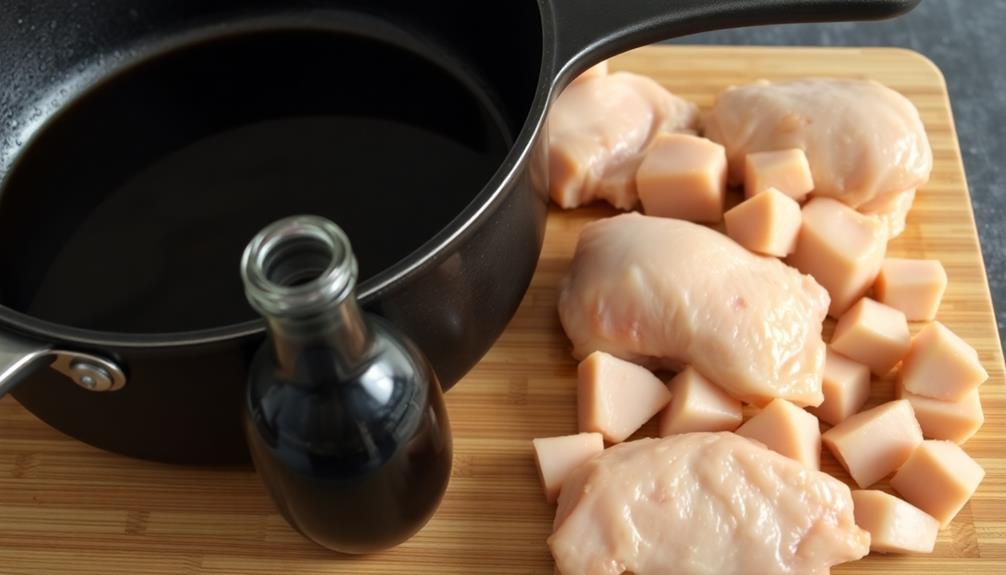
With the fragrant ginger now sizzling in the pan, you'll want to add a splash of soy sauce and some chicken broth. The soy sauce will lend a delightful umami flavor, while the broth will help create a mouthwatering sauce to coat the chicken.
Carefully pour in about 1/4 cup of soy sauce and 1 cup of chicken broth. Stir everything together, making sure to scrape up any browned bits from the bottom of the pan. This will infuse the dish with even more flavor.
Now, let the mixture come to a gentle simmer. As it bubbles away, the soy sauce and broth will meld together, creating a rich, savory base for your Vietnamese braised chicken.
The chicken will slowly braise, absorbing all those incredible flavors. Get ready for your kitchen to be filled with the most tantalizing aromas!
Step 5. Simmer Until Chicken Is Tender
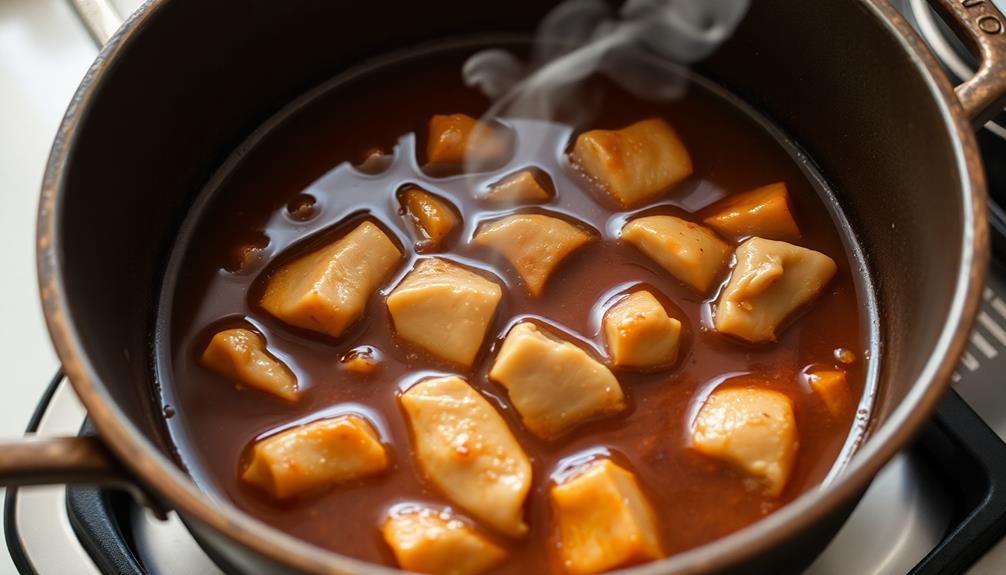
Let the chicken simmer gently in the aromatic broth until it becomes meltingly tender, about 30 to 40 minutes.
Keep the heat at a gentle simmer – you don't want the liquid to boil vigorously, which could toughen the meat. As the chicken cooks, the flavors of the ginger, garlic, and spices will infuse the meat, making it incredibly flavorful.
Periodically, use a spoon to baste the chicken with the flavorful sauce. This will help the meat stay moist and absorb all the wonderful tastes.
When the chicken is fork-tender and the sauce has thickened nicely, it's ready to serve. The meat should practically fall off the bone at this point.
Serve the Vietnamese braised chicken over steamed rice or noodles, and don't forget to spoon plenty of that rich, gingery sauce over the top. Enjoy this comforting and delicious dish with your family!
Final Thoughts
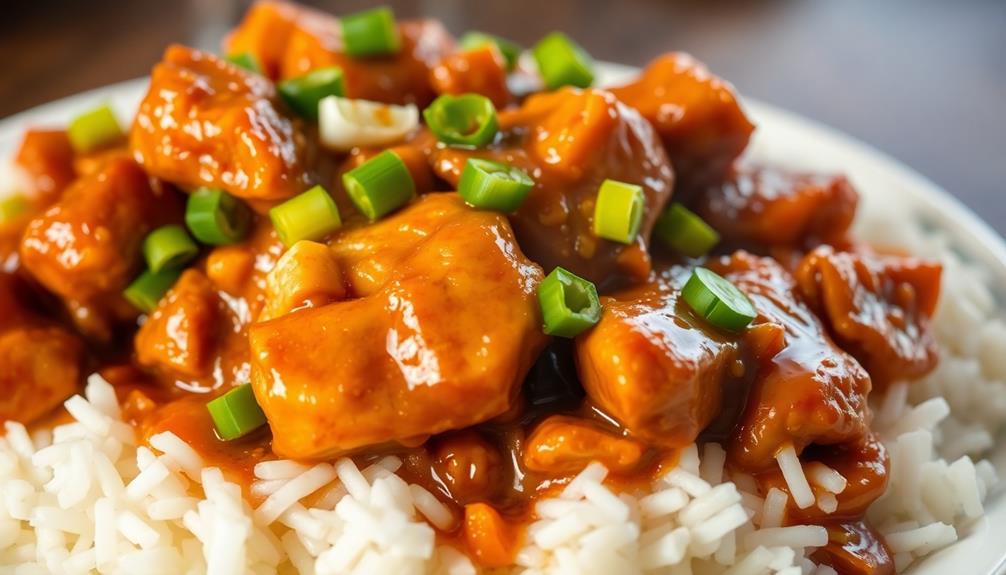
This Vietnamese braised chicken dish is a delightful fusion of flavors that's sure to impress. The tender chicken, infused with the warm, earthy notes of ginger, creates a comforting and satisfying meal.
The simmering process allows the ingredients to meld together, resulting in a depth of flavor that's both complex and harmonious.
What's great about this recipe is its versatility. Serve it over steaming white rice for a classic pairing, or try it with fragrant jasmine rice for an extra special touch.
You can also experiment with different vegetable sides, such as sautéed bok choy or a fresh, crunchy salad, to complement the braised chicken.
Whether you're hosting a family gathering or simply looking for a delicious weeknight dinner, this Vietnamese braised chicken with ginger is sure to become a new favorite.
Enjoy the vibrant flavors and the comforting warmth of this dish.
Frequently Asked Questions
What Is the Origin of the Name "Ga Kho Gung"?
Well, the name "ga kho gung" originates from the Vietnamese language. Ga means "chicken," kho means "braised," and gung means "ginger." So, the name simply describes the key ingredients and cooking method of this Vietnamese dish.
How Can I Adjust the Spiciness of the Dish?
To adjust the spiciness of the dish, you can add more or less chili peppers, chili paste, or hot sauce to suit your desired level of heat. Be mindful of your personal tolerance and adjust accordingly.
Can I Use Different Types of Chicken in This Recipe?
You can certainly use different types of chicken in this recipe. Chicken thighs, drumsticks, or a mix of both would work well, adjusting the cooking time as needed. The flavor profiles should complement the other ingredients nicely.
How Long Does the Braised Chicken Keep in the Refrigerator?
The braised chicken should keep in the refrigerator for 3-4 days. Be sure to store it in an airtight container and reheat it thoroughly before serving. Enjoy your delicious leftovers!
Are There Any Vegetarian Alternatives to This Recipe?
To make a vegetarian alternative, you could substitute the chicken with firm tofu or mushrooms. Braise them in the same savory sauce, and you'll have a delicious meatless version of this dish.
Mai is a passionate chef specializing in Vietnamese cuisine. From fragrant pho to fresh spring rolls and banh mi, Mai’s dishes showcase the balance of sweet, salty, sour, and spicy that defines Vietnamese cooking. Her recipes emphasize fresh herbs, flavorful broths, and the light, vibrant ingredients that make Vietnamese food so special.
Vietnamese Cuisine
Vietnamese Thịt Kho Tàu: Sweet and Savory Braised Pork
Jump into the savory-sweet world of Vietnamese Thịt Kho Tàu, where tender pork simmers in a caramelized sauce for a dish that’s sure to delight.
You're in for a real treat with Vietnamese Thịt Kho Tàu – a savory-sweet braised pork dish that's been delighting families for generations! This beloved dish originates from Vietnam's coastal regions, where fishermen and farmers collaborated to create a comforting meal that's become a Lunar New Year staple, symbolizing togetherness. The tender pork, infused with garlic, shallots, and fish sauce, simmers in a caramelized sauce until it's fall-off-the-bone perfection. Top it with fresh herbs, serve it over steaming rice, and you've got a dish that'll have your taste buds dancing. Keep reading to discover the mouthwatering details behind this Vietnamese culinary treasure.
Key Takeaways
- Thịt Kho Tàu is a traditional Vietnamese braised pork dish known for its savory-sweet flavor profile and tender, caramelized pork.
- The dish originated in the coastal regions of Vietnam, where fishermen and farmers collaborated, and has become a staple during the Lunar New Year celebration.
- The recipe essentials include pork belly, fish sauce, brown sugar, shallots, garlic, and black pepper, with an optional addition of hard-boiled eggs.
- The cooking method involves marinating the pork, searing it, and then slow-braising it in a savory-sweet sauce, along with the addition of fresh vegetables.
- The final dish is typically served over steamed rice, garnished with fresh herbs like cilantro, mint, and basil, and is enjoyed for its delightful taste and aromatic herbs.
History
Vietnamese Thịt Kho Tàu has a rich history that dates back centuries. This beloved dish originated in the coastal regions of Vietnam, where fishermen and farmers would come together to share their bounty.
They'd braise pork in a savory-sweet sauce, creating a comforting and satisfying meal. Over time, the recipe evolved, with families passing down their unique twists and techniques.
Today, Thịt Kho Tàu is a staple in Vietnamese cuisine, enjoyed by people of all ages. It's often served during Tết, the Lunar New Year celebration, when families gather to feast and honor their roots.
The dish's versatility shines, as it can be paired with rice, noodles, or even crusty bread, making it a crowd-pleasing option for any occasion.
Whether you're new to Vietnamese flavors or a longtime fan, Thịt Kho Tàu is sure to delight your senses and warm your soul. Its story is woven into the fabric of Vietnamese culture, a testament to the country's rich culinary heritage.
Recipe
Thịt Kho Tàu, or Vietnamese Braised Pork Belly, is a beloved dish that showcases the richness and depth of Vietnamese cuisine. The combination of tender pork belly, caramelized fish sauce, and aromatic spices creates a truly satisfying and flavorful experience.
The key to a successful Thịt Kho Tàu lies in the patient and attentive cooking process. Slow-braising the pork allows the flavors to meld and the meat to become meltingly tender, while the caramelization of the fish sauce and sugar lends a beautiful glossy sheen and a delightful balance of sweet and savory notes.
- Pork belly, cut into 1-inch cubes
- Fish sauce
- Brown sugar
- Shallots, thinly sliced
- Garlic, minced
- Black pepper
- Hard-boiled eggs (optional)
In a large, heavy-bottomed pot or Dutch oven, combine the pork belly, fish sauce, brown sugar, shallots, garlic, and black pepper. Bring the mixture to a gentle simmer over medium heat, then reduce the heat to low and let the pork braise slowly, stirring occasionally, for approximately 1.5 to 2 hours, or until the pork is fork-tender and the sauce has thickened and caramelized.
To elevate the dish further, you can add hard-boiled eggs during the last 30 minutes of cooking, allowing them to soak up the flavorful sauce.
Serve the Thịt Kho Tàu over steamed rice, garnished with fresh herbs and a sprinkle of chopped scallions or crispy shallots, for a truly authentic and satisfying Vietnamese meal.
Cooking Steps
First, you'll marinate the pork in a flavorful spice mixture.
Next, sear the pork in a hot pan to lock in the juices.
Then, let the pork braise in a savory sauce, allowing the flavors to meld.
Don't forget to add fresh veggies for a vibrant twist.
Finish by garnishing with fragrant herbs for a truly mouthwatering dish!
Step 1. Marinate Pork in Spice Mixture
Take the pork pieces and submerge them in the carefully-crafted spice mixture. Gently rub the aromatic blend of garlic, shallots, fish sauce, and brown sugar all over the meat, ensuring every nook and cranny is coated. The pork will soak up all those incredible flavors, becoming infused with the essence of Vietnamese cuisine.
Next, cover the marinating pork and let it sit in the fridge for at least an hour, or even better, overnight. This allows the spices to work their magic, tenderizing the meat and building layers of delicious complexity. The wait will be worth it, as the pork transforms into a mouthwatering masterpiece.
When you're ready to cook, remove the pork from the marinade and discard any remaining liquid. Your fragrant, flavor-packed protein is now prepared and ready to be braised to perfection.
Get ready for your kitchen to be filled with the irresistible aroma of Thịt Kho Tàu!
Step 2. Sear Pork in Hot Pan
Fire up a large, heavy-bottomed pan over high heat. Once it's scorching hot, add a splash of oil and swirl it around.
Toss in the marinated pork pieces, making sure they sizzle dramatically. Don't crowd the pan – work in batches if needed. Let the pork sear undisturbed for 2-3 minutes, until the edges turn golden brown and crispy.
Flip the pork over and repeat on the other side. You want those beautiful caramelized bits! The high heat will lock in the juices and give the pork a delectable crust.
Once seared on both sides, transfer the pork to a plate. Repeat with the remaining pork, adding more oil as needed. This crucial step adds incredible depth of flavor to the final dish.
Now you're ready to move on to the next stage of braising the pork to tender perfection!
Step 3. Braise Pork in Savory Sauce
With the pork nicely seared, it's time to braise it in a savory sauce to achieve melt-in-your-mouth tenderness.
First, add the browned pork chunks to a large pot or Dutch oven. Pour in the soy sauce, fish sauce, brown sugar, and a splash of water. Bring the mixture to a gentle simmer, then reduce the heat to low.
Incorporating elements of modern bathroom design can elevate your cooking environment, just as this dish elevates your dining experience.
Now, let the pork simmer for 45 minutes to an hour, stirring occasionally, until the meat is incredibly tender. The savory sauce will thicken and caramelize, coating the pork in a delectable glaze.
Toward the end of cooking, stir in the sliced hard-boiled eggs. They'll soak up all the flavors and create a lovely contrast in texture.
When the pork is fall-apart tender, it's ready to serve!
Scoop the braised pork and sauce over steamed rice. Garnish with sliced green onions and a sprinkle of fried shallots for extra crunch and flavor.
Get ready for a mouthwatering Vietnamese feast!
Step 4. Add Vegetables
After the pork has simmered to tender perfection, it's time to add some fresh veggies to the mix. You'll want to toss in a variety of crunchy, colorful veggies to balance out the rich, savory flavors of the pork.
Consider incorporating some vibrant, seasonal ingredients that can elevate the dish, like those found in trendy fall cocktails.
Start by adding sliced carrots, bell peppers, and snap peas. These will add a delightful crunch and vibrant hues to the dish.
Next, throw in some fresh bean sprouts and chopped green onions. They'll lend a refreshing, lively touch.
Don't forget the mushrooms! Sliced shiitake or button mushrooms will soak up all the tasty sauce, creating a medley of textures and flavors.
Finally, sprinkle in a handful of fresh cilantro leaves for a pop of herbal freshness.
Gently stir everything together and let the veggies simmer until they're tender-crisp, about 5-7 minutes. This'll allow all the flavors to meld together beautifully.
Get ready for a vibrant, nourishing dish that's sure to delight your senses!
Step 5. Garnish With Fresh Herbs
Finish off the dish by sprinkling fresh herbs over the top. Chopped cilantro, mint, and basil will add a burst of vibrant flavor and aroma to your Vietnamese Thịt Kho Tàu. Gently toss the herbs into the braised pork and vegetables, ensuring each bite is infused with their fragrant notes.
Balinese Interior Design Ideas emphasize the use of natural elements which can inspire the presentation of your dish.
The fresh herbs act as a lively contrast to the rich, savory flavors of the dish. Tender cilantro leaves, fragrant mint sprigs, and aromatic basil add a refreshing, herbal dimension that balances the overall taste. These vibrant garnishes also lend a visually appealing pop of color, making your Thịt Kho Tàu even more enticing.
Don't be shy with the herbs! Generously scatter them over the top, allowing their flavors to mingle with the other ingredients. The more herbs, the merrier your taste buds will be. Embrace the fresh, zesty notes they bring to this beloved Vietnamese dish.
Final Thoughts
So, what're your final thoughts on this delightful Vietnamese dish, Thịt Kho Tàu? This braised pork dish is truly a delight for the senses!
The tender, caramelized pork, the savory-sweet sauce, and the fragrant herbs come together in perfect harmony. You can't help but smile as you take that first bite, with the flavors bursting on your tongue.
The key is to take your time and savor every morsel, letting the dish transport you to the bustling streets of Vietnam.
And don't forget the garnishes! The fresh herbs, like mint and cilantro, add a bright, refreshing touch that balances the richness of the pork.
Plus, they make the dish look absolutely gorgeous, perfect for impressing your family and friends.
Frequently Asked Questions
What Is the Best Cut of Pork to Use for This Dish?
For this dish, you'll want to use a tougher cut of pork like shoulder or pork belly. These cuts have more fat and connective tissue, which will become tender and flavorful after the long braising process.
Can This Dish Be Made in an Instant Pot or Slow Cooker?
Absolutely! This dish can be easily prepared in an instant pot or slow cooker. The low and slow cooking method will tenderize the pork and allow the flavors to meld together beautifully. It's a fuss-free way to enjoy this delicious dish.
How Long Does the Dish Typically Take to Prepare?
Typically, the dish takes around 2-3 hours to prepare. This includes the time it takes to braise the pork until tender. The exact time may vary depending on the cut of meat and your cooking method, whether you use an instant pot or slow cooker.
Can This Dish Be Frozen and Reheated?
Yes, you can freeze and reheat this dish. The flavors will hold up well, and reheating it is a breeze. Just thaw it in the fridge overnight and reheat it on the stovetop or in the microwave until heated through.
What Side Dishes Pair Well With Vietnamese ThịT Kho Tàu?
For this dish, you could pair it with steamed rice, Vietnamese pickles, or a simple salad to balance the rich, savory flavors. Crunchy veggies like carrots or cucumbers can also make a refreshing contrast.
Mai is a passionate chef specializing in Vietnamese cuisine. From fragrant pho to fresh spring rolls and banh mi, Mai’s dishes showcase the balance of sweet, salty, sour, and spicy that defines Vietnamese cooking. Her recipes emphasize fresh herbs, flavorful broths, and the light, vibrant ingredients that make Vietnamese food so special.
Vietnamese Cuisine
Vietnamese Ginger Chicken: Ginger Chicken for Bold and Spicy Flavors
Kickstart your taste buds with Vietnamese Ginger Chicken, a bold and spicy dish that’ll transport you to the vibrant flavors of Southeast Asia. Uncover the secret to its irresistible allure.
Vietnamese Ginger Chicken is a bold and spicy dish that'll awaken your taste buds with its vibrant flavors. For centuries, this beloved comfort food has been passed down through generations, each family adding their own unique twist. The key is fresh, aromatic ginger that enhances the natural sweetness of the chicken. You'll start by seasoning the chicken, then searing it to create a golden-brown crust. Next, you'll sauté fragrant ginger and garlic, then braise the chicken in a rich, syrupy sauce until it's meltingly tender. Serve this over rice or noodles to soak up every last drop of the delectable sauce – a true flavor sensation.
Key Takeaways
- Vietnamese Ginger Chicken is a centuries-old comfort food rooted in rich culinary traditions, showcasing the bold and spicy flavors of fresh ginger.
- Preparation involves seasoning the chicken with a ginger-garlic rub, searing to achieve a golden-brown crust, and braising in a ginger-infused liquid to tenderize the meat.
- Aromatic ingredients like sliced ginger, garlic, scallions, and star anise are added to the pan, enhancing the overall flavor profile of the dish.
- The long simmer time allows the flavors to meld, creating a rich, syrupy sauce that coats the tender chicken pieces in a delectable glaze.
- Served over rice or noodles, Vietnamese Ginger Chicken offers a delightful balance of savory, spicy, and aromatic notes, making it a beloved family favorite.
History
The origins of Vietnamese ginger chicken date back centuries, rooted in the country's rich culinary traditions.
It's a dish that's been passed down through generations, each family putting their own unique spin on the recipe. You see, ginger has long been revered in Vietnamese cuisine for its bold, spicy flavors and its ability to enhance the natural sweetness of other ingredients.
Over time, home cooks have experimented with different cuts of chicken, various aromatics, and an array of seasonings to create the perfect balance of salty, sour, and umami notes.
Today, Vietnamese ginger chicken, or Gà Kho Gừng, is a beloved comfort food that brings families together and showcases the country's vibrant food culture.
Whether it's simmered with caramel sauce or stir-fried with fragrant herbs, this dish always delivers a delightful punch of flavor in every bite.
Cooking Steps
To begin, gather all the necessary ingredients and equipment.
You'll need a large skillet or wok, a sharp knife, and a cutting board. Prepare the chicken by cutting it into bite-sized pieces. Peel and mince the ginger, and slice the green onions.
Next, heat the skillet over medium-high heat and add the oil. Sauté the ginger and garlic until fragrant, about 1 minute.
Add the chicken and cook, stirring occasionally, until it's no longer pink, around 5-7 minutes.
Pour in the soy sauce, rice vinegar, brown sugar, and chili sauce. Stir to combine, then let the mixture simmer for 2-3 minutes, allowing the flavors to meld.
Step 1. Season Chicken
Next up is seasoning the chicken. You'll want to grab a small bowl and mix together some great flavors to make the chicken really shine.
First, add a teaspoon of ground ginger – this will give the dish its signature ginger taste. Then, sprinkle in a pinch of salt and a dash of black pepper. Don't be shy with the seasonings, as they'll really help bring out the best in the chicken.
Now, take those seasoned chicken thighs or drumsticks and give them a good rub-down. Make sure to get the seasoning all over the surface of the meat.
This will ensure every bite is packed with that delicious ginger-garlic goodness. Once the chicken is nicely coated, you're ready to move on to the next step – searing it to get that perfect golden-brown crust.
Get ready, because your kitchen is about to smell amazing!
Step 2. Sear Chicken in Hot Pan
Heat a large skillet or Dutch oven over medium-high heat. Once the pan is hot, add a couple of tablespoons of oil.
It's time to sear that chicken! Gently place the chicken pieces in the hot pan, making sure not to overcrowd them. You want them to have plenty of room to brown nicely. Let the chicken sizzle and sear for about 4-5 minutes per side, until they're golden brown and crispy on the outside.
Keep an eye on them, and don't be afraid to adjust the heat if they're browning too quickly. You want them to develop a nice, caramelized crust without burning.
Once the first side is seared, use tongs to flip the chicken over and let the other side get the same treatment. The chicken should release from the pan easily when it's ready to be flipped.
After searing, the chicken will be beautifully browned on the outside, locking in all those juicy, savory flavors. You're well on your way to creating an amazing Vietnamese ginger chicken dish!
Step 3. Add Aromatics
With the chicken seared to perfection, you'll now want to add the aromatic ingredients that will infuse the dish with Vietnamese flavors.
First, thinly slice some fresh ginger and garlic cloves. These will provide a bold and spicy foundation for the dish. Utilizing fresh herbs can enhance the overall aroma and flavor, making it a delightful experience for your palate, as seen in herb-infused cocktails.
Next, dice up a few scallions, using both the white and green parts. The scallions will add a lovely oniony flavor and a pop of color.
Don't forget to add a few whole star anise pods. These unique spices will lend a subtle licorice note that's essential for authentic Vietnamese cuisine.
Finally, sprinkle in a bit of brown sugar. This will help balance the bold flavors and create a caramelized glaze as the dish simmers.
With all these aromatic ingredients sizzling in the pan, your kitchen will be filled with the mouthwatering aroma of Vietnamese ginger chicken.
Get ready for your taste buds to be delighted!
Step 4. Braise Chicken in Ginger Liquid
Once you've sautéed the aromatic ingredients, it's time to braise the chicken in the flavorful ginger liquid.
Add the chicken pieces to the pot, making sure they're fully submerged in the ginger-infused broth. Bring the liquid to a gentle simmer, then reduce the heat to low, cover the pot, and let the chicken cook for about 25-30 minutes.
This slow, steady braising process will allow the chicken to become incredibly tender and infused with the bold ginger flavor.
As the chicken cooks, the liquid will reduce and thicken, creating a rich, syrupy sauce. Occasionally, use a spoon to baste the chicken with the sauce, ensuring it's evenly coated.
The longer you braise the chicken, the more intense the ginger flavor will become, so adjust the cooking time to suit your taste preferences.
When the chicken is fall-off-the-bone tender, it's ready to serve over fragrant jasmine rice, with the flavorful sauce spooned generously over the top.
Step 5. Reduce Heat, Simmer Until Chicken Is Tender
Reduce the heat to low, then cover the pot and let the chicken simmer gently for about 25-30 minutes. This allows the flavors to meld together and tenderizes the chicken.
As it simmers, the ginger, garlic, and spices infuse the meat, creating a wonderfully aromatic and savory dish. You'll notice the sauce thickens and becomes glossy, coating the chicken in a rich, flavorful glaze.
Stir the pot occasionally to prevent sticking. The chicken is ready when it's fall-off-the-bone tender and the juices run clear when pierced with a fork. This long, slow cooking process is the key to unlocking the deep, complex flavors of Vietnamese ginger chicken.
Once the chicken is cooked through, you can remove the lid and continue simmering for a few more minutes to further reduce the sauce, if desired.
Now your kitchen will be filled with the mouthwatering aroma of this authentic Vietnamese dish.
Final Thoughts
This Vietnamese Ginger Chicken dish is a delightful blend of flavors that's sure to impress your guests. The rich, savory sauce and tender chicken pieces create a harmonious symphony on the palate. The addition of fresh ginger lends a vibrant, aromatic kick that elevates the entire dish.
You'll be amazed at how the simple combination of ingredients can produce such a complex and satisfying meal. The long simmer time allows the flavors to meld together beautifully, ensuring each bite is bursting with bold and spicy notes.
Don't be surprised if your guests can't get enough of this Vietnamese gem. Serve it over steaming white rice or noodles to soak up every last drop of the delectable sauce.
This dish is sure to become a new family favorite, one that you'll turn to again and again for its irresistible flavors and easy preparation. Savor every moment of this Vietnamese Ginger Chicken delight!
Frequently Asked Questions
What Are the Key Ingredients in Vietnamese Ginger Chicken?
The key ingredients in Vietnamese ginger chicken are chicken, ginger, garlic, fish sauce, brown sugar, and various seasonings. You'll need to marinate the chicken in a blend of these flavorful ingredients to create the bold and spicy dish.
How Can I Adjust the Spice Level of the Dish?
To adjust the spice level of the dish, you can add more or less chili peppers, chili garlic sauce, or sriracha. Start with a small amount and gradually increase to reach your desired level of heat and flavor.
Can I Use a Different Type of Chicken in This Recipe?
You can use a different type of chicken in this recipe, such as chicken thighs or drumsticks. The cooking time may need to be adjusted, but the bold and spicy flavors will still work well with the alternative chicken cuts.
How Long Does It Take to Prepare Vietnamese Ginger Chicken?
Preparing the Vietnamese ginger chicken dish typically takes about 45 minutes to an hour, depending on your familiarity with the recipe and the prep work involved. You'll need to marinate the chicken, then sauté it with the ginger and other seasonings.
Is This Dish Suitable for a Low-Carb or Keto Diet?
Is this dish suitable for a low-carb or keto diet? Absolutely! The primary ingredients – chicken and ginger – align perfectly with the low-carb lifestyle. Just be mindful of any added sugars or starches in the recipe.
Mai is a passionate chef specializing in Vietnamese cuisine. From fragrant pho to fresh spring rolls and banh mi, Mai’s dishes showcase the balance of sweet, salty, sour, and spicy that defines Vietnamese cooking. Her recipes emphasize fresh herbs, flavorful broths, and the light, vibrant ingredients that make Vietnamese food so special.
Vietnamese Cuisine
Chả Cá Lã Vọng: The Vietnamese Fish Dish You Must Try
Nestled in the vibrant tapestry of Vietnamese culinary heritage, “Chả Cá Lã Vọng” beckons with its captivating blend of crispy fish, aromatic lemongrass, and a promise of culinary enchantment.
Prepare to embark on a captivating culinary journey with Chả Cá Lã Vọng, a beloved Vietnamese fish dish that'll transport your taste buds to the sun-kissed coastlines. Originating in late 19th century Hanoi, this mouthwatering creation showcases the ingenuity and traditions of Vietnam's coastal communities. Crispy fish fillets mingle with aromatic lemongrass, ginger, and garlic, creating a symphony of flavors that'll delight your senses. Served alongside fluffy rice or springy noodles, this dish encourages gathering with loved ones, symbolizing the warmth and hospitality at the heart of Vietnamese cuisine. Get ready to discover why this fish dish is a must-try for any food enthusiast.
Key Takeaways
- Chả Cá Lã Vọng is a beloved Vietnamese grilled fish dish with origins in late 19th century Hanoi, reflecting the nation's rich culinary heritage and coastal traditions.
- The dish combines fragrant lemongrass, ginger, and fresh white fish fillets, resulting in a captivating fusion of flavors and textures.
- Sharing Chả Cá Lã Vọng is a cherished social tradition that encourages gatherings among families and friends, symbolizing hospitality and community spirit.
- This versatile dish can be enjoyed for both weekend feasts and casual meals, appealing to both adventurous and traditional palates.
- Serving Chả Cá Lã Vọng provides a memorable dining experience, offering a sensory journey through the vibrant colors, inviting aroma, and delectable flavors of Vietnamese cuisine.
History
The history of Vietnamese fish dishes can be traced back to the country's coastal geography and reliance on seafood as a dietary staple. For generations, coastal communities have perfected the art of preparing delectable fish-based meals, infusing them with the vibrant flavors of Vietnamese cuisine.
One such iconic dish is the Chả Cá Lã Vọng, a beloved specialty from Hanoi.
This dish's origins can be traced to the late 19th century, when a family in the Đồng Xuân market began serving up their unique take on grilled fish. The secret lies in the marinade, a tantalizing blend of turmeric, dill, and a touch of fish sauce, which imparts a depth of flavor that's simply irresistible.
Over time, the dish gained a devoted following, becoming a must-try for both locals and visitors alike.
Today, the Chả Cá Lã Vọng remains a beloved part of Vietnam's culinary heritage, showcasing the country's rich coastal traditions and the ingenuity of its people.
Recipe
Vietnamese Fish Dish
Recipe
Vietnamese cuisine is renowned for its delicate balance of flavors and fresh ingredients. This traditional fish dish is a prime example of the country's culinary artistry. The combination of tender white fish, aromatic herbs, and a nuanced sauce creates a harmonious and deeply satisfying meal.
The key to this dish's success lies in the careful selection and preparation of the ingredients. The fish should be fresh, flaky, and of high quality, while the herbs and spices must be perfectly balanced to enhance the natural flavors of the seafood.
- White fish fillets (such as cod, tilapia, or snapper)
- Lemongrass, finely chopped
- Garlic, minced
- Ginger, grated
- Fish sauce
- Lime juice
- Chili peppers, sliced (optional)
- Cilantro, chopped
- Mint leaves
- Rice or vermicelli noodles
To prepare the dish, gently poach the fish fillets in a fragrant broth made from the lemongrass, garlic, ginger, fish sauce, and lime juice. Serve the fish immediately, garnished with the sliced chili peppers, cilantro, and mint leaves.
Accompany the dish with steamed rice or vermicelli noodles to soak up the delicious sauce.
When cooking this Vietnamese fish dish, be mindful of not overcooking the fish, as it can easily become tough and dry. Additionally, experiment with the spice level by adjusting the amount of chili peppers used, as the heat can vary depending on personal preference.
Enjoy this authentic and flavorful Vietnamese delicacy.
Cooking Steps
Start by cleaning and scaling the fish – you don't want any stray scales in your dish!
Next, marinate the fish in a mix of fragrant spices to really make those flavors pop.
Then, fry the fish in hot oil until it's golden brown and crispy.
Finish by garnishing with fresh herbs for a vibrant, mouthwatering presentation.
Serve this Vietnamese fish dish hot with a side of steamed rice – a truly delightful meal!
Step 1. Clean and Scale Fish
Before you can begin cooking the delectable Vietnamese fish dish, it's important to properly clean and scale the fish. First, rinse the fish under cool running water to remove any dirt or debris.
Using a sharp knife, gently scrape the scales off the skin, working from the tail towards the head. Be careful not to cut the flesh. Once the scales are removed, use a pair of sharp kitchen shears to snip off the fins and tail.
Next, make a small incision along the belly of the fish to remove the internal organs. Rinse the cavity thoroughly under water to wash away any blood or impurities.
Pat the fish dry with paper towels, ensuring it's completely clean and ready for cooking. With the hard work done, you can now move on to the exciting part – preparing the flavorful marinade and cooking the fish to perfection.
Get ready to savor the authentic taste of this beloved Vietnamese dish!
Step 2. Marinate Fish in Spices
To begin, gather a mix of aromatic spices and herbs that will infuse the fish with bold Vietnamese flavors. Lemongrass, ginger, garlic, and chili peppers are classic choices. Chop these ingredients into a flavorful paste, then rub it all over the clean and scaled fish fillets.
Next, whisk together a marinade of fish sauce, lime juice, brown sugar, and a splash of water. Pour this over the seasoned fish, ensuring every nook and cranny is coated. Cover the dish and let it sit in the fridge for 30 minutes to an hour, allowing the flavors to meld.
When ready to cook, heat a bit of oil in a skillet over medium-high heat. Gently place the marinated fish fillets in the pan and sear for 3-4 minutes per side, until they develop a nice golden-brown crust.
Serve the fragrant, spice-rubbed fish immediately, garnished with fresh herbs and a squeeze of lime. Enjoy the perfect balance of sweet, sour, and savory in every bite!
Step 3. Fry Fish in Hot Oil
After marinating the fish in the aromatic spice mixture, it's time to bring the flavors to life through frying.
Grab your trusty skillet and heat up some oil over medium-high heat. When the oil starts to shimmer, it's ready for action! Carefully place the marinated fish fillets into the hot oil, making sure not to crowd the pan.
Now, get ready for the sizzle! As the fish hits the oil, it'll create a beautiful golden-brown crust, locking in all that delicious flavor. Gently flip the fillets after a couple of minutes, cooking until they're perfectly crispy on both sides. The aroma alone will have your mouth watering!
Once the fish is cooked through, transfer it to a plate lined with paper towels to drain off any excess oil.
Serve it up hot and enjoy the perfect balance of tender, flaky fish and crispy, flavor-packed exterior. This Vietnamese dish is sure to delight your taste buds and transport you straight to the vibrant street markets of Vietnam.
Step 4. Garnish With Fresh Herbs
First, gather a handful of fresh Vietnamese herbs, such as cilantro, mint, and Thai basil. These vibrant greens will add a burst of flavor and a beautiful pop of color to your dish.
Gently wash and pat dry the herbs, then tear or chop them into bite-sized pieces.
Next, sprinkle the chopped herbs over the fried fish, making sure to cover the entire surface. The fragrant herbs will complement the savory flavors of the fish, creating a harmonious blend of tastes and textures.
Don't be afraid to get a little creative! You can arrange the herbs in a decorative pattern, or try mixing and matching different varieties for a visually stunning presentation.
The key is to let the fresh, lively herbs shine and enhance the overall appeal of your Vietnamese fish dish.
With the final touch of the herbal garnish, your "Chả Cá Lã Vọng" is now complete and ready to be savored. Enjoy the vibrant, flavorful combination of crispy fried fish and aromatic herbs!
Step 5. Serve Hot With Steamed Rice
Serve the Vietnamese fish dish piping hot, accompanied by a bed of fluffy, freshly steamed rice. The aroma of the spices and the sizzle of the fish will fill the air, enticing your senses.
Scoop up a generous portion of the flavorful fish, making sure to capture all the delectable sauce. Savor each bite, letting the tender, flaky fish melt in your mouth. The steamed rice provides the perfect canvas to soak up every last drop of the aromatic broth.
Garnish the dish with a sprinkle of chopped green onions and cilantro, adding a vibrant pop of color and a burst of fresh flavor.
The combination of the hot, savory fish and the fluffy, comforting rice creates a harmonious balance that will transport your taste buds straight to the heart of Vietnam. Enjoy this authentic and satisfying meal with your loved ones, and let the flavors transport you to a new culinary adventure.
Final Thoughts
The Vietnamese fish dish offers a captivating fusion of flavors that transports your taste buds on a culinary journey. From the fragrant lemongrass and ginger to the succulent fish and crunchy vegetables, every bite is a delightful discovery.
What makes this dish truly special is the way it brings people together. Sharing a steaming plate of Chả Cá Lã Vọng is a beloved tradition, where families and friends gather to savor the flavors and create cherished memories.
The vibrant colors and inviting aroma set the stage for a memorable dining experience.
Whether you're enjoying it as a weekend feast or incorporating it into your weekly meal rotation, this Vietnamese fish dish is sure to become a new favorite.
Frequently Asked Questions
What Are the Main Ingredients in Chả Cá Lã VọNg?
The main ingredients in chả cá lã vọng are fish, turmeric, dill, peanuts, and vermicelli noodles. You'll find these flavorful components come together to create a truly delightful and authentic Vietnamese dish.
How Long Does It Take to Prepare Chả Cá Lã VọNg?
Preparing chả cá lã vọng takes some time, but it's well worth the effort. You'll need to allow about an hour and a half to properly marinate the fish and assemble all the components.
Can Chả Cá Lã VọNg Be Made Vegetarian?
While chả cá là vọng is traditionally a fish dish, you can make a vegetarian version by substituting the fish with plant-based proteins like tofu or mushrooms. The flavors will still be delicious without the seafood.
How Is Chả Cá Lã VọNg Typically Served?
Typically, chả cá là vọng is served with a variety of fresh herbs, rice noodles, and dipping sauces. You'll often find it presented on a sizzling platter, allowing you to assemble your own flavorful bites.
What Are the Traditional Accompaniments for Chả Cá Lã VọNg?
Chả cá lã vọng is traditionally served with rice noodles, fresh herbs like dill and mint, and a dipping sauce made with fish sauce, lime juice, and chili peppers. Don't forget to add these tasty accompaniments to your meal!
Mai is a passionate chef specializing in Vietnamese cuisine. From fragrant pho to fresh spring rolls and banh mi, Mai’s dishes showcase the balance of sweet, salty, sour, and spicy that defines Vietnamese cooking. Her recipes emphasize fresh herbs, flavorful broths, and the light, vibrant ingredients that make Vietnamese food so special.
-
Southern Comfort Food1 month ago
Cheese Straws
-
Brazilian Cuisine1 month ago
Caldeirada
-
Southern Comfort Food1 month ago
Creamed Corn
-
Brazilian Cuisine1 month ago
Chicken in Brown Sauce
-
Brazilian Cuisine1 month ago
Tacacá
-
Southern Comfort Food1 month ago
Squash Casserole
-
Polish Comfort Food1 month ago
Krupnik (Barley Soup)
-
Southern Comfort Food1 month ago
Chocolate Gravy