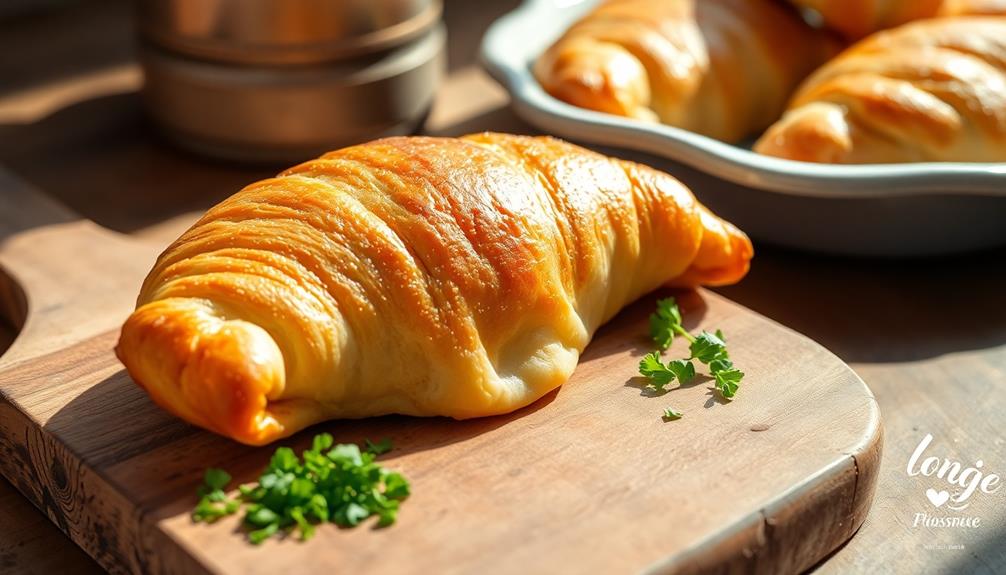
Risoles are a tasty treat you'll love to make and eat! These crispy, golden-brown snacks originated in Portugal and have spread worldwide. They're like little savory crepes filled with yummy ingredients like chicken, veggies, or seafood, then deep-fried to perfection. You'll start by making a thin dough, then add your filling, roll it up, and fry until crispy. Serve them hot with dipping sauces for a fun appetizer or party snack. The best part? You can get creative with fillings and sauces to make them your own. Stick around to uncover the secrets of making these delectable bites!
Key Takeaways
- Risoles are savory crepes filled with meat, vegetables, or seafood, then deep-fried until crispy.
- Originating in Portugal, risoles have become popular street food in Brazil and Indonesia.
- The dish consists of a thin dough wrapper filled with various ingredients and sealed before frying.
- Common fillings include chicken, shrimp, vegetables, and cheese, often mixed with a creamy sauce.
- Risoles are typically served as appetizers or snacks, accompanied by dipping sauces like sweet chili or garlic aioli.
Top picks for "risol"
Open Amazon search results for this keyword.
As an affiliate, we earn on qualifying purchases.
History
Risoles have a rich history spanning several centuries. You'll be amazed to learn that these delicious snacks originated in Portugal! They've been a beloved treat since the 15th century, when Portuguese explorers introduced them to other parts of the world.
As risoles traveled across the globe, they became popular in many countries. In Brazil, you'll find them as a favorite street food, often filled with creamy chicken or shrimp.
Indonesian risoles, which you might know as risoles mayo, are a bit different. They're usually stuffed with vegetables and meat, then coated in breadcrumbs before frying.
You'd be surprised to know that risoles have different names in various cultures. In Spain, they're called empanadillas, while in Italy, you'll hear them referred to as rissóis. In Brazil, they’re known as risoles, a name that is derived from the French word for “rissole”. In all these cultures, the essence of a crispy and savory pastry filled with various ingredients remains the same. The versatility of risoles is truly fascinating, much like a tragic love story that captures the hearts of people from different corners of the world.
No matter what they're called, these crispy, golden-brown pastries have been making people happy for generations. Whether you're enjoying them as a snack, appetizer, or main course, you're tasting a piece of history with every bite!
Recipe
Risoles, a popular snack in Indonesian cuisine, are savory crepes filled with a delicious mixture of vegetables, meat, or seafood, and then deep-fried to golden perfection. These crispy, flavorful treats are often served as appetizers or enjoyed as a quick street food snack.
To make risoles, you'll need to prepare both the crepe wrapper and the filling separately before assembling and frying. The crepes are made with a thin batter, while the filling typically consists of a creamy mixture of vegetables and protein. Once filled and rolled, the risoles are coated in breadcrumbs and fried until crispy.
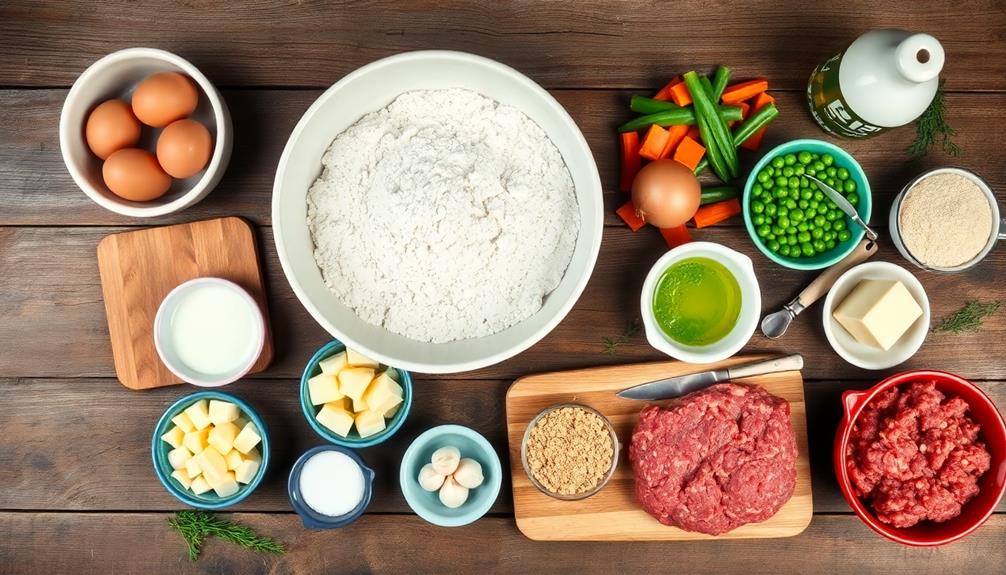
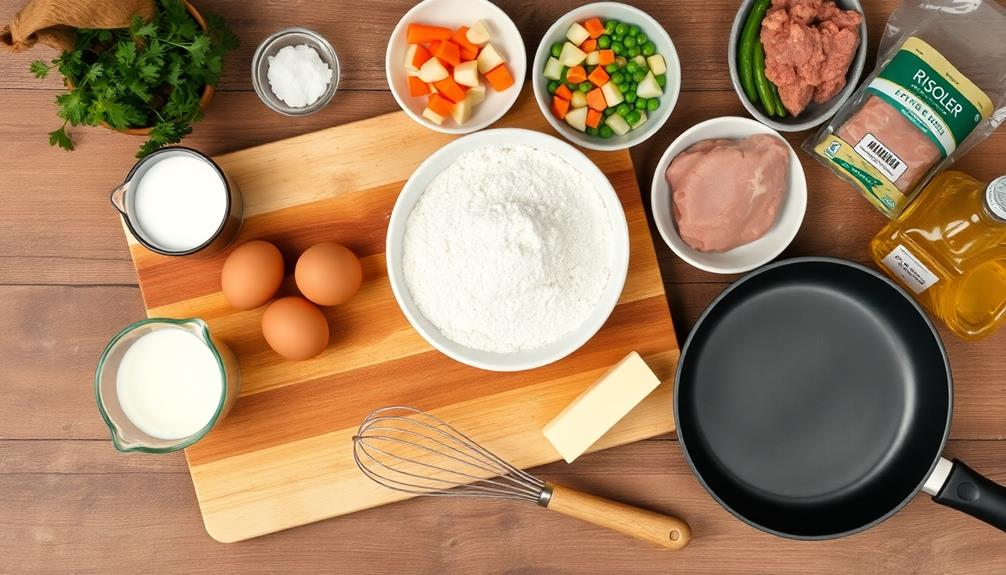
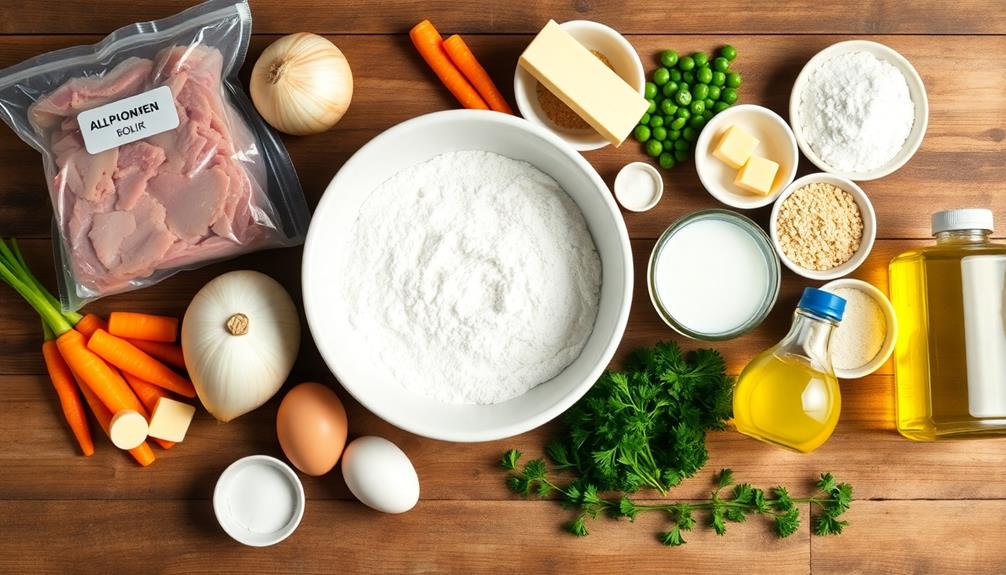
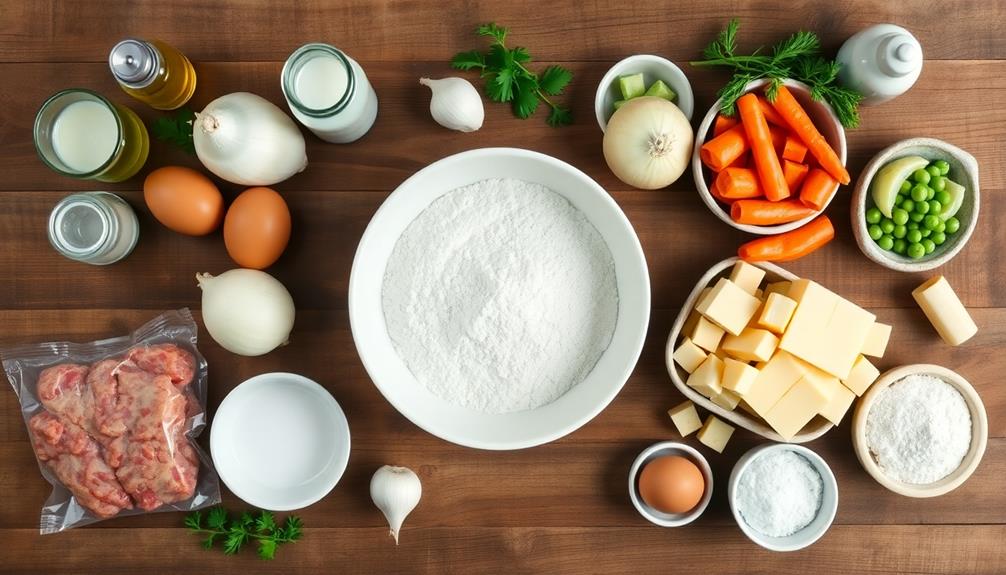
Ingredients:
- 250g all-purpose flour
- 2 eggs
- 500ml milk
- 1/4 tsp salt
- 200g ground chicken or beef
- 1 diced onion
- 2 minced garlic cloves
- 100g diced carrots
- 100g diced potatoes
- 50g frozen peas
- 2 tbsp butter
- 2 tbsp all-purpose flour
- 250ml milk
- Salt and pepper to taste
- 1 beaten egg (for sealing)
- Breadcrumbs for coating
- Vegetable oil for frying
To make risoles, start by preparing the crepe batter by mixing flour, eggs, milk, and salt until smooth. Cook thin crepes in a non-stick pan.
For the filling, sauté onions, garlic, and ground meat, then add vegetables and cook until tender. Make a roux with butter and flour, add milk to create a creamy sauce, and combine with the meat mixture.
Once cooled, place a spoonful of filling on each crepe, roll tightly, and seal with beaten egg. Coat the rolls in breadcrumbs and deep-fry until golden brown and crispy.
For best results, ensure the filling is completely cooled before assembling the risoles to prevent the crepes from becoming soggy. You can prepare the crepes and filling in advance and assemble just before frying.
Experiment with different fillings such as cheese, tuna, or vegetarian options to suit your taste preferences. Serve hot with chili sauce or your favorite dipping sauce for a delicious snack or appetizer.
Cooking Steps
Get ready to whip up some delicious risoles by following these cooking steps!
You'll start by preparing the filling ingredients and making the dough, then move on to filling and rolling your risoles.
Once they're all rolled up, you'll fry them until they're golden brown and crispy, and serve them with a tasty dipping sauce.
Step 1. Prepare Filling Ingredients
To kick off the filling preparation, you'll need to gather a handful of key ingredients. First up, grab some diced chicken breast, chopped onions, and minced garlic.
Don't forget to include some colorful veggies like carrots and peas, which will add both flavor and nutrition to your risoles.
Next, you'll want to have some herbs and spices ready. Grab some salt, pepper, and maybe a pinch of paprika for a little extra kick. If you're feeling adventurous, you can even add some thyme or oregano to spice things up!
Now, let's not forget about the creamy element. You'll need some butter and flour to make a roux, which will help thicken your filling.
And of course, you can't forget the milk – it's what gives the filling its smooth, velvety texture.
Lastly, make sure you have some cooking oil on hand. You'll need it to sauté your ingredients and bring all those delicious flavors together.
With these ingredients ready to go, you're all set to create a mouthwatering filling for your risoles!
Step 2. Make Dough for Risoles

Occasionally, the dough-making process can seem daunting, but it's actually quite simple for risoles. You'll need just a few ingredients to get started: all-purpose flour, milk, eggs, and a pinch of salt.
First, grab a large mixing bowl and pour in the flour. Make a little well in the center, like a tiny volcano crater. Crack your eggs into this well and add the milk.
Now, it's time to get your hands dirty! Use a whisk or fork to mix everything together, starting from the center and working your way out. As you stir, you'll see the mixture come together into a smooth, slightly thick batter.
Don't worry if there are a few small lumps – they'll disappear as you cook. If the batter seems too thick, add a splash more milk. Too thin? Sprinkle in a bit more flour. The goal is to achieve a consistency similar to pancake batter.
Once you're happy with the texture, cover the bowl with a clean kitchen towel and let it rest for about 30 minutes. This resting time helps the gluten relax, making your risoles extra tender.
Step 3. Fill and Roll Risoles
With your dough prepared and rested, it's time to move on to filling and rolling your risoles. First, you'll want to prepare your filling. This could be anything from savory meat and veggies to sweet fruits and chocolate.
Once your filling's ready, grab a small portion of dough and roll it out into a thin circle.
Next, spoon a dollop of filling onto the center of your dough circle. Don't overfill it, or you'll have trouble closing your risole! Carefully fold the dough over the filling, creating a half-moon shape. Press the edges together firmly to seal in all that yummy goodness.
Now comes the fun part – rolling! Gently roll your risole to create a neat, compact package. If you're feeling fancy, you can even crimp the edges with a fork for a pretty pattern.
Repeat this process until you've used up all your dough and filling. Remember, practice makes perfect, so don't worry if your first few aren't picture-perfect. They'll still taste amazing!
Step 4. Fry Until Golden Brown
Now that you've prepared your risoles, it's time to fry them to golden perfection.
Heat about an inch of oil in a deep frying pan or pot over medium-high heat. You'll know the oil is ready when a small piece of bread sizzles and turns golden in about 60 seconds.
Carefully place a few risoles in the hot oil, making sure not to overcrowd the pan. They should have enough space to swim around freely.
As they fry, you'll see the coating turn a beautiful golden brown color. It's like magic! Use tongs or a slotted spoon to gently flip the risoles after about 2-3 minutes. This ensures they cook evenly on all sides.
Once they're golden brown all over, it's time to take them out. Lift them from the oil and let the excess drip off.
Then, place them on a plate lined with paper towels to absorb any extra oil. Let them cool for a few minutes before you dig in. Your crispy, golden risoles are now ready to enjoy!
Step 5. Serve With Dipping Sauce
The perfect dipping sauce can elevate your crispy risoles to new heights. You've got lots of tasty options to choose from! A classic sweet chili sauce is always a crowd-pleaser, with its tangy-sweet flavor and just a hint of heat.
If you're feeling adventurous, why not try a zesty garlic aioli? It's creamy, garlicky, and oh-so-delicious!
For a local twist, you can't go wrong with a spicy peanut sauce. It's rich, nutty, and pairs wonderfully with the savory filling of your risoles.
If you're in the mood for something lighter, a refreshing cucumber yogurt dip might be just the thing. It's cool, tangy, and provides a nice contrast to the fried exterior of your risoles.
Don't forget to serve your dipping sauce in small bowls or ramekins alongside your hot, crispy risoles. This way, everyone can choose their favorite sauce or even mix and match!
Final Thoughts
Risoles offer a delightful culinary experience that's worth exploring. These crispy, golden-brown snacks are perfect for parties, family gatherings, or anytime you're craving a tasty treat. You'll love how versatile they are, as you can fill them with your favorite ingredients, from savory meats and cheeses to sweet fruits and chocolate.
Don't be intimidated by the process of making risoles. With a little practice, you'll become a pro at rolling and frying these delicious treats. Remember, the key is to seal the edges well to prevent the filling from leaking out.
As you become more confident, you can experiment with different fillings and dipping sauces to create your own unique combinations.
Risoles aren't just about taste; they're also about bringing people together. There's something special about sharing a plate of homemade risoles with friends and family.
Frequently Asked Questions
Can Risoles Be Frozen for Later Consumption?
You can freeze risoles for later consumption. It's a great way to save time and have a quick snack on hand. Just wrap them individually in plastic wrap or foil before freezing. They'll keep well for several months.
Are There Gluten-Free Alternatives for Making Risoles?
You can make gluten-free risoles by using alternatives like rice flour, cornstarch, or gluten-free bread crumbs for the coating. Replace regular flour with almond or coconut flour in the filling. Experiment with different combinations to find your favorite.
What Are Common Dipping Sauces Served With Risoles?
You'll often find risoles paired with savory dipping sauces. Common options include chili sauce, sweet soy sauce, peanut sauce, or mayonnaise. You can also try ketchup, garlic aioli, or even a tangy yogurt-based dip for variety.
How Long Do Homemade Risoles Stay Fresh in the Refrigerator?
You'll find that homemade risoles can stay fresh for up to 3-4 days in your refrigerator. It's best to store them in an airtight container. For longer storage, you can freeze them for up to 3 months.
Can Risoles Be Baked Instead of Fried for a Healthier Option?
Yes, you can bake them for a healthier option. Preheat your oven to 375°F, brush them with oil, and place on a baking sheet. They'll turn out crispy and golden after about 20-25 minutes.