
Salted duck eggs are a truly special Asian delicacy you've simply gotta try! These salty, creamy gems have been prized for centuries, with an intriguing history tracing back to ancient China. To make 'em, you'll start by soaking the duck eggs in a salt brine, which transforms them into a deep, rich amber color. After rinsing and air-drying, the eggs get refrigerated for weeks, allowing the salt to fully permeate the tender yolks and gelatinous whites. Serve these salted wonders chilled, with soy sauce, sesame oil, or even a spicy kick – the flavor combinations are endless! Keep reading for the full step-by-step instructions.
Key Takeaways
- Salted duck eggs originate from ancient China, prized as a delicacy with a unique flavor profile and creamy texture.
- The traditional brining process takes several weeks, resulting in firm, spreadable yolks and gelatinous egg whites.
- The salting and curing process enhances the umami notes, creating a complex and savory taste.
- Salted duck eggs can be enjoyed on their own or paired with condiments like soy sauce, sesame oil, or chili oil.
- This versatile ingredient can elevate various dishes, from salads and sandwiches to baked goods, making it a unique Asian treat.
History

The origins of the salted duck egg can be traced back to ancient China, where it was a cherished delicacy enjoyed by the imperial courts. For centuries, the Chinese have mastered the art of preserving duck eggs through a process that transforms the yolks into a rich, creamy, and intensely flavorful treat.
The traditional method involves submerging the eggs in a brine solution, often enhanced with spices and herbs. Over the course of several weeks, the eggs absorb the salty brine, resulting in a unique texture and taste.
The salted yolks become firm and spreadable, while the whites take on a gelatinous consistency.
These savory and indulgent eggs have long been a staple in Chinese cuisine, featured in a variety of dishes, from dim sum to rice porridge. Their popularity has also spread to other parts of Asia, where they're enjoyed as a delightful snack or incorporated into various culinary creations.
Cooking Steps

Begin by rinsing the duck eggs under cool running water. This will help remove any dirt or impurities from the shells. Gently pat the eggs dry with a clean towel.
Next, place the eggs in a large pot and cover them with cold water by about an inch. Bring the water to a boil over high heat. Once the water is boiling, reduce the heat to medium-low and let the eggs simmer for 10-12 minutes. This will fully cook the eggs.
Carefully drain the hot water and cover the eggs with cold water. Let them sit for 10-15 minutes to cool completely. Gently tap the eggs against the counter to crack the shells, then peel them. Discard the shells.
In a bowl, combine the peeled eggs, salt, and water. Stir gently to coat the eggs evenly. Cover the bowl and refrigerate for at least 3 days, up to 1 week, to allow the eggs to become fully salted and flavorful.
Step 1. Soak Duck Eggs in Brine
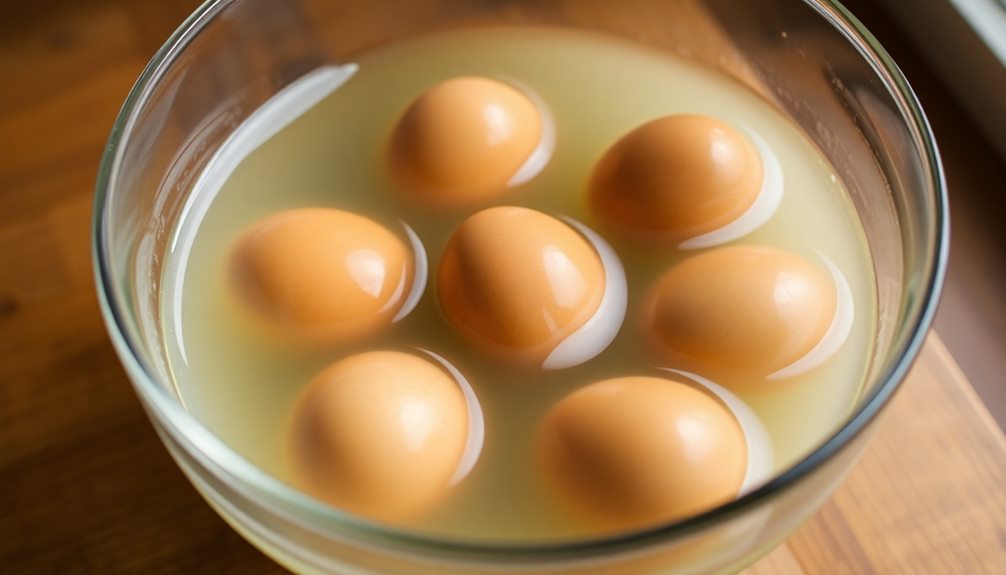
To begin the salting process, you'll need to prepare a brine solution. In a large bowl, combine water and salt. The ratio should be 1 cup of water for every 2 tablespoons of salt. Stir the mixture until the salt has fully dissolved.
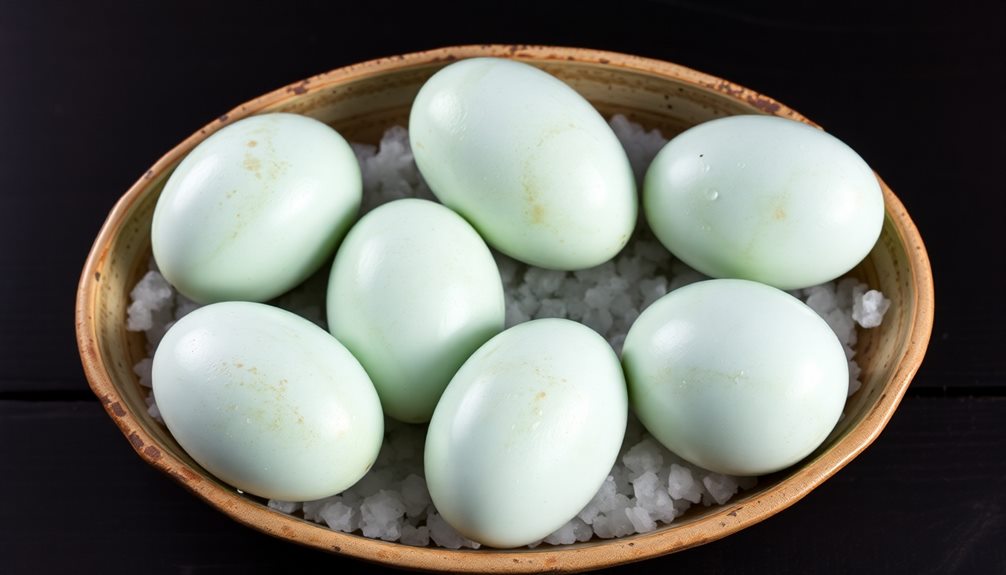
Now, gently place the duck eggs into the brine, making sure they're fully submerged. Cover the bowl and let it sit at room temperature for 21 to 28 days. During this time, the brine will gradually penetrate the eggs, transforming the yolks into a rich, creamy, and salty delicacy.
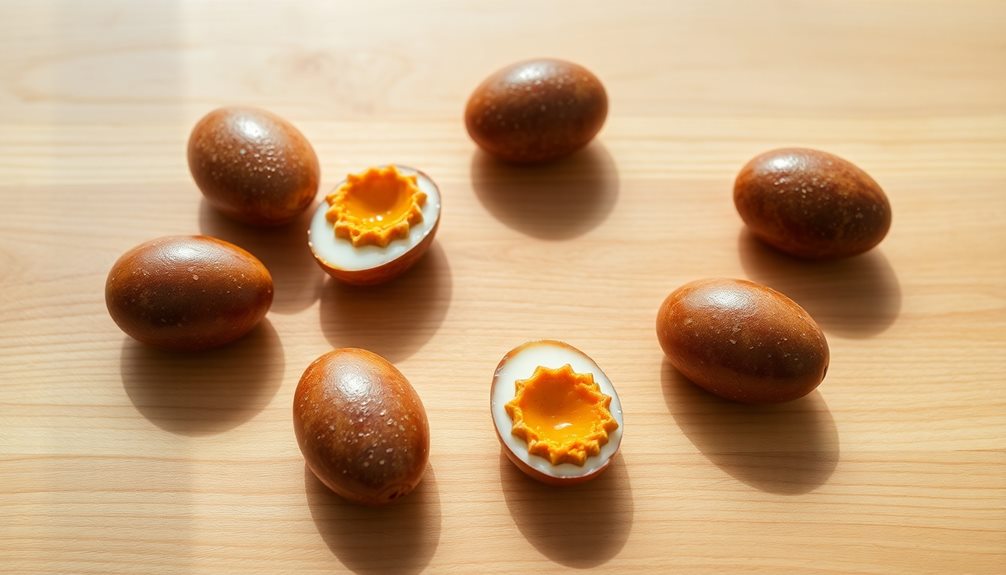
As the days pass, you might notice the eggs change color, darkening to a deep amber or reddish-brown hue. This is a sign that the salting process is working.
Resist the temptation to open the eggs too early, as they need this extended soaking time to develop their signature flavor and texture. Once the curing is complete, you'll be rewarded with a truly unique and mouthwatering treat.
Step 2. Drain and Rinse the Duck Eggs
After the salting process is complete, carefully remove the duck eggs from the brine.
Make sure to handle the eggs with care, as they can be delicate after soaking. Gently place the salted duck eggs into a strainer or colander to allow the excess brine to drain off.
Once the eggs have drained, it's time to give them a quick rinse under cool, running water.
This will help remove any remaining brine from the surface of the eggs. Be gentle during this step, as you don't want to damage the fragile shells. Lightly pat the eggs dry with a clean, soft cloth or paper towel.
With the salting and rinsing complete, your salted duck eggs are now ready for the next step in the process.
Carefully transfer the eggs to a clean, dry container or storage dish, and get ready to enjoy their delightful, creamy texture and salty flavor.
Step 3. Let Duck Eggs Air Dry
With the salted duck eggs now rinsed and dried, it's time to let them air dry. This step is crucial to allow the eggs to develop their signature salty and creamy texture.
Place the drained duck eggs on a clean, dry surface, making sure they're not touching each other. You can use a baking sheet or a clean dish towel for this.
Now, simply let the eggs sit and air dry for the next 12-24 hours. This allows the salt to penetrate the eggs fully and concentrate the flavors.
Don't worry, your kitchen won't smell – the salting process helps to control any strong odors. As the eggs dry, you'll notice the shells starting to wrinkle, which is a good sign they're ready for the next step.
Just be patient and let nature take its course. Before you know it, those duck eggs will be perfectly seasoned and ready to enjoy!
Step 4. Place in Refrigerator
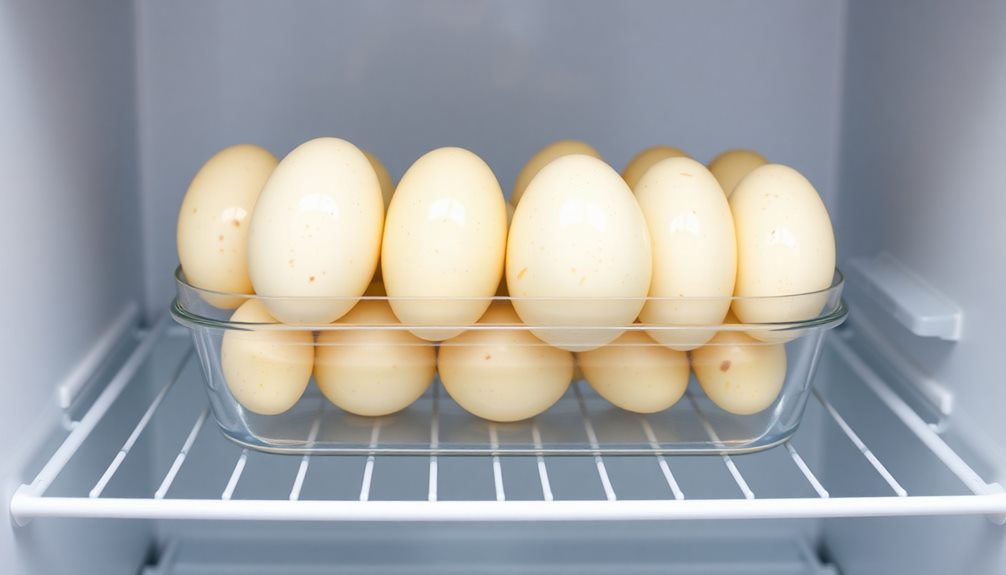
Once the air-drying period is complete, gently place the salted duck eggs into the refrigerator. This step is crucial to help the eggs continue curing and develop their signature salty-creamy flavor.
Carefully arrange the eggs in a single layer on a plate or in a container, making sure they don't touch each other. It's important to keep the temperature consistent, so the fridge is the perfect spot.
Over the next few weeks, the salt will slowly permeate the egg whites and yolks, transforming them into the rich, savory delicacy you love.
Check on the eggs every few days, gently turning them to ensure even curing. As the weeks pass, you'll notice the whites becoming firmer and the yolks turning a deep, golden hue.
This gradual process is what gives salted duck eggs their unique texture and taste. Be patient and let the magic happen – soon, you'll have a batch of perfectly cured, mouthwatering salted duck eggs to enjoy!
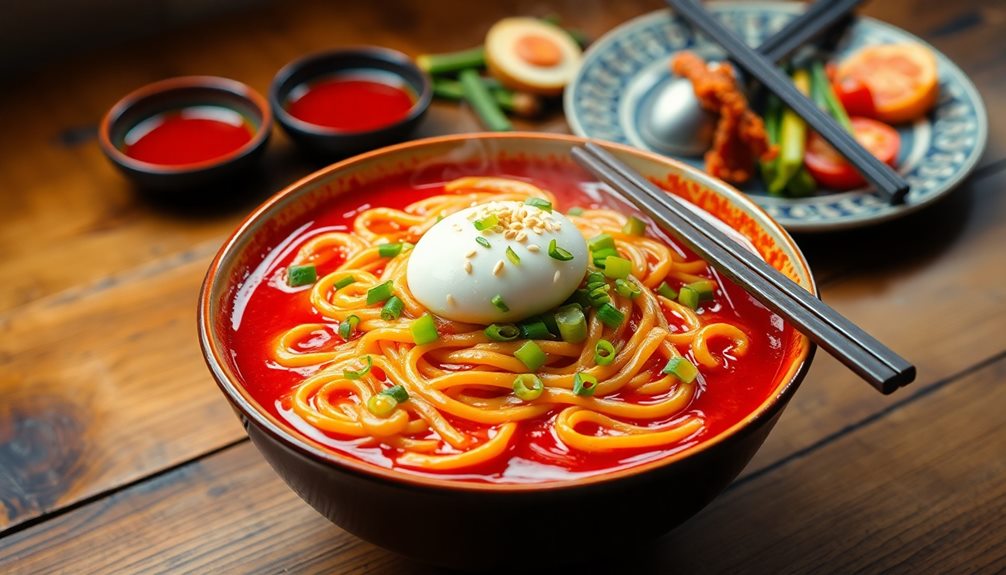
Step 5. Serve Chilled With Condiments

Your salted duck eggs have been carefully curing in the fridge for the past few weeks. Now it's time to serve these delicious, salty treats!
First, take the eggs out of the refrigerator and let them sit at room temperature for about 15 minutes. This will help them reach the perfect chilled temperature.
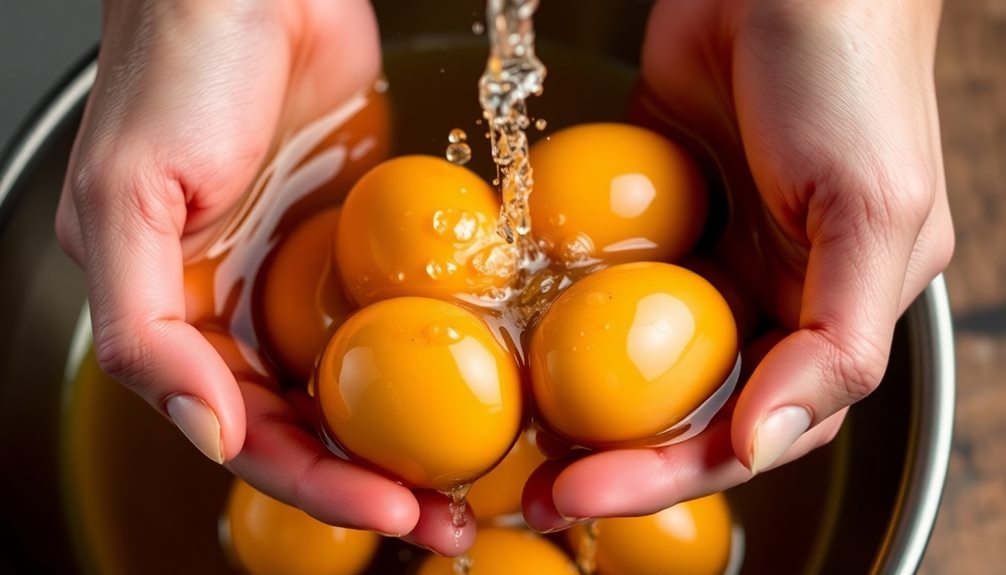
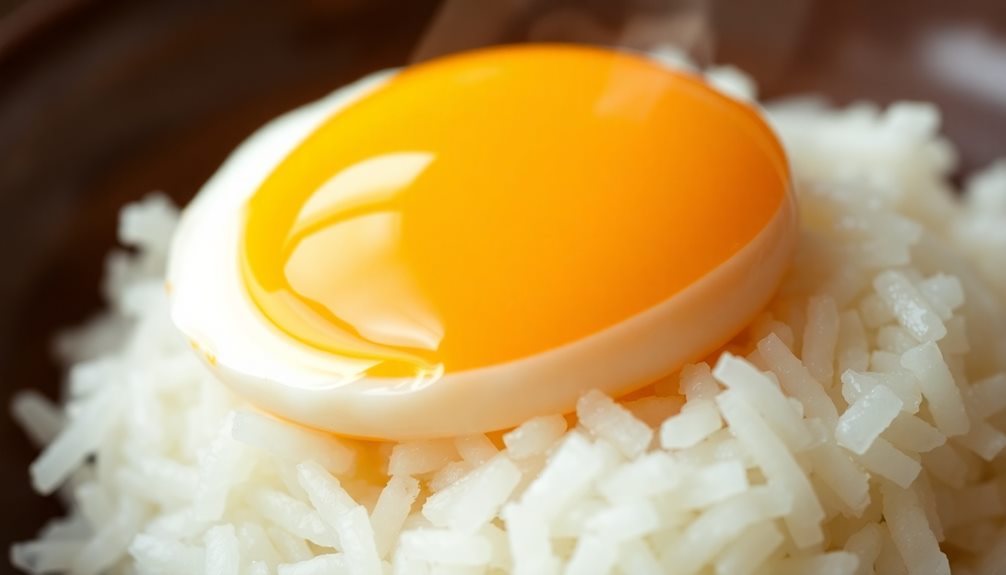
Next, crack open the eggs and spoon out the rich, creamy yolks. You can serve the yolks on their own, or pair them with some tasty condiments.
Try drizzling them with a bit of soy sauce or sesame oil for an authentic Asian flavor. Or, sprinkle on some chopped scallions, ginger, or cilantro for a fresh twist. If you're feeling adventurous, a dash of chili oil or Sriracha can add a spicy kick. For an extra burst of flavor, you could serve them alongside a tangy dipping sauce made from lime juice, fish sauce, and a touch of sugar. Pair these enhancements with a perfect crispy Vietnamese spring roll, and you’ll have a delicious appetizer or snack that will impress any crowd. Whether you’re going for a mild or bold flavor profile, the combination is sure to elevate your meal.
Serve the salted duck egg yolks chilled, either on a small plate or in individual dishes. Your guests will love the unique, umami-packed taste of this traditional Asian delicacy. Enjoy!
Final Thoughts
Salted duck egg is a delightful delicacy that offers a unique flavor profile and a rich, creamy texture. As you've discovered, preparing this savory treat at home can be a rewarding experience. The salting process enhances the natural umami notes, creating a complex and satisfying taste.
While the chilled serving with your choice of condiments is a classic presentation, don't be afraid to explore other creative ways to enjoy salted duck eggs. They can be incorporated into various dishes, from salads and sandwiches to omelets and even baked goods. The possibilities are endless!
As you continue on your culinary journey, remember that experimenting and having fun in the kitchen are just as important as following the recipe.
Salted duck eggs are a versatile ingredient that can elevate your meals and impress your guests. Embrace the unique flavors and textures, and let your creativity shine through. Bon appétit!
Frequently Asked Questions
How Long Do Salted Duck Eggs Last?
Salted duck eggs can last for several weeks when stored properly. They'll stay fresh in the fridge for 2-3 weeks, or you can freeze them for up to 6 months. Proper storage is key to enjoying their delicious, savory flavor.
Can I Use Regular Eggs Instead of Duck Eggs?
You can use regular chicken eggs instead of duck eggs, but the flavor and texture won't be quite the same. Salted duck eggs have a richer, creamier taste that's harder to replicate with regular eggs.
Do I Need to Soak the Eggs Before Cooking?
Yes, you'll need to soak the eggs before cooking. Soaking the eggs in a salt brine helps develop the signature creamy texture and salty flavor of salted eggs, no matter if they're duck or chicken eggs.
How Do I Adjust the Salt Content to My Taste?
To adjust the salt content to your taste, start by soaking the eggs in a saltwater brine. Taste the eggs after a few days and add more salt to the brine if you'd like them saltier.
Can I Add Other Ingredients to the Recipe?
Absolutely! You can customize the recipe by adding other ingredients to suit your taste preferences. Get creative and experiment with flavors that complement the salty and creamy notes of the salted duck egg.

Rina is passionate about the rich and diverse flavors of Indonesian cuisine. From fragrant nasi goreng to spicy rendang, Rina brings Indonesia’s vibrant and bold tastes to the Cook if Ya table. Her recipes are rooted in tradition but accessible to home cooks exploring Southeast Asian flavors.