Connect with us

African Cuisine

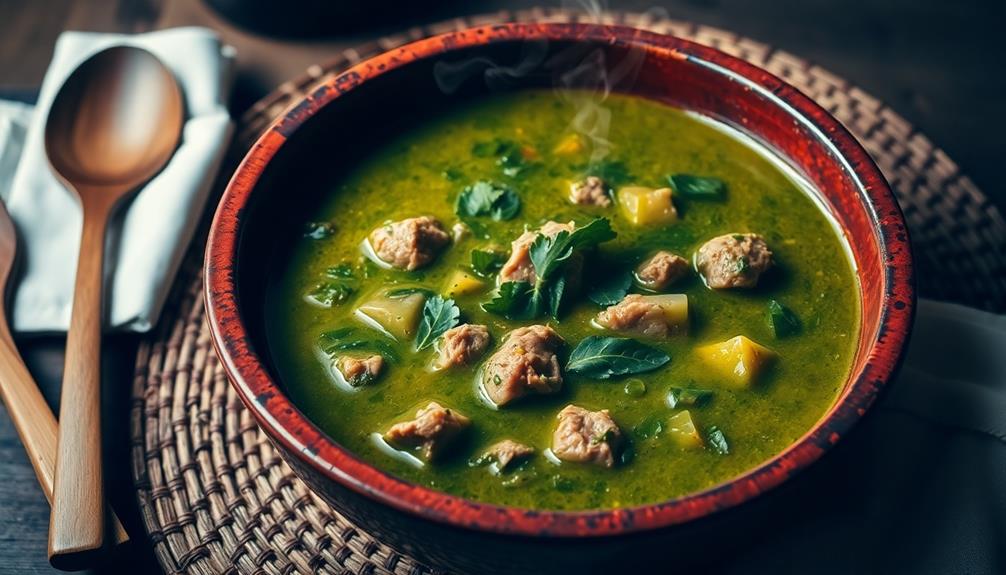
West African Comfort: The Heartiness of Afang Soup

Your taste buds are in for a delightful journey as you explore the rich, umami-packed flavors of afang soup, a beloved West African comfort food that…

Published

on

afang soup s hearty comfort

Get ready for a culinary adventure that'll transport you to the vibrant heart of West Africa! Afang soup, a beloved comfort food from southeastern Nigeria, is a heartwarming delight. This nutrient-dense dish features the distinctive bitterness of afang leaves balanced by savory umami flavors. Traditionally served during festive celebrations, the recipe has been passed down through generations, showcasing the essence of West African culture. Chopped afang leaves simmer in a rich broth, mingling with smoky protein and aromatic spices. Whether enjoyed on a cozy night or a celebratory feast, afang soup is sure to leave you feeling nourished and joyful. There's so much more to discover about this culinary treasure.

Key Takeaways

  • Afang soup is a traditional West African dish that showcases the rich culinary heritage of the Efik and Ibibio people of southeastern Nigeria.
  • The dish's distinct bitterness and umami flavors come from the nutrient-dense afang leaves, which are simmered and combined with various proteins and seasonings.
  • Afang soup is typically served during festive celebrations, where it is enjoyed alongside starches like garri, eba, or fufu, fostering a sense of community and cultural identity.
  • The recipe and preparation techniques for afang soup have been passed down through generations, highlighting the importance of preserving traditional culinary knowledge.
  • The hearty and nourishing profile of afang soup makes it a comforting West African dish that can be enjoyed on both casual and formal occasions.

History
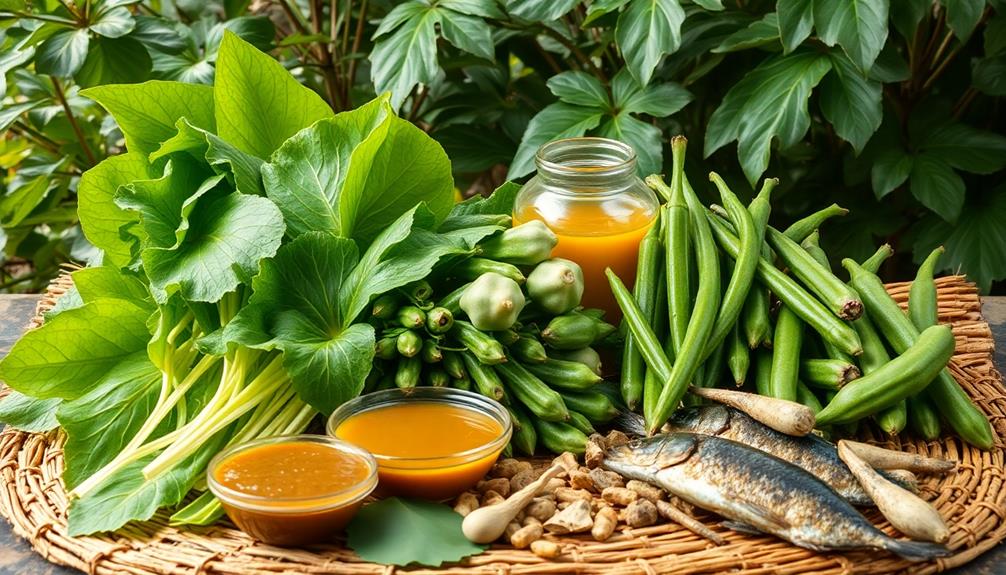
historical events and timelines

Afang soup has a rich history rooted in the culinary traditions of West Africa. This beloved dish traces its origins to the Efik and Ibibio people of southeastern Nigeria. For generations, families have gathered around the table to enjoy the hearty, flavorful broth and its signature leafy greens.

The key ingredient, afang leaves, are harvested from the Gnetum africanum vine, a plant native to the region. These nutrient-dense greens lend the soup its distinct bitterness, which is balanced by the rich, umami flavors of smoked fish, dried shrimp, and ground crayfish.

In festive celebrations, Afang soup is often served alongside staple dishes like eba (gari) and pounded yam, creating a truly mouthwatering and satisfying meal.

The preparation of this soup has been passed down through generations, with families cherishing their unique recipes and techniques.

Recipe

cooking instructions and ingredients

Afang Soup is a popular Nigerian dish that combines fresh greens, meat or fish, and an array of aromatic spices. This hearty soup isn't only nourishing but also bursting with flavor.

The key to a delicious Afang Soup lies in the careful selection and preparation of the ingredients. By following this recipe, you can recreate the authentic taste of this beloved West African specialty in your own kitchen.

Advertisement
  • Afang leaves (fresh or dried)
  • Goat meat or smoked fish
  • Palm oil
  • Onions
  • Crayfish
  • Stock cube
  • Salt and pepper to taste

To prepare the soup, start by boiling the meat or fish until tender. In a separate pot, sauté the onions in palm oil until translucent.

Add the Afang leaves, crayfish, and stock cube, and continue cooking until the leaves are wilted and the flavors have melded together. Season with salt and pepper to taste.

Serve the Afang Soup hot, accompanied by a starch such as garri, eba, or fufu.

When preparing this dish, be mindful of the texture of the Afang leaves. If using fresh leaves, chop them finely to ensure a smooth consistency.

If using dried Afang, be sure to soak and rehydrate them before adding to the pot. Additionally, adjust the cooking time as needed to achieve your desired level of tenderness in the meat or fish.

Cooking Steps

step by step cooking instructions

Chop up those Afang leaves into small, bite-sized pieces.

Bring a pot of water to a boil, then add the Afang and let it simmer.

Advertisement

Stir in some palm oil, toss in your favorite seasonings, and finish it off with a delicious protein of your choice.

Step 1. Chop Afang Leaves Into Small Pieces
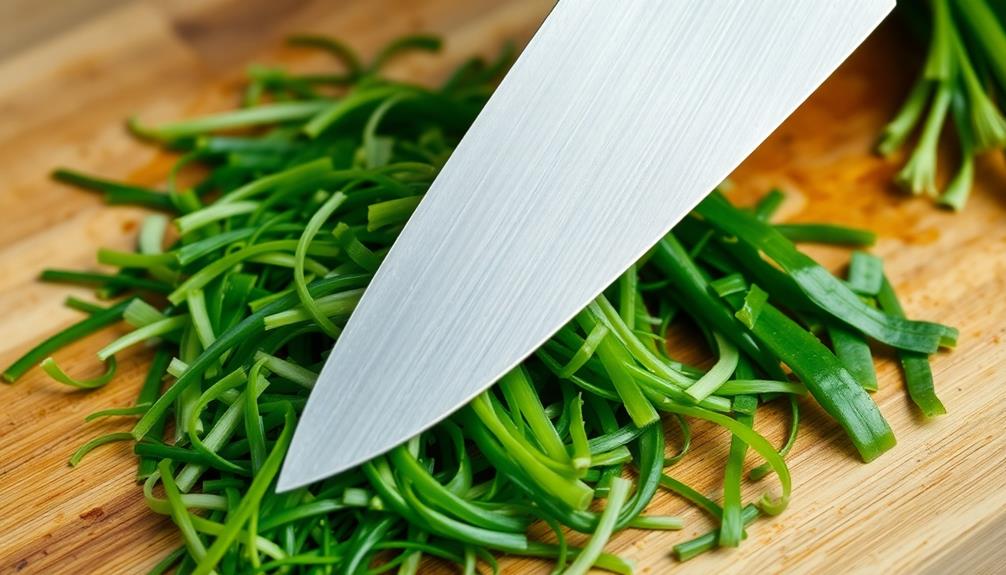
chop afang leaves small

With a sharp knife, carefully chop the afang leaves into small, bite-sized pieces. The key is to slice them evenly, so they'll cook through quickly.

Don't worry if they're not perfect – the more rustic, the better! Gather the chopped leaves and set them aside. You'll want them handy when it's time to add them to the soup.

Next, take a moment to admire the deep green color of the afang leaves. Aren't they lovely? They'll really make your soup pop with vibrant flavor.

Just wait until you taste the finished dish – the tender leaves will melt in your mouth, complementing the rich broth and hearty ingredients.

Now that your afang is prepped, you're one step closer to enjoying a comforting bowl of this West African classic.

Advertisement

Keep up the good work – the rest of the recipe is just as easy. Soon, you'll be serving up a steaming hot serving of afang soup, perfect for sharing with family and friends.

Step 2. Boil Afang Leaves in Water
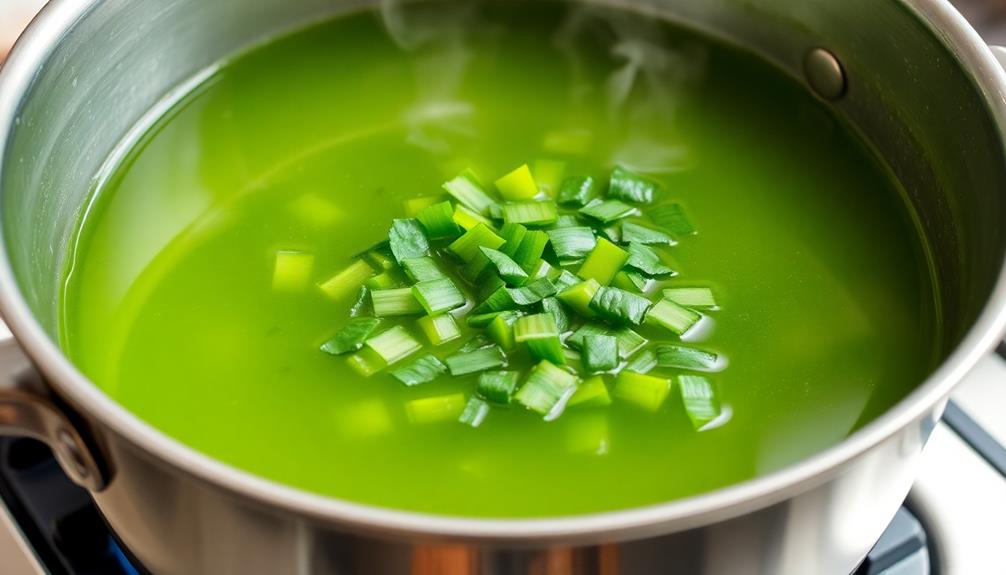
boil afang leaves process

After chopping the afang leaves, add them to a pot of boiling water. The leaves will quickly wilt, releasing their delightful earthy flavor.

Gently simmer the leaves for about 10 minutes, until they're tender and have turned a vibrant green color. Be sure to stir the pot occasionally to ensure even cooking.

Next, drain the cooked afang leaves, reserving the flavorful afang broth. This broth will serve as the base for your soup, so don't let a drop go to waste!

The afang leaves are now ready to be combined with the other ingredients in your Afang Soup recipe.

Step 3. Add Palm Oil

incorporate palm oil now

Next, add a generous amount of palm oil to the pot. This rich, golden oil will infuse your Afang soup with a delightful, aromatic flavor.

Swirl it around, letting it heat up and shimmer. Ah, can you smell that? The nutty aroma is simply divine!

Advertisement

Now, it's time to add your chopped onions. Toss them in and watch them sizzle.

Stir everything together, ensuring the onions are coated in that delectable palm oil. As the onions cook, they'll become soft and translucent, adding a lovely depth of flavor to your soup.

Don't forget to season with some salt and pepper. A sprinkle here and a dash there will enhance the overall taste.

Taste as you go, adjusting the seasonings to your preference. The perfect balance of savory and earthy notes is key for an incredibly satisfying Afang soup.

Step 4. Add Seasoning

enhance flavor with seasoning

Flavor is the cornerstone of a great Afang soup. As you've added the rich, nutty palm oil, it's time to season this dish to perfection.

First, grab a handful of dried shrimp and crush it into the pot. This adds a delightful umami punch. Next, sprinkle in some ground crayfish – it'll bring a bold, seafood-y essence.

Advertisement

Don't forget the spices! A teaspoon each of cayenne pepper and ground ginger will give your Afang a pleasant kick.

Finish with a few shakes of dried thyme and a pinch of salt and black pepper. Stir it all together and let those flavors meld.

The aroma filling your kitchen is simply mouthwatering. Your family will be drawn to the table, eager to savor every spoonful of this hearty, well-seasoned Afang soup.

With the right balance of seasonings, you're well on your way to creating a comforting West African classic.

Step 5. Add Protein
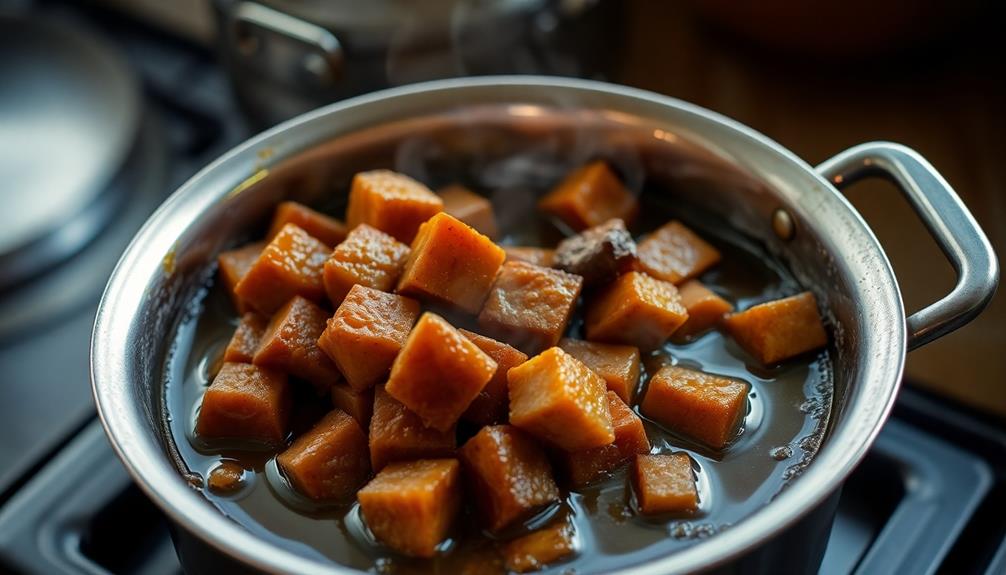
incorporate protein into mixture

With the seasonings perfectly blended, you can now turn your attention to adding the protein that will truly transform this Afang soup.

Afang is traditionally made with smoked fish, often mackerel or herring, which lends a delightful, smoky depth of flavor. Simply add your chosen fish to the simmering pot, ensuring it's submerged in the aromatic broth.

Advertisement

Don't forget about the versatility of this dish – you can also use shrimp, chicken, or even beef to create your perfect Afang.

Just be sure to adjust the cooking time accordingly, as different proteins will require varying amounts of time to become tender and fully incorporated.

For a special touch, you might even consider adding a hard-boiled egg or two, which will soak up all the incredible flavors of the soup.

No matter which protein you select, you can rest assured that it will meld seamlessly with the complex, earthy notes of the Afang.

Final Thoughts

reflective conclusion insights

Afang soup is a delightful dish that encapsulates the vibrant flavors of West African cuisine. Once you've added your protein of choice, the final step is to simply sit back, relax, and savor every spoonful.

The complex blend of leafy greens, aromatic seasonings, and hearty ingredients come together to create a truly satisfying and comforting meal.

Advertisement

You'll find that Afang soup is a versatile dish that can be enjoyed year-round, whether as a cozy weeknight dinner or a celebratory feast.

The richness of the broth, the tenderness of the meat, and the burst of flavors in every bite will leave you craving more.

So, gather your loved ones, share this special dish, and revel in the warmth and joy that Afang soup brings to the table.

It's a culinary adventure that will transport you to the heart of West Africa, one delectable spoonful at a time.

Frequently Asked Questions

Is Afang Soup Suitable for Vegetarians or Vegans?

No, afang soup is not suitable for vegetarians or vegans as it typically contains meat, such as beef or fish. The traditional recipe includes ingredients like smoked fish, dried shrimp, and beef that would not be appropriate for plant-based diets.

Advertisement

How Long Can Afang Soup Be Stored Before Spoiling?

You can store afang soup for up to 3-4 days in the refrigerator if you keep it in an airtight container. However, it's best to consume it within a couple of days for optimal freshness and flavor.

What Are the Common Substitutes for the Key Ingredients?

When preparing afang soup, you can substitute the key ingredients like afang leaves with similar leafy greens like bitter leaves, kale, or spinach. Periwinkle can be replaced with shrimp, crayfish, or oysters. Get creative with what's available to you.

Can Afang Soup Be Frozen and Reheated Later?

You can freeze afang soup and reheat it later. The soup's hearty flavors and textures hold up well to freezing, allowing you to enjoy its comforting warmth even on a busy weeknight.

Is Afang Soup Considered a Traditional Dish in Other Regions?

Afang soup is considered a traditional dish in other regions of Africa, though it's most commonly associated with the cuisine of Nigeria and Cameroon. You'll find variations of this hearty, flavorful soup across West and Central Africa.
Advertisement

Advertisement

Ethiopian Cuisine

Ethiopian Kale Recipe: A Nutritious Side Dish Full of Flavor

Prepare a vibrant Ethiopian kale dish that’s bursting with flavor and nutrition; discover the secret ingredients that elevate this simple recipe to new heights!

Published

on

flavorful ethiopian kale dish

You're gonna love making Ethiopian kale, or "gomen"! Start by washing and chopping fresh kale into bite-sized pieces. Sauté chopped onions in olive oil until they're soft, then add minced garlic and your favorite spices like cumin and turmeric for a flavorful punch. Stir in the kale until it wilts, then cover it and steam for a few minutes. This nutritious dish is packed with vitamins and pairs perfectly with rice or lentils. It's not just healthy, but also a wonderful way to bring family and friends together! Ready to explore more delicious ways to enjoy this vibrant dish?

Key Takeaways

  • Ethiopian kale, or "gomen," is rich in vitamins A, C, and K, making it a highly nutritious side dish.
  • The recipe emphasizes sautéing and steaming, preserving kale's flavor and nutrients while achieving tender texture.
  • Key ingredients include fresh kale, onions, garlic, and spices like cumin and turmeric for enhanced flavor.
  • This dish pairs well with grains like injera or rice and proteins such as lentils or chicken.
  • Sharing this recipe fosters community connections and celebrates the rich culinary traditions of Ethiopia.

History

When you explore the history of Ethiopian kale, you'll discover that this leafy green has been a staple in Ethiopian cuisine for centuries. Known as "gomen," it's not just a vegetable; it's a part of family gatherings and celebrations. People in Ethiopia have been enjoying gomen for generations, making it a beloved dish that connects them to their roots.

Ethiopian kale grows well in the highlands of the country, where the cool climate helps it flourish. Farmers have cultivated it for its nutritional value, rich flavor, and versatility. It's packed with vitamins and minerals, making it a healthy choice for everyone.

Traditionally, it's often cooked with spices, garlic, and onions, bringing out its natural taste and making it a delicious side dish.

As you delve deeper into its history, you'll find that gomen is more than just food; it represents community and togetherness. Families often gather around a big plate of injera topped with gomen, sharing stories and laughter.

Cooking Steps

To make a delicious Ethiopian kale dish, start by preparing your ingredients. Gather fresh kale, a chopped onion, minced garlic, and some spices like turmeric and cumin. You'll also need a bit of olive oil for cooking.

Advertisement

Now, heat the olive oil in a large skillet over medium heat. Add the chopped onion and sauté it for about five minutes, or until it turns soft and golden.

Then, toss in the minced garlic, stirring for another minute. The aroma will be amazing!

Next, add the kale to the skillet. Stir it well, and let it cook down for about five to seven minutes.

As the kale wilts, sprinkle in the turmeric and cumin. These spices will give your dish that yummy Ethiopian flavor.

Keep stirring until the kale is tender and bright green.

Advertisement

Step 1. Wash and Chop Kale

prepare kale for cooking

Before you dive into cooking, you'll want to thoroughly wash and chop the kale. Start by rinsing the kale under cold water to remove any dirt or tiny bugs. Gently rub the leaves with your hands to make sure they're nice and clean.

Once you're done washing, shake off the excess water. You can also use a salad spinner if you have one, which makes drying the kale super easy!

Now, it's time to chop! Lay the kale leaves flat on a cutting board. Grab a sharp knife and remove the tough stems by cutting along each side. Don't worry if you're not perfect; just try to keep the leaves intact.

After removing the stems, stack a few leaves together, and slice them into bite-sized pieces. Aim for pieces about one to two inches long—this makes them easier to cook and eat.

Once you've chopped all the kale, look at that beautiful green pile! You're one step closer to creating a delicious Ethiopian dish. Isn't it exciting?

With your kale all prepped, you're ready to move on to the next cooking steps!

Advertisement

Step 2. Sauté Onions Until Translucent

saut onions until translucent

Start by heating a tablespoon of oil in a large skillet over medium heat. As the oil warms, take a moment to enjoy the sizzle you'll soon hear.

Next, slice one medium onion into thin rings or half-moons. Once the oil is hot, carefully add the onions to the skillet. You'll want to stir them gently, making sure they get coated in the oil.

Cook the onions for about five to seven minutes, stirring occasionally. Keep an eye on them, as they'll start to soften and change color. You're looking for that lovely, translucent look, which means they're perfectly cooked! If the heat feels too high, don't hesitate to lower it a bit. We want those onions to become sweet and flavorful, not burnt.

As the onions sauté, they'll fill your kitchen with a warm, inviting aroma. It's a sign that you're on the right track!

Once the onions are translucent, you're ready to move on to the next step. This is just the beginning of creating a delicious Ethiopian kale dish that everyone will love! Enjoy the process—it's all part of the fun!

Step 3. Add Garlic and Spices

incorporate garlic and spices

With the onions now perfectly translucent, it's time to elevate the flavor by adding garlic and spices. Grab some minced garlic—about three cloves should do the trick. When you toss it into the pan, you'll notice the delightful aroma filling your kitchen. Stir the garlic around for about a minute, just until it turns golden. Be careful not to let it burn!

Chia seeds, which are high in omega-3 fatty acids and rich in dietary fiber, are a fantastic addition to your meals for enhancing digestive health.

Advertisement

Now, let's spice things up! You can't go wrong with a teaspoon of ground cumin and a half teaspoon of turmeric. These spices are like a warm hug for your taste buds! Sprinkle them in, and stir everything together. The colors will become vibrant, and the smell will make your mouth water.

If you want a little kick, consider adding a pinch of cayenne pepper. Just a little bit goes a long way! Stir everything well, letting the spices coat the onions and garlic. This step is super important because it brings out all those wonderful flavors.

Once you're happy with the aroma, you're ready for the next step! Your dish is already smelling amazing, and it's only going to get better from here!

Step 4. Add Kale and Stir Well

incorporate kale thoroughly

Now that the spices have melded beautifully with the garlic and onions, it's time to introduce the kale. Grab a bunch of fresh, vibrant kale and wash it thoroughly. Once it's clean, tear the leaves into bite-sized pieces. This will make it easier to eat later.

Add the kale to your pan, and watch it transform as it mixes with the delightful flavors already cooking.

Stir well! You want each piece of kale to get coated in that spicy, garlicky goodness. As you stir, the kale will start to wilt and become tender. This is where the magic happens! The bright green leaves will soak up all those delicious flavors, making each bite a treat.

Advertisement

Keep stirring for a few minutes, and don't forget to scrape the bottom of the pan so nothing burns.

You might notice that the kale shrinks a bit, and that's just fine. It'll still pack a nutritious punch! Once the kale is bright and tender, you'll be ready for the next step in this exciting recipe.

Just think about how tasty this dish is going to be—your taste buds are in for a real treat!

Step 5. Cover and Steam Kale

cover and steam kale

Covering the kale is essential for the steaming process, which locks in moisture and enhances the flavors. Once you've added the kale to your pot, grab a lid and put it on top. This helps create a mini sauna for your kale, allowing it to cook just right!

Turn the heat to medium-low and let it steam for about 5 to 7 minutes. You'll notice the vibrant green color deepening, and that's a sign it's getting tender and delicious. During this time, try not to peek too often; letting steam escape can make it take longer to cook.

When the timer goes off, carefully remove the lid—watch out for steam! Give the kale a gentle stir to mix in all those lovely flavors. You can even taste it to see if it's to your liking. If you want it a bit softer, cover and steam for a couple more minutes.

Advertisement

Once you're happy with the texture, it's ready to serve. This Ethiopian kale dish is full of goodness and pairs well with many meals. Enjoy every bite of your tasty creation!

Final Thoughts

As you reflect on this Ethiopian kale recipe, you'll find that it's not just a delicious dish but also a celebration of vibrant flavors and healthy eating.

You've learned how to make tender, flavorful kale that's packed with nutrients. This dish is perfect for sharing with family and friends, showing off the rich culture of Ethiopian cuisine.

By adding spices like garlic and ginger, you've transformed simple kale into a dish that dances on your taste buds. It's amazing how a few ingredients can come together to create something so special!

You can feel proud knowing that you're serving something not only tasty but also good for you.

Advertisement

Next time you prepare this dish, consider pairing it with your favorite grains or proteins to make a complete meal.

Don't forget to share your experience with others—who knows, you might inspire someone else to try cooking Ethiopian food!

Frequently Asked Questions

What Are the Health Benefits of Ethiopian Kale?

Ethiopian kale's packed with vitamins A, C, and K, boosting your immune system and promoting healthy skin. It also offers fiber, aiding digestion, and antioxidants, which help protect your cells from damage. Enjoy its numerous benefits!

Can I Use Other Greens Instead of Kale?

Absolutely, you can use other greens instead of kale! Spinach, Swiss chard, or collard greens work great. Just adjust the cooking time and seasonings to suit the greens you choose for a delicious result.

How Do I Store Leftover Ethiopian Kale?

To store leftover kale, cool it to room temperature, then transfer it to an airtight container. Refrigerate for up to five days. If you want to freeze it, use freezer bags for longer storage.

Advertisement

Is Ethiopian Kale Suitable for Vegan Diets?

Yes, Ethiopian kale's perfect for vegan diets. It's packed with nutrients and flavor, making it a great choice. You'll enjoy its versatility in various dishes, ensuring you maintain a healthy, plant-based lifestyle effortlessly.

What Dishes Pair Well With Ethiopian Kale?

When you're pairing dishes, Ethiopian kale complements spicy lentil stew, injera, or roasted vegetables beautifully. You'll find its earthy flavor enhances the meal, making it a perfect addition to any Ethiopian-inspired spread.

Continue Reading

African Cuisine

Crispy Yam Chips: A Delicious Twist on a Classic Snack

Yams take center stage in this delectable recipe for homemade yam chips, offering a natural sweetness and a crunchy texture that’ll have you craving more.

Published

on

crispy yam chips recipe

You'll love how crispy and delicious these homemade yam chips are! Yams are native to Africa and the Americas, and ancient voyagers even carried them on their Pacific adventures. Today, you can make your own yam chips at home – they're a tasty twist on the classic snack that's packed with natural sweetness and nutrition. Slice the yams, toss them in oil, and bake at 400°F for 18-22 minutes. The results are golden brown, crispy chips that are perfect for sharing as a side, snack, or appetizer. And you'll be surprised by all the health benefits yams provide – learn more about their fascinating history and versatility.

Key Takeaways

  • Crispy yam chips offer a healthier alternative to traditional potato chips, providing a natural sweetness and satisfying crunch.
  • Achieving the perfect crispy texture requires even slicing and thorough drying before frying or baking the yam slices.
  • The baking process at 400°F for 18-22 minutes, with flipping halfway, ensures the yam chips are golden brown and crispy.
  • Yams are a versatile ingredient, featuring in various cultural dishes and traditions, especially in the Caribbean and Asia.
  • Homemade yam chips are a nutritious snack option, packed with vitamins, minerals, and antioxidants from the yam's natural goodness.

History

historical events and narratives

Yams, the starchy roots that inspired these crispy chips, have a long and varied history. Native to Africa and the Americas, yams have been a dietary staple for centuries. In fact, ancient Polynesian voyagers even carried yams with them as they explored the Pacific!

These versatile vegetables come in a rainbow of colors, from vibrant orange to deep purple.

Throughout history, yams have played a central role in many cultural traditions. In the Caribbean, they're a beloved ingredient in festive dishes, while in parts of Asia, they're revered for their medicinal properties.

And of course, who could forget the classic Thanksgiving yam casserole, complete with marshmallows?

Today, yams are enjoyed around the world, often transformed into delectable snacks like these crispy yam chips.

Advertisement

Recipe

cooking instructions and ingredients

Yam chips are a delightful and crunchy snack that can be enjoyed as a healthier alternative to traditional potato chips. The natural sweetness of the yams pairs beautifully with the satisfying crunch achieved through proper preparation.

To ensure the perfect crispy texture, it's essential to slice the yams evenly and thoroughly dry them before frying. This step is crucial in achieving the desired crispness, as any moisture can lead to soggy chips.

Ingredients:

  • 2 medium-sized yams, peeled and sliced into 1/8-inch thick rounds
  • 2 cups vegetable or canola oil for frying
  • Salt to taste

Cooking Instructions:

Heat the oil in a large, heavy-bottomed pan or Dutch oven to 350°F. Working in batches, carefully add the yam slices to the hot oil and fry for 2-3 minutes, or until golden brown and crispy.

Remove the chips from the oil using a slotted spoon and transfer them to a paper towel-lined plate to drain excess oil. Sprinkle with salt while still hot.

It's important to note that the key to achieving the perfect crispy yam chips is to maintain the oil temperature and fry the slices in small batches. This ensures even cooking and prevents the chips from becoming soggy.

Advertisement

Serve the crispy yam chips immediately for optimal crunch and enjoy!

Cooking Steps

sequential meal preparation instructions

Preheat your oven to 400°F and get ready to slice those yams into thin, round slices.

Toss the slices with a bit of oil, then arrange them on a baking sheet.

Now bake them until they're crispy and golden – you're going to love these tasty yam chips!

Step 1. Preheat Oven to 400°F

preheat oven to 400 f

Before you begin slicing and baking the yams, you'll want to preheat your oven to 400°F. This is a crucial first step to ensure your yam chips turn out crispy and delicious. Preheating the oven allows it to reach the perfect temperature, which helps the yams to bake evenly and develop that irresistible crunch.

Once your oven is preheated, you'll be ready to slice the yams and get them in the oven. Be sure to keep an eye on the chips as they bake, checking them periodically to ensure they don't overcook.

The high temperature will work its magic, transforming the yams into golden-brown, crispy perfection. Preheating the oven is an essential part of the process, so don't skip this step.

Advertisement

With the oven ready to go, you'll be one step closer to enjoying those mouthwatering, homemade yam chips!

Step 2. Slice Yams Into Thin Rounds

slice yams into rounds

With your oven preheated, you can now grab your fresh yams and start slicing them into thin, even rounds.

Grab a sharp knife and carefully slice the yams about 1/4 inch thick. Try to make each slice the same thickness so they'll bake evenly.

As you slice, lay the yam rounds in a single layer on a large baking sheet. Don't overcrowd them, or they won't get crispy.

Once all the slices are on the baking sheet, you're ready for the next step.

Remember to work slowly and safely with the knife. Taking your time will help you get those perfect, uniform slices.

Advertisement

Soon, you'll have a tray full of yummy yam rounds, just waiting to be transformed into crispy, golden-brown chips.

Get ready for the delicious aroma to fill your kitchen as these babies bake to perfection!

Step 3. Toss Yam Slices With Oil

toss yam slices oil

Now that you have your tray of neatly sliced yam rounds, it's time to get them ready for baking. In a large bowl, drizzle the yam slices with a few tablespoons of olive oil.

Use your clean hands to gently toss the yams, making sure each slice is lightly coated. Don't be afraid to get in there and get a little messy – it's all part of the fun!

Next, arrange the oiled yam slices in a single layer on a baking sheet lined with parchment paper. This will help them get extra crispy as they bake.

Make sure the slices aren't overlapping, so they've plenty of room to become the perfect golden-brown chips you're craving.

Advertisement

With the yams all prepped and ready, it's time to pop them in the oven. Preheat to 400°F and let those delicious yam morsels work their magic.

Get ready for the most irresistible, crispy yam chips you've ever had!

Step 4. Arrange Yam Slices on Baking Sheet

arrange yam slices evenly

Next, arrange the oiled yam slices in a single layer on a baking sheet lined with parchment paper. This will help prevent the yams from sticking and ensure they cook evenly.

Make sure the slices don't overlap, as that can prevent them from getting crispy. Spread them out with a little bit of space in between each one.

Now, pop that baking sheet into a preheated oven. The high heat is the key to getting those yam slices perfectly crispy on the outside while still tender on the inside.

Keep a close eye on them, as they can go from perfectly golden to burnt in the blink of an eye. Rotate the baking sheet halfway through the cooking time to ensure even browning.

Advertisement

Once the yam chips are sizzling and irresistibly crispy, it's time to take them out of the oven.

Get ready to enjoy this tasty, healthier alternative to traditional potato chips!

Step 5. Bake Until Crispy and Golden

bake until crispy golden

Preheat your oven to 400°F (200°C). This is the perfect temperature to get those yam slices crispy and golden!

Arrange the slices in a single layer on a parchment-lined baking sheet. Make sure they're not overlapping, so they can get nice and crispy all around.

Now, pop that sheet into the oven and let the magic happen. Bake for 18 to 22 minutes, flipping the slices halfway through. Keep a close eye on them, as yams can go from perfectly crispy to burnt in the blink of an eye!

You'll know they're ready when they're a beautiful golden brown and you can easily pierce them with a fork.

Advertisement

Once they're done, take the sheet out of the oven and let the chips cool for a few minutes. This will help them get even crispier.

Grab a plate, pile on those delectable yam chips, and get ready for a snack that's out of this world!

Final Thoughts

concluding reflections and insights

Crispy yam chips make a versatile and satisfying snack. Whether you're hosting a party or craving a healthier alternative to traditional potato chips, these crunchy delights won't disappoint.

The best part? They're a breeze to prepare at home. Simply slice the yams, toss them in oil, and bake until golden. The result is a batch of irresistibly crispy, flavorful chips that will have your taste buds dancing.

Serve them up as a side dish, a movie-night snack, or even a fun appetizer. They pair perfectly with a variety of dips and toppings, from savory ranch to sweet and tangy fruit salsa.

And let's not forget the health benefits – yams are packed with vitamins, minerals, and antioxidants, making them a nutritious choice for the whole family.

Advertisement

Frequently Asked Questions

What Is the Best Way to Store Leftover Yam Chips?

To store leftover yam chips, place them in an airtight container or resealable plastic bag. This will help maintain their crispness and prevent them from getting soggy. Refrigerate them for up to 3-5 days for best quality.

How Long Do Homemade Yam Chips Last?

Homemade yam chips can last up to 5 days when stored properly in an airtight container at room temperature. However, they'll stay crispier for longer if you refrigerate them.

Can I Use a Different Type of Potato Instead of Yam?

Absolutely! You can use other types of potatoes, like russet or sweet potatoes, to make delicious homemade chips. The cooking process will be similar, but the flavor and texture may vary slightly. Feel free to experiment with different potato varieties.

Is It Possible to Bake Yam Chips in the Air Fryer?

Absolutely! You can definitely bake yam chips in the air fryer. The air fryer's circulating hot air will help create a deliciously crispy texture, making it a fantastic alternative to traditional deep-frying.

What Are Some Tasty Dipping Sauces for the Yam Chips?

For your delicious yam chips, you can whip up some tasty dipping sauces like a creamy garlic aioli, a sweet and tangy honey mustard, or a fiery chipotle mayo to complement the natural sweetness of the yams.

Advertisement

Continue Reading

African Cuisine

Sweet and Savory African Breakfast: Plantain Porridge Recipe

Joyfully wake up your taste buds with the sweet and savory delight of African-inspired plantain porridge, a nourishing start to your day.

Published

on

plantain porridge recipe delight

Get ready to wake up your taste buds with the sweet and savory delight of plantain porridge, a treasured African breakfast staple! This creamy and comforting dish showcases the vibrant culinary heritage of the continent. You'll love how the natural sweetness of ripe plantains blends seamlessly with aromatic spices, creating a truly nourishing and satisfying start to your day. Top it off with your favorite toppings, like toasted coconut or crunchy nuts, for a delightful textural contrast. Dive in and discover the rich flavors that make this plantain porridge a true celebration of African cuisine.

Key Takeaways

  • Plantain porridge is a comforting and nutritious West African breakfast dish made by cooking ripe plantains in milk or water for a smooth, creamy texture.
  • The natural sweetness of plantains is enhanced by savory spices, creating a versatile flavor profile that can be enjoyed with various toppings.
  • Plantains are a dietary staple in Africa, and plantain porridge has roots in the communal cooking traditions of rural African communities, reflecting the vibrant culinary heritage.
  • The dish can be customized with a variety of toppings, such as toasted coconut, crunchy nuts, and sweeteners like honey or maple syrup, adding texture and flavor.
  • Plantain porridge offers a nourishing and fragrant breakfast option that celebrates the tradition and comfort of African cuisine.

History

historical events and timelines

Plantains, a close cousin of the banana, have long been a dietary staple across tropical regions. These starchy, savory fruits have been a part of African cuisine for centuries, with their cultivation and culinary uses deeply intertwined with the continent's rich cultural heritage.

From the lush rainforests of West Africa to the sun-drenched highlands of East Africa, plantains have been celebrated as a versatile and nourishing ingredient, serving as the foundation for many traditional breakfast dishes, including the beloved plantain porridge.

This beloved dish has its roots in the communal cooking traditions of rural African communities, where families would gather early in the morning to prepare a hearty and satisfying meal to fuel their day.

The simple act of mashing and simmering plantains with spices and milk or water has been passed down through generations, evolving into a cherished culinary ritual that brings people together and celebrates the flavors of the land.

Recipe

cooking instructions and ingredients

Plantain Porridge is a comforting and nutritious dish that's popular in many West African countries. This creamy and flavorful porridge is made by cooking ripe plantains in milk or water, creating a smooth and satisfying meal.

The natural sweetness of the plantains pairs perfectly with the creaminess of the milk, making this porridge a delightful breakfast or snack option. It's a versatile dish that can be enjoyed on its own or served with additional toppings and accompaniments.

Advertisement

Ingredients:

  • 4 ripe plantains, peeled and sliced
  • 2 cups milk or water
  • 1 teaspoon vanilla extract
  • 1/2 teaspoon ground cinnamon (optional)
  • 1/4 teaspoon ground nutmeg (optional)
  • Pinch of salt

Cooking Instructions:

In a medium saucepan, combine the sliced plantains and milk or water. Bring the mixture to a boil over medium heat, then reduce the heat and let it simmer, stirring occasionally, until the plantains are soft and the porridge has thickened, about 15-20 minutes.

Stir in the vanilla extract, cinnamon (if using), nutmeg (if using), and a pinch of salt. Adjust the seasoning to your taste.

Tips:

For a creamier consistency, you can use a combination of milk and water or substitute the milk with coconut milk. If the porridge becomes too thick, you can add a bit more liquid to reach your desired consistency.

Advertisement

Serve the plantain porridge warm, and consider adding your favorite toppings such as chopped nuts, dried fruits, or a drizzle of honey for an extra touch of sweetness.

Cooking Steps

recipe preparation instructions

Peel the plantains and slice them diagonally.

Add the sliced plantains to a pot, then pour in some water and give it a good stir.

Simmer the mixture until the plantains are nice and soft, then mash them up to create a delightful porridge.

Step 1. Peel and Slice Plantains Diagonally

peel slice plantains diagonally

To begin, take the firm, green plantains and carefully peel away their thick, tough skins with a knife or vegetable peeler.

Once the skins are removed, you'll be left with the starchy, banana-like flesh. Next, slice the peeled plantains diagonally into coins about 1/2 inch thick. This diagonal cut not only looks lovely, but it also helps the plantains cook evenly.

Be sure to make the slices uniform in size so they'll cook at the same rate. As you work, keep in mind that the plantains may discolor a bit, but don't worry – that's totally normal.

Advertisement

Just try to work quickly to minimize browning. Once all the plantains are sliced, you're ready to move on to the next step in creating your delicious, homemade plantain porridge!

Step 2. Add Sliced Plantains to Pot

add sliced plantains now

With the plantains now sliced, you'll want to add them to a pot. Carefully place the golden slices into a large pot, making sure they're in a single layer. This will help them cook evenly and absorb all the delicious flavors.

Next, pour in enough water to just cover the plantains. You don't want them drowning, but you want enough liquid to create a creamy porridge. Bring the pot to a boil over medium-high heat, then reduce the heat to medium-low.

Let the plantains simmer for 15-20 minutes, stirring occasionally, until they're tender and the water has thickened into a porridge-like consistency.

As the plantain porridge cooks, the kitchen will be filled with the sweet, comforting aroma. Get ready to savor this traditional African breakfast treat!

Once the porridge is ready, you can serve it warm, topped with your favorite toppings like honey, cinnamon, or even a sprinkle of coconut flakes. Mmm, delicious!

Advertisement

Step 3. Add Water and Stir

mix water thoroughly stir

Next, pour in enough water to just cover the plantains. You'll want to add about 3 cups of water for this recipe.

Stir the mixture gently to combine. The water should barely skim the top of the sliced plantains.

Now, turn the heat up to medium and let the porridge come to a gentle simmer. As it heats, the plantains will start to soften and break down, thickening the porridge.

Stir occasionally to prevent sticking or burning on the bottom of the pot.

Simmering the plantain porridge for 10-15 minutes will create the perfect creamy, luscious texture. The plantains will become tender and the mixture will take on a wonderfully sweet aroma.

Keep a close eye on it, adjusting the heat as needed to maintain an active, but gentle simmer.

Advertisement

Once the porridge has reached your desired consistency, it's ready to serve!

Ladle the warm, comforting plantain porridge into bowls and get ready to enjoy this delicious African-inspired breakfast.

Step 4. Simmer Until Plantains Are Softened

simmer plantains until softened

The gentle simmer is key to achieving the perfect plantain porridge texture. Once you've added the water, reduce the heat to medium-low and let the mixture gently bubble. This slow cooking process will allow the plantains to soften and break down, creating that irresistibly creamy consistency you're after.

Don't be tempted to crank up the heat – patience is a virtue when making this delightful dish!

Stir the porridge occasionally, scraping the bottom of the pot to prevent any sticking or burning. After about 15-20 minutes, the plantains should be fork-tender. You'll know they're ready when they practically melt into the liquid, creating a luscious, velvety texture.

The longer you simmer, the more the flavors will develop and meld together. Just be sure to keep an eye on the pot, adding a splash of water if it starts to look too thick.

Advertisement

Step 5. Mash the Softened Plantains

mash softened plantains thoroughly

Once the plantains have softened to your liking, it's time to mash them right in the pot. Grab a potato masher or the back of a sturdy spoon and start mashing away!

Mash the plantains until they're nice and smooth, with a few chunky bits still remaining. This texture will add some delightful variety to your porridge.

As you mash, you'll notice the plantains becoming creamier and more inviting. Keep mashing until you've achieved your desired consistency. Some folks like their porridge on the thicker side, while others prefer it a bit thinner. Go with whatever suits your taste buds best!

Once the plantains are perfectly mashed, give the pot a good stir to incorporate all the flavors.

Now, you're ready to move on to the next step – adding in the remaining ingredients to create your delightful plantain porridge!

Final Thoughts

concluding reflections and insights

Ultimately, you should feel proud of creating this nourishing plantain porridge. The fragrant aroma and creamy texture are sure to delight your family's senses. This dish isn't only delicious but also packed with essential nutrients to fuel your day.

The sweetness of the plantains blends harmoniously with the savory spices, making it a versatile option for breakfast, brunch, or even a satisfying snack. Additionally, incorporating herbs like chamomile can enhance the dish's soothing qualities, making it even more comforting.

Advertisement

Don't be afraid to get creative! Try adding your favorite toppings, like toasted coconut, crunchy nuts, or a drizzle of honey. The possibilities are endless.

This recipe is a wonderful way to introduce new flavors to your loved ones and celebrate the vibrant culinary traditions of Africa. So, savor each spoonful, and enjoy the comfort and nourishment that this plantain porridge provides.

Frequently Asked Questions

What Are the Health Benefits of Plantain Porridge?

Plantain porridge offers a nutritious start to your day. It's rich in fiber, vitamins, and minerals that can boost your digestion, heart health, and energy levels. Plus, it's a gluten-free and filling breakfast option.

How Long Can Leftover Plantain Porridge Be Stored?

Leftover plantain porridge can be stored in the refrigerator for 3-4 days. Make sure to store it in an airtight container to maintain its freshness and prevent it from drying out or absorbing unwanted flavors.

Can I Substitute Other Types of Plantains in the Recipe?

You can certainly substitute other types of plantains in the recipe. Green, yellow, and red plantains all have distinct flavors and textures that can work well, though the cooking time may need to be adjusted accordingly.

Advertisement

How Do I Adjust the Sweetness Level of the Porridge?

To adjust the sweetness level of the porridge, you can add more or less sugar to taste. Start with a small amount and gradually increase it until you reach your desired level of sweetness.

Can I Add Additional Toppings or Ingredients to the Porridge?

Absolutely! You can customize the porridge by adding your favorite toppings or ingredients. Try nuts, dried fruit, cinnamon, honey, or even a dollop of yogurt to amp up the flavor and texture.

Continue Reading

Affiliate Disclaimer
As an affiliate, we may earn a commission from qualifying purchases. We get commissions for purchases made through links on this website from Amazon and other third parties.

Advertisement

Vetted

top local car washes top local car washes
Vetted1 month ago

14 Best Car Washes Near You for a Sparkling Clean Ride

I discovered the 14 best car washes near you that promise a sparkling clean ride, and you won't want to...

top mops for 2024 top mops for 2024
Vetted1 month ago

The 15 Best Mops of 2025 – Your Ultimate Guide to a Spotless Home

Find the perfect mop for your cleaning needs in 2025, and discover how these top choices can revolutionize your home...

top women s fragrances 2024 top women s fragrances 2024
Vetted1 month ago

15 Best Perfumes for Women in 2025 – A Fragrance Guide You Can’t Miss

Keen to discover the top 15 perfumes for women in 2025? Uncover unique scents that will elevate your fragrance game!

top local bars guide top local bars guide
Vetted1 month ago

14 Best Bars Near You for an Unforgettable Night Out

Looking for the perfect bar to elevate your night out? Discover the 14 best spots that promise unforgettable experiences!

luxurious beard oil selection luxurious beard oil selection
Vetted1 month ago

15 Best Beard Oils for a Luxurious Grooming Experience in 2025

Shop the 15 best beard oils for a luxurious grooming experience in 2025 and discover which ones will elevate your...

top college laptops 2024 top college laptops 2024
Vetted1 month ago

15 Best College Laptops of 2025: The Ultimate Guide for Students

With our guide to the 15 best college laptops of 2025, discover which powerful models will elevate your academic experience...

waterproof mascaras for tears waterproof mascaras for tears
Vetted1 month ago

15 Best Waterproof Mascaras That Will Survive Any Tear-Jerker

Outstanding waterproof mascaras await to keep your lashes flawless through any emotional moment; discover which ones made the top 15...

top flavorful disposable vapes top flavorful disposable vapes
Vetted1 month ago

15 Best Disposable Vapes of 2025: Top Picks for Flavor and Convenience

Prepare to discover the 15 best disposable vapes of 2025 that blend exceptional flavor and convenience, but which ones truly...

refreshing lunch salad ideas refreshing lunch salad ideas
Vetted1 month ago

15 Best Salads Near You That Will Freshen Up Your Lunch Routine

Transform your lunch with the 15 best salads nearby that will tantalize your taste buds and leave you craving more...

top convertible car seats top convertible car seats
Vetted1 month ago

15 Best Convertible Car Seats of 2025 – Safety and Comfort for Your Little One

Get ready to discover the top 15 convertible car seats of 2025 that blend safety and comfort—find out which models...

delicious fast food breakfast delicious fast food breakfast
Vetted1 month ago

15 Best Fast Food Breakfast Options That Will Make Your Mornings Delicious

Uncover the 15 best fast food breakfast options that will transform your mornings into a delicious experience you won't want...

stylish contacts for vision stylish contacts for vision
Vetted1 month ago

14 Best America’s Contacts for Clear Vision and Style

Browse through the 14 best contact lenses in America for clear vision and style, and discover which one perfectly complements...

Trending