Connect with us

Kitchen Hacks and Tips

Freezer Meals: Convenience Without Sacrificing Quality

Unlock the secret to effortless, mouthwatering meals with our guide to freezer-friendly recipes that deliver on both convenience and flavor. Discover the culinary possibilities.

Published

on

convenient quality freezer meals

Freezer meals have come a long way! Way back, folks used old-school methods like drying, salting, and pickling to preserve food. But nowadays, you've got all sorts of tasty, nutritious freezer meals – from hearty casseroles to sweet desserts. They're a total lifesaver on busy weeknights, saving you time while still delivering amazing flavors. Plus, you can whip up big batches to stock your freezer, cutting down on food waste and grocery bills. With the right prep and storage, you can enjoy restaurant-quality meals with just a few minutes of effort. Intrigued? Keep reading to discover more creative freezer meal ideas!

Key Takeaways

  • Freezer meals offer convenience and time-saving benefits without compromising nutritional value and flavor when properly stored and prepared.
  • Diverse recipe options and preparation techniques allow for creative and customizable freezer meals to suit various dietary needs and preferences.
  • Organized freezer storage and labeling facilitate efficient meal planning, reducing stress and ensuring quick access to nutritious meals.
  • Batch cooking and meal prepping maximize the number of freezer meals available, cutting down on grocery costs and food waste.
  • Freezer meals support busy lifestyles by providing a reliable backup plan for unexpected schedule changes and hectic weeknights.

History

Freezer meals have been around for decades, with the concept of preserving food for later use dating back centuries. Can you imagine what life was like before refrigeration? People had to rely on techniques like drying, salting, and pickling to keep their food fresh.

But as technology advanced, a new way to save time and energy emerged: the freezer meal. This evolution in cooking has allowed for the incorporation of diverse flavors and nutritional benefits, much like fermented vegetable plates that enhance gut health.

In the 1950s, TV dinners made their debut, allowing families to quickly heat up a pre-made meal. Over the years, the variety and quality of freezer meals have greatly improved.

Nowadays, you can find everything from hearty casseroles to delicious desserts in the frozen food aisle. Freezer meals are a lifesaver for busy households, providing a tasty and convenient option when you don't have time to cook from scratch.

With just a few minutes of preparation, you can enjoy a homemade-style meal without all the hassle. It's no wonder freezer meals have become a staple in so many kitchens!

Advertisement

Recipe

Freezer Meals: Recipe

Preparing meals in advance and storing them in the freezer can be an incredibly useful strategy for busy individuals or families. Not only does it save time on hectic weeknights, but it also allows you to have a delicious and nutritious meal ready to go with minimal effort.

This recipe for a classic dish is perfect for adding to your freezer meal rotation. This recipe yields a hearty and flavorful meal that can be easily reheated and enjoyed straight from the freezer. The combination of savory ingredients and simple preparation makes it a great option for quick and satisfying dinners.

  • 2 pounds boneless, skinless chicken breasts
  • 1 cup diced onion
  • 2 cloves garlic, minced
  • 1 can (15 oz) crushed tomatoes
  • 1 cup uncooked long-grain rice
  • 2 cups chicken broth
  • 1 teaspoon dried oregano
  • Salt and pepper to taste

In a large skillet, sauté the onion and garlic until softened. Add the chicken breasts, crushed tomatoes, rice, chicken broth, and oregano. Season with salt and pepper.

Bring the mixture to a boil, then reduce heat and simmer for 20-25 minutes, or until the rice is tender and the chicken is cooked through. Allow the dish to cool completely before portioning and freezing.

When ready to serve, simply reheat the frozen portions in the oven or microwave until heated through. This dish can be enjoyed on its own or paired with a fresh salad or steamed vegetables for a complete and satisfying meal. Enjoy!

Advertisement

Cooking Steps

Chop those veggies into bite-size pieces so they're easy to eat.

Mix all the ingredients together in a bowl until they're well combined.

Seal the mixture in freezer-safe bags, then freeze them flat to save space in your freezer.

Don't forget to label the bags so you know what's inside!

Step 1. Chop Vegetables Into Bite-Size Pieces
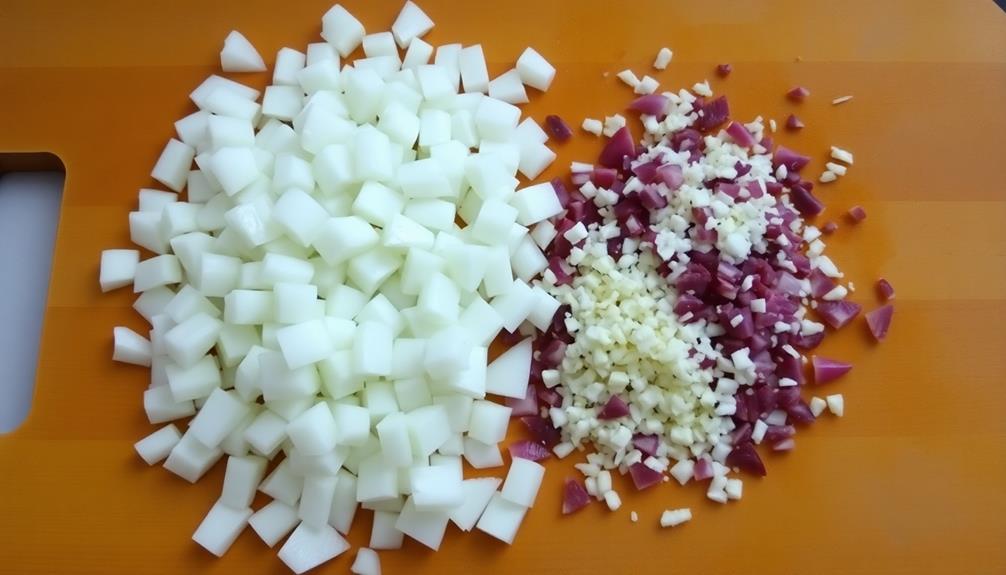
chop vegetables into pieces

The next step is to chop the vegetables into bite-size pieces. This is an important task that will make your freezer meal even more delicious. Not only do these freshly chopped veggies enhance the flavor, but their aroma can also contribute to a more enjoyable cooking experience, similar to how aromatherapy can improve mood.

Grab your cutting board and a sharp knife, and let's get chopping! Start with the carrots – slice them into thin, round discs. Isn't it satisfying to hear that crunch as the knife hits the board?

Advertisement

Now, move on to the bell peppers. Slice them into strips, then cut the strips into smaller pieces. The vibrant colors will really pop in your meal!

Don't forget the onion – peel it, then chop it into little squares. Your eyes might water a bit, but it's worth it for that delicious flavor.

Finally, tackle the zucchini. Cut it into bite-size half-moons, and you're all set!

Take a moment to admire your handiwork – the perfectly chopped veggies are ready to go into your freezer meal. Nice work!

Step 2. Mix All Ingredients
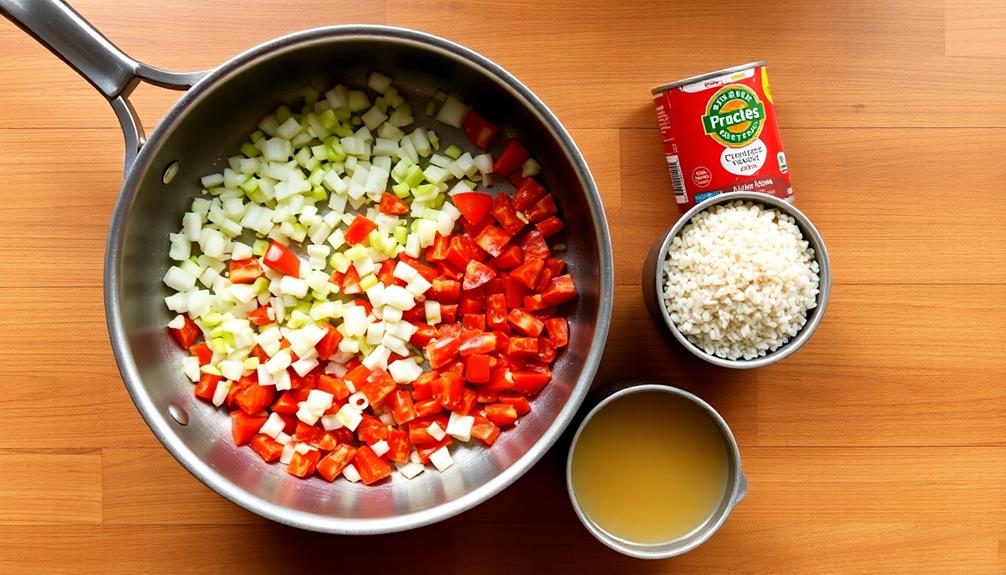
combine all components thoroughly

Next, mix all the prepared ingredients together in a large bowl. This is where the magic happens!

Grab your favorite spatula and start stirring everything up. The colorful chopped veggies, the savory spices, and the juicy protein will all come together to create a delicious base for your freezer meal.

Advertisement

Don't be afraid to really get in there and make sure everything is evenly distributed. You want each bite to be packed with flavor. As you mix, take a deep breath and enjoy the mouthwatering aroma. It's like a sneak peek of the tasty meal to come!

Once everything is well combined, it's time to divide the mixture into portion-sized containers. This will make it super easy to grab and go when you're ready to enjoy your homemade freezer meal.

Just wait until you take that first bite – you'll be amazed at how flavorful and satisfying it is, all while saving you time on busy weeknights.

Step 3. Seal Mixture in Freezer-Safe Bags
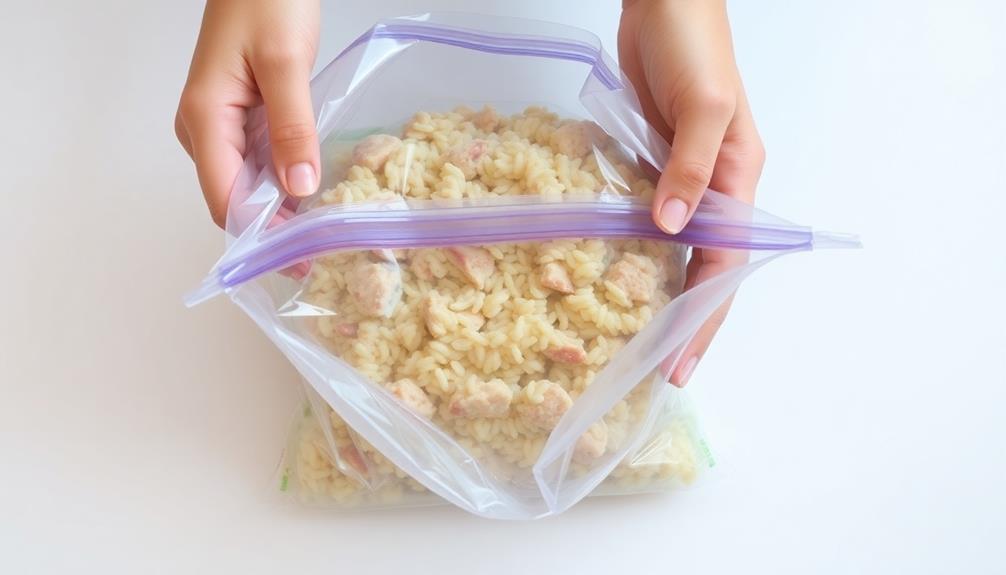
seal mixture in bags

After mixing the ingredients together, portion the mixture into freezer-safe plastic bags or airtight containers. This is key to ensuring your meals stay fresh and delicious!

Scoop the mixture into the bags, leaving a bit of space at the top for expansion. Then, use your hands to gently press out any excess air, sealing the bags tightly. Alternatively, you can use a straw to suck out the remaining air before sealing. This helps prevent freezer burn and keeps your meals protected.

Label each bag with the contents and the date, so you can easily keep track of what's inside. Stacking the bags or containers in your freezer makes them easy to access later.

Advertisement

When you're ready to enjoy your homemade freezer meal, simply grab a bag, thaw it in the fridge, and reheat. Isn't that convenient? With just a little prep work, you can have nourishing, homemade meals ready to go whenever you need them.

Step 4. Freeze Flat for Compact Storage
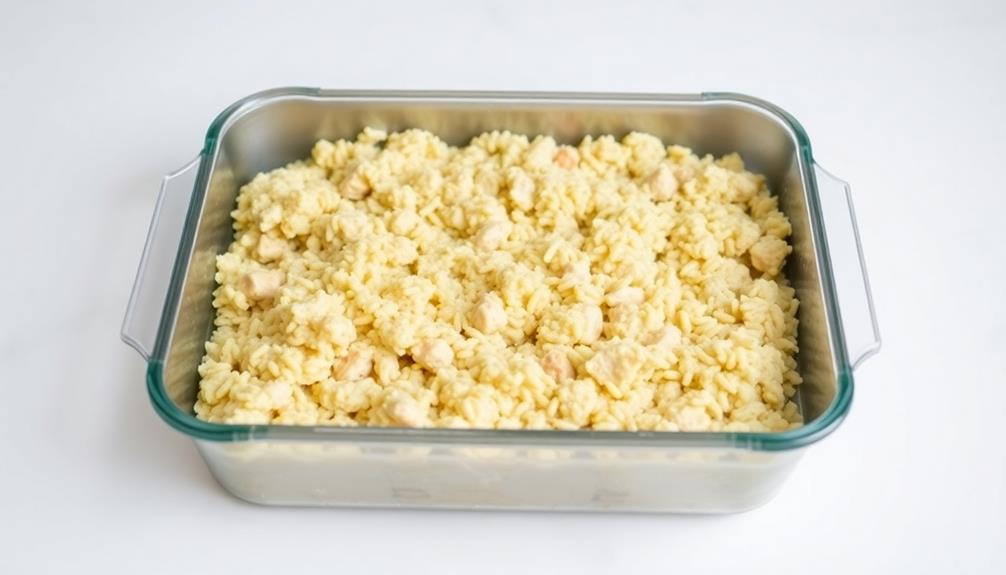
freeze flat for storage

1. Once you've sealed up your freezer-safe bags, it's time to freeze them flat for compact storage!

This clever trick will help you maximize the space in your freezer and make your meals a breeze to organize. Simply lay the bags flat on a baking sheet or other flat surface and pop them in the freezer.

As the contents freeze, they'll become nice and compact, allowing you to stack the bags neatly and fit more in your freezer. This way, you won't have to struggle to find what you need or waste valuable freezer space.

Plus, the flat shape makes the bags super easy to slide in and out, so you can grab your meal in a jiffy.

Freeze your bags flat, and you'll be on your way to a tidy, efficient freezer full of tasty homemade treats!

Advertisement

Step 5. Label Bags With Contents

label bags with contents

With your bags now frozen flat, it's time to label them with the meal contents and cooking instructions. Grab a permanent marker and start writing! This is an important step to keep your freezer organized and make mealtimes a breeze.

First, write the name of the dish in big, bold letters. This way, you'll know exactly what's inside each bag at a glance.

Next, list the ingredients so you remember what's in the recipe. This is especially helpful if you've got multiple chicken casserole bags or veggie lasagna pouches.

Don't forget the cooking directions! Jot down the oven temperature and the amount of time needed to heat up your delicious homemade meal. This way, you can just grab a bag, pop it in the oven, and have a tasty dinner ready in no time.

Label everything clearly, and you'll have a freezer full of tasty, home-cooked meals waiting for you.

Final Thoughts

Freezer meals can be a game-changer for busy households, helping you save time, money, and reduce food waste. With a little planning, you can stock up on delicious, homemade meals that are ready to go whenever you need them.

Advertisement

Imagine coming home after a long day and having a tasty, nutritious dinner just waiting for you in the freezer. Mealtime becomes a breeze, and you can spend more time relaxing with your family instead of slaving away in the kitchen.

The best part is that freezer meals don't have to be boring or sacrifice quality. You can get creative with your recipes and experiment with all sorts of flavors and ingredients.

Plus, by making extra portions, you'll always have a backup plan for those nights when you just don't feel like cooking. Freezer meals are a smart and convenient solution that can truly transform your lifestyle.

Frequently Asked Questions

How Long Can Freezer Meals Be Stored?

You can typically store freezer meals for 3-4 months in the freezer. However, it's best to check the specific storage guidelines for each meal to ensure maximum freshness and food safety.

Are Freezer Meals Nutritionally Balanced?

Well, you'll be pleased to know that freezer meals can be nutritionally balanced. Many recipes are designed to provide a healthy, well-rounded meal that's convenient and delicious. Just check the nutrition facts before buying or making your own.

Advertisement

Can I Freeze Homemade Meals Easily?

You can easily freeze homemade meals! Simply portion them out, let them cool completely, then package them in airtight containers or freezer bags. Be sure to label and date the meals for best quality.

What Are the Best Containers for Freezing Meals?

You can use a variety of containers for freezing meals, like airtight plastic containers, glass jars, or resealable plastic bags. Choose containers that minimize air exposure to prevent freezer burn and maintain the meal's quality.

How Should I Thaw My Freezer Meals?

To thaw your frozen meals, you can transfer them from the freezer to the refrigerator and let them thaw slowly overnight. Alternatively, you can use the defrost setting on your microwave for a quicker thawing process.


Advertisement

Kitchen Hacks and Tips

Scottish Porridge: The Hearty Oatmeal Tradition

Oatmeal has long been a staple in Scottish cuisine, with its rich history and cherished traditions still captivating palates today. Uncover the story of this beloved Scottish porridge.

Published

on

hearty scottish oatmeal tradition

Step into the cozy world of Scottish porridge, a hearty oatmeal tradition that's been warming the hearts and souls of Scots for centuries. This nourishing dish, crafted from steel-cut oats and simmered to creamy perfection, is not just a breakfast staple – it's a cherished part of Scotland's cultural heritage, connecting generations to the country's rural landscapes and resourceful agrarian roots. With a simple recipe and versatile toppings, Scottish porridge offers a satisfying sensory experience, from its comforting aroma to its rich, velvety texture. Discover the intriguing history and traditions behind this timeless Scottish delight.

Key Takeaways

  • Scottish porridge has a rich history dating back to the 13th century, reflecting the country's agrarian roots and cultural identity.
  • The traditional recipe involves simmering steel-cut oats with water or milk and salt, resulting in a creamy, comforting texture.
  • Porridge can be customized with a variety of toppings, from sweet to savory, making it suitable for various occasions.
  • Oats in Scottish porridge provide a nutritious foundation, offering fiber, vitamins, and minerals that contribute to overall well-being.
  • The sensory experience of Scottish porridge, from its warm aroma to its satisfying mouthfeel, evokes nostalgia and connection to Scottish heritage.

History

When did the tradition of Scottish porridge begin? Well, it's been a beloved breakfast staple in Scotland for centuries!

Scottish porridge has its roots in the country's long history of oat cultivation. Oats grew abundantly in the rugged Scottish landscape, making them a readily available and affordable ingredient.

As early as the 13th century, Scots were cooking up hearty bowls of porridge made from these nutrient-rich oats. Over time, the recipe evolved, with people adding unique regional touches, like stirring in sweet honey or savory cheeses.

Today, Scottish porridge remains a cherished part of the country's culinary heritage.

Whether enjoyed on a crisp morning or as a comforting midday meal, this classic dish connects Scots to their past. The simple act of simmering oats into a creamy, satisfying porridge has united generations, providing nourishment and a taste of home.

Advertisement

It's a tradition that continues to warm hearts and bellies across Scotland.

Recipe

Porridge has been a staple breakfast dish in Scotland for centuries. The creamy and comforting texture of properly cooked Scottish porridge is a quintessential part of the country's culinary heritage. While the basic recipe is simple, there are a few key techniques that can elevate this humble dish to new heights.

The traditional method of preparing Scottish porridge involves slowly simmering steel-cut oats in water or milk until they reach a thick, smooth consistency. The slow cooking process allows the starches in the oats to fully gelatinize, resulting in a porridge that's both nourishing and deeply satisfying.

Ingredients:

  • 1 cup steel-cut oats
  • 4 cups water or milk (or a combination)
  • Pinch of salt

Cooking Instructions:

In a medium saucepan, combine the steel-cut oats and liquid (water, milk, or a combination). Bring the mixture to a boil over medium-high heat, then reduce the heat to low and let the porridge simmer, stirring occasionally, for 20-30 minutes, or until it reaches the desired consistency. Stir in a pinch of salt.

Advertisement

When preparing Scottish porridge, patience is key. The slow, gentle cooking process is essential for achieving the perfect creamy texture. Stirring the oats continuously helps release their natural starches, contributing to that rich, velvety consistency. While it may take a bit longer than some modern-day methods, the time invested is well worth the reward. For those who prefer shortcuts, there are many quick and easy pressure cooker recipes available, but nothing quite compares to the time-honored tradition of stovetop Scottish porridge.

Additionally, be mindful of the ratio of liquid to oats, as this can greatly affect the final result. Feel free to experiment with different liquids, such as a blend of milk and water, to find your preferred flavor profile.

Serve the porridge hot, topped with your choice of condiments, such as brown sugar, honey, fruit, or a drizzle of cream.

Cooking Steps

First, you'll want to rinse those steel-cut oats thoroughly to get rid of any impurities.

Then, add the boiling water and let it simmer for 15 to 20 minutes, stirring occasionally to prevent sticking.

Advertisement

Step 1. Rinse Steel-Cut Oats Thoroughly

rinse steel cut oats

Before cooking the steel-cut oats, it's crucial to rinse them thoroughly under running water. This simple step helps remove any dust, debris, or impurities that may be present on the grains.

Simply place the oats in a fine-mesh strainer and hold it under cool, running water, gently stirring and swishing the oats around. You'll notice the water quickly becomes cloudy, indicating that you're successfully rinsing away any unwanted particles.

Once the water runs clear, you know the oats are clean and ready for cooking. This thorough rinsing helps ensure your porridge turns out perfectly smooth and creamy, without any gritty or unpleasant textures.

It's a quick and easy step that makes a big difference in the final dish. So, don't skip this important preparation – take the time to rinse those steel-cut oats and enjoy the delicious, wholesome results!

Step 2. Add Boiling Water

add boiling water now

With the steel-cut oats thoroughly rinsed, you can now move on to the cooking process. Grab your trusty pot and pour in the recommended amount of boiling water. The exact ratio will depend on your recipe, but a good starting point is about 4 cups of water for every 1 cup of oats.

Once the water is bubbling, carefully pour in the rinsed oats. Stir the mixture gently to prevent any lumps from forming. Then, reduce the heat to low and let the porridge simmer. This slow, gentle cooking is the key to achieving that classic Scottish texture – creamy, yet with a satisfying chew.

As the oats cook, you'll notice the liquid thickening. This is a good time to give the pot an occasional stir to ensure even cooking.

Advertisement

After about 20-25 minutes, your porridge should be ready. The oats will be tender and the overall consistency will be rich and comforting, perfect for a hearty breakfast.

Step 3. Simmer for 15-20 Minutes

simmer for 15 20 minutes

Once the oats have been added to the boiling water, reduce the heat to low and let the porridge simmer for 15-20 minutes.

This gentle simmering process is crucial for allowing the oats to fully cook and develop their creamy, irresistible texture.

Don't be tempted to rush this step – the longer you let the porridge simmer, the better it will turn out.

Stir the mixture occasionally to prevent sticking or burning.

The porridge should thicken nicely as it simmers, becoming rich and comforting.

Advertisement

You'll know it's ready when the oats have softened and the mixture has a smooth, velvety consistency.

This slow, steady simmering is what sets authentic Scottish porridge apart, creating the signature creaminess that makes it so beloved.

Take your time and enjoy the wonderful aroma filling your kitchen.

Before you know it, you'll have a steaming bowl of traditional Scottish porridge, perfect for starting your day off right.

Step 4. Stir Occasionally to Prevent Sticking

stir to avoid sticking

As the porridge simmers, be sure to stir it occasionally to prevent sticking or burning on the bottom of the pot.

Gently move your spoon around the mixture, lifting and folding the oats to ensure even cooking. This simple step helps to create the perfect, creamy texture that Scottish porridge is known for.

Advertisement

Don't let the porridge sit unattended – give it a few stirs every few minutes to keep it from scorching. The goal is a smooth, luxurious consistency, so take the time to monitor and stir as needed.

Stirring regularly also helps to release the natural starches in the oats, which contribute to the porridge's wonderfully thick and comforting mouthfeel.

With just a little attention, you'll end up with a hearty, nourishing bowl of traditional Scottish porridge that's sure to warm you up on a chilly morning.

Step 5. Serve Warm With Desired Toppings

serve warm with toppings

When the porridge has reached your desired consistency, it's time to serve it warm with your choice of toppings. You can start by ladling the creamy, comforting porridge into your favorite bowl.

To make it even more nutritious, consider adding a sprinkle of chia seeds, which are high in dietary fiber and promote digestive health through Chia Seeds and Digestive Health.

Now, the fun part – it's time to dress it up!

Advertisement

Consider topping your porridge with a drizzle of golden honey or a sprinkle of brown sugar. For a touch of sweetness, you could also add a handful of juicy raisins or diced apples.

If you're feeling adventurous, try a dollop of tangy Greek yogurt or a sprinkle of toasted nuts for a delightful crunch.

Don't be afraid to get creative with your toppings! The possibilities are endless. The key is to find the combination that truly satisfies your taste buds and warms your soul on a chilly morning.

Enjoy your hearty Scottish porridge, personalized to perfection.

Final Thoughts

Ultimately, Scottish porridge remains a time-honored tradition that has withstood the test of time. Whether you prefer it with a drizzle of honey, a sprinkle of cinnamon, or a dollop of cream, this humble dish is a true delight.

Advertisement

The versatility of porridge allows you to customize it to your taste buds, making it a comforting breakfast or snack that can be enjoyed year-round.

Beyond its delicious flavor, Scottish porridge also holds cultural significance. It's a beloved part of the Scottish identity, a connection to the country's rich heritage and the rural landscapes that inspired its creation.

Savoring a bowl of steaming porridge can transport you to the misty glens and rolling hills of Scotland, evoking a sense of warmth and tradition.

As you savor your next bowl of Scottish porridge, take a moment to appreciate the history and care that goes into this timeless dish.

It's a testament to the enduring power of simple, nourishing foods to bring joy and comfort to our lives.

Advertisement

Frequently Asked Questions

What Are the Health Benefits of Eating Scottish Porridge?

Eating Scottish porridge provides various health benefits. It's a filling, fiber-rich meal that can improve digestion, promote heart health, and keep you energized throughout the day. Plus, it's a versatile breakfast that can be customized to your taste.

How Does Scottish Porridge Differ From Other Types of Oatmeal?

Scottish porridge differs from other oatmeals by its thicker, creamier texture and heartier flavor. It's made with steel-cut oats, which are less processed, resulting in a chewier, more filling meal compared to rolled or instant oats.

Can Scottish Porridge Be Prepared in a Microwave?

You can certainly prepare Scottish porridge in the microwave. Simply combine oats, water or milk, and a pinch of salt, then cook and stir until it reaches your desired consistency. It's a quick and easy way to enjoy this traditional breakfast.

Is Scottish Porridge Suitable for People With Dietary Restrictions?

Yes, Scottish porridge can be suitable for people with dietary restrictions. It's often made with gluten-free oats and can be customized to accommodate various dietary needs, making it a versatile and inclusive breakfast option.

How Long Does It Take to Properly Prepare Scottish Porridge?

Preparing proper Scottish porridge takes about 15-20 minutes. You'll need to simmer the oats, stir frequently, and adjust the consistency to your desired thickness. It's a hands-on process, but the creamy, comforting result is well worth the time.

Advertisement

Continue Reading

Kitchen Hacks and Tips

Mise En Place: the Key to Effortless Cooking

Never underestimate the power of mise en place – the ultimate secret to unlocking a world of effortless cooking and flavorful, custom-made dishes.

Published

on

effortless cooking with prep

Mise en place – it's the secret to cooking with ease! By gathering and organizing all your ingredients and tools before you start, you'll feel so much more focused and in control. No more frantically searching for that lost spice or realizing you're missing a key ingredient. With everything at your fingertips, you can glide through the cooking steps and unleash your inner culinary artist. Plus, you'll have the freedom to experiment with different flavors and techniques, creating delicious, custom-made dishes your whole family will love. The joy of effortless cooking is just a mise en place away!

Key Takeaways

  • Mise en place, the preparation of all ingredients before cooking, enhances efficiency and reduces stress during the cooking process.
  • Organized workspace and tools streamline the cooking experience, allowing for smoother transitions between steps and more confident experimentation.
  • Planning meals in advance and having all required ingredients on hand facilitates effortless cooking and the ability to adapt recipes to personal preferences.
  • Practicing cooking regularly helps build skills and confidence, transforming the activity into a relaxing and enjoyable experience.
  • Focusing on simplicity, quality ingredients, and the joy of creating delicious meals, rather than complex techniques, is the key to effortless cooking.

History

Cooking has a rich and storied past, tracing its origins back to the dawn of human civilization. From the first primitive campfires to the sophisticated kitchens of today, the art of preparing food has evolved and transformed over thousands of years.

You can just imagine the ancient hunter-gatherers roasting their catch over an open flame, their senses delighted by the tantalizing aromas. As time passed, humans discovered new ingredients, developed ingenious cooking methods, and shared recipes across cultures. The invention of the wheel, the plow, and the oven all played a crucial role in shaping the culinary landscape.

Fast forward to the modern era, and you'll find a dizzying array of cooking techniques, from grilling and sautéing to baking and slow-cooking. No matter the era, one thing remains constant: the universal joy of creating delicious meals and sharing them with loved ones.

Recipe

Cooking doesn't have to be a laborious task. With the right recipe, you can create delectable dishes with minimal effort. This recipe for a classic meal is sure to delight your taste buds without demanding hours in the kitchen. Incorporating flavorful elements like herbal tea can elevate your dishes, providing unique tastes and potential health benefits; consider using herbal teas for flavor in your cooking.

The key to this effortless cooking lies in the carefully selected ingredients and the straightforward preparation method. By focusing on quality components and streamlining the process, you can enjoy a satisfying home-cooked meal with ease.

Advertisement

Ingredients:

  • 1 lb boneless, skinless chicken breasts
  • 2 cups uncooked long-grain white rice
  • 1 (15 oz) can diced tomatoes
  • 1 (15 oz) can black beans, rinsed and drained
  • 1 cup frozen corn kernels
  • 1 tsp ground cumin
  • 1 tsp chili powder
  • 1/2 tsp garlic powder
  • Salt and pepper to taste

In a large skillet, cook the chicken over medium-high heat until no longer pink, about 6-8 minutes per side. Shred the chicken using two forks.

Add the rice, diced tomatoes, black beans, corn, cumin, chili powder, and garlic powder. Stir to combine, cover, and simmer for 20-25 minutes, or until the rice is tender. Check the seasoning and adjust with salt and pepper to taste, adding a squeeze of fresh lime juice for an extra burst of flavor. While the dish simmers, you can multitask by experimenting with side dishes like making gourmet mustard spreads to complement the main course. Once the rice is perfectly cooked, garnish with fresh cilantro and serve hot.

Remember to taste and adjust the seasoning as needed. This dish can be easily customized to suit your preferences. For a creamier texture, consider stirring in a spoonful of sour cream or shredded cheese just before serving.

Enjoy your effortless and delicious meal!

Cooking Steps

First, gather all the ingredients you'll need – chop and measure them out so they're ready to go.

Advertisement

Did you know that the average person in the U.S. consumes about 23 pounds of ice cream annually? This beloved treat is particularly popular during the summer months, especially in July, making it a great time to use ingredients like fresh fruit or unique flavors in your baking ice cream consumption trends.

Preheat the oven to the right temperature, then mix the wet and dry ingredients together.

Step 1. Gather All Necessary Ingredients

collect required ingredients first

With the cooking area prepped, it's time to gather all the necessary ingredients. First, collect the fresh produce – juicy tomatoes, crisp lettuce, and fragrant basil.

Don't forget the protein, such as tender chicken breasts or succulent shrimp, which can be enhanced by serving alongside a refreshing Shrimp Ceviche.

Round out the dish with pantry staples like olive oil, vinegar, and seasonings. Take a quick inventory to make sure you have everything on hand.

Measure out the right amounts for each ingredient, using measuring cups and spoons. This helps ensure the recipe turns out perfectly every time.

Advertisement

Place all the items within easy reach on the counter or table, so you can quickly add them to the dish as you cook. Gather the cooking tools, too, like a sharp knife, cutting board, and saucepan.

With all the ingredients lined up and ready to go, you can start cooking with confidence. The preparation work is done, so now it's time to create a delicious meal with ease.

Just follow the recipe steps, and enjoy the process of effortless cooking.

Step 2. Chop and Measure Ingredients

chop and measure ingredients

Typically, you'll want to start by chopping the fresh produce. Grab your sharpest knife and tackle those crisp veggies. Slice the juicy tomatoes, dice the fragrant onions, and mince the aromatic garlic.

Don't be afraid to get a little messy – the more finely you chop, the better the flavors will meld together.

Next, measure out all your dry ingredients. Use those trusty measuring cups and spoons to get the perfect amounts of flour, sugar, and spices. Precise measurements are the key to consistent, delicious results.

Advertisement

Be sure to level off each cup and spoon for accuracy.

With your fresh produce chopped and dry goods measured, you're well on your way to an effortless cooking experience. Take a moment to admire your organized workspace – everything is within reach and ready to go.

Now you can relax and let the magic happen in the kitchen.

Step 3. Preheat Oven to Required Temperature

preheat oven to temperature

Preheat your oven to the temperature specified in the recipe. This is a crucial step that ensures your dish cooks evenly and turns out perfectly.

Grab your oven mitts and open the oven door. Look for the temperature dial and turn it to the right number. As the oven heats up, you'll hear a gentle hum and feel the warmth radiating from inside.

Once the oven beeps or the temperature light turns off, it's ready to go. Slide in your prepared dish and set the timer.

Advertisement

The sizzling sounds and delicious aromas that soon fill the air will have your mouth watering in anticipation. Keeping a close eye on the oven ensures your food cooks at the right pace and doesn't overcook.

When the timer goes off, carefully remove your creation, using those trusty oven mitts. Now you're ready to serve up a scrumptious, home-cooked meal with minimal effort. Bon appétit!

Step 4. Mix Wet and Dry Ingredients

combine wet and dry

Next, you'll want to mix together the wet and dry ingredients for your dish. This is a really important step, as it helps everything come together just right.

First, grab a big mixing bowl and add in all your dry stuff – that's things like flour, sugar, baking powder, and any spices or herbs you're using. Give it a good stir to make sure it's all blended.

Now it's time for the wet ingredients. Crack your eggs into the bowl, then pour in the milk, oil, or melted butter. Use a wooden spoon to mix it all up until you've got a nice, smooth batter.

Be sure to scrape down the sides of the bowl so you don't miss any pockets of unmixed ingredients.

Advertisement

Once everything is combined, your batter is ready to go! Wasn't that easy?

Now you can move on to the next step in the recipe. Just wait until you see how awesome your dish turns out.

Step 5. Bake Until Golden Brown

bake until golden brown

With the wet and dry ingredients now thoroughly combined, you can go ahead and prepare your oven for baking. Preheat the oven to 375°F (190°C) and let it heat up while you get your dish ready.

Grab a baking sheet or a casserole dish and give it a light coating of non-stick cooking spray or a thin layer of oil. This will help prevent your delicious creation from sticking to the pan.

Carefully transfer the mixed batter into the prepared dish, using a spatula to spread it out evenly. Make sure the top is smooth and level, ready to bake to a perfect golden-brown.

Slide the pan into the hot oven and set a timer for about 25-30 minutes. As it bakes, your kitchen will start to fill with the mouthwatering aroma.

Advertisement

Keep an eye on it, checking occasionally until the top is beautifully browned and a toothpick inserted in the center comes out clean. Mmm, can you almost taste it already?

Final Thoughts

Ultimately, effortless cooking is about embracing simplicity. It's not about complicated recipes or fancy techniques. It's about finding joy in the process and creating delicious meals with ease.

Remember, the key is to mise en place – have all your ingredients prepped and ready to go. This way, you can focus on the actual cooking without feeling stressed or rushed.

Cooking should be a relaxing and rewarding experience, not a chore. When you have your mise en place in order, you can easily adapt recipes to your liking.

Don't be afraid to experiment and put your own spin on things. The more you cook, the more confident you'll become. Soon, you'll be whipping up incredible meals without breaking a sweat.

Advertisement

Frequently Asked Questions

How Do I Store Mise En Place Ingredients Properly?

To store your mise en place ingredients properly, use airtight containers, label them clearly, and refrigerate perishable items. This'll keep your ingredients fresh and readily available for efficient cooking.

What Are the Essential Tools for Mise En Place?

To prepare for effortless cooking, you'll need essential mise en place tools like small bowls, ramekins, cutting boards, sharp knives, and measuring spoons and cups. These allow you to organize and access your ingredients quickly.

How Can I Make Mise En Place More Efficient in My Kitchen?

To make mise en place more efficient in your kitchen, organize your tools and ingredients beforehand, label and store them properly, and create a system that works for your cooking style and kitchen layout.

Can I Prepare Mise En Place in Advance for a Multi-Course Meal?

Absolutely! Preparing mise en place in advance for a multi-course meal can make your cooking more efficient and enjoyable. You can chop, measure, and organize ingredients ahead of time, allowing you to focus on the actual cooking process.

Is Mise En Place Necessary for Simple, Everyday Cooking?

Even for simple, everyday cooking, mise en place is a game-changer. It'll save you time, reduce stress, and help you cook more efficiently. You'll be amazed at how much smoother your cooking process becomes with a little bit of preparation.

Advertisement

Continue Reading

Kitchen Hacks and Tips

Turkish Menemen: Scrambled Eggs With a Mediterranean Twist

Discover the captivating flavors of Turkish Menemen, a breakfast dish that combines scrambled eggs with a savory medley of tomatoes, peppers, and spices, offering a mouthwatering Mediterranean twist.

Published

on

mediterranean scrambled eggs dish

You'll love the rich, aromatic flavors of Turkish Menemen – a classic breakfast dish that combines scrambled eggs with a savory medley of tomatoes, peppers, and spices. This traditional Mediterranean recipe offers a comforting and satisfying start to your day, showcasing the vibrant ingredients and culinary heritage of Turkey. The dish's tender, absorbent interior enhances the flavor of the ingredients, making it a beloved staple in Turkish households. Whether you're looking for a cozy family meal or a casual entertaining option, Menemen promises to delight your taste buds and leave you craving more.

Key Takeaways

  • Menemen is a classic Turkish breakfast dish featuring scrambled eggs combined with a savory medley of tomatoes, peppers, and aromatic spices.
  • The dish celebrates the freshness of Mediterranean ingredients and has become a staple in Turkish households, embodying the vibrant markets of the region.
  • The basic recipe includes a versatile combination of core ingredients like eggs, tomatoes, peppers, onions, and spices, allowing for customization to individual tastes.
  • Menemen is cooked by sautéing the vegetables, adding the eggs, and seasoning with a blend of spices for a flavorful, comforting, and satisfying meal.
  • Menemen is often served hot, with the scrambled egg mixture spooned over toasted crusty bread, creating a delightful dining experience.

History

Turkish Menemen, a beloved breakfast dish, has its origins deep in the culinary history of Turkey. This delectable scramble was created centuries ago, drawing inspiration from the vibrant flavors of the Mediterranean region.

Over time, the recipe has evolved, with each family adding their own unique twist, but the core ingredients – eggs, tomatoes, and peppers – remain the same.

The dish's name, "Menemen," is believed to have come from the town of the same name in the Aegean region of Turkey. Here, local chefs perfected the art of blending the fresh produce from their gardens with just the right spices to create a harmonious and satisfying meal.

As the dish gained popularity, it spread throughout the country, becoming a cherished part of Turkish breakfast culture. Regional variations began to emerge, with each area putting its own unique spin on the dish, further enriching its cultural significance. Interestingly, much like the deep-rooted traditions surrounding Scottish porridge history, the evolution of this breakfast staple showcases the way food can traverse time and space while remaining deeply connected to local customs. Today, it stands not only as a culinary delight but also as a symbol of Turkish hospitality and heritage.

Today, Menemen is a staple on tables across Turkey, enjoyed by people of all ages and backgrounds. Its simplicity and versatility make it a beloved choice for a hearty start to the day.

Advertisement

Recipe

Menemen is a classic Turkish breakfast dish that combines eggs, tomatoes, peppers, and onions in a delectable, savory medley. This vibrant dish originated in the Aegean region of Turkey and has since become a beloved staple across the country.

The beauty of Menemen lies in its simplicity and the harmony of its flavors, which can be further enhanced by incorporating fresh herbs from your garden or market, akin to herb-infused cocktails. It's a dish that celebrates the freshness of its ingredients and the rich cultural heritage of Turkish cuisine.

Whether enjoyed for breakfast, lunch, or even dinner, Menemen is a versatile and comforting meal that's sure to delight the senses.

Ingredients:

  • 4 eggs
  • 2 tomatoes, diced
  • 1 green bell pepper, diced
  • 1 onion, diced
  • 2 cloves of garlic, minced
  • 2 tablespoons olive oil
  • 1 teaspoon paprika
  • Salt and black pepper to taste
  • Chopped parsley for garnish (optional)

Instructions:

In a skillet over medium heat, sauté the onions and garlic in the olive oil until fragrant and translucent.

Advertisement

Add the diced bell pepper and continue cooking for another 2-3 minutes. Then, add the diced tomatoes and season with paprika, salt, and black pepper.

Allow the mixture to simmer for 5-7 minutes, or until the tomatoes have released their juices and the flavors have melded together.

Finally, crack the eggs directly into the skillet, gently stirring them into the vegetable mixture. Cook until the eggs are scrambled and the dish is heated through, being careful not to overcook the eggs.

For the best Menemen experience, serve the dish hot, garnished with fresh parsley if desired. Enjoy it with crusty bread or Turkish pide for a hearty and satisfying meal.

Cooking Steps

Sauté the onions and peppers until they're nice and tender.

Advertisement

Then, add the juicy tomatoes and watch as they release their flavors into the mix.

Next, carefully crack the eggs right into the tomato mixture and let them cook until they're just the way you like them.

Season it all up with your favorite spices and you're ready to serve this delicious Turkish Menemen over some crusty bread.

Step 1. Sauté Onions and Peppers

saut onions and peppers

Once the ingredients are prepared, you'll want to sauté the onions and peppers. Heat a large skillet over medium heat and add a tablespoon of olive oil. Toss in the sliced onions and bell peppers, stirring frequently. The key is to cook them until they're tender and lightly browned, which should take around 5-7 minutes. To enhance the flavor further, consider incorporating some spices or herbs that align with a gout-friendly diet.

As the onions and peppers sizzle in the pan, you'll notice their aroma start to fill the kitchen. The onions will become soft and translucent, while the peppers will start to develop a slightly charred edge. Keep an eye on them, adjusting the heat as needed to prevent burning.

Once the vegetables are cooked to your liking, remove the skillet from the heat and set it aside. You're now ready to move on to the next step in creating your delicious Turkish Menemen dish. The sautéed onions and peppers will add a wonderful depth of flavor and texture to the scrambled eggs.

Advertisement

Step 2. Add Tomatoes

incorporate tomatoes next step

Next, add the diced tomatoes to the skillet. They'll bring a bright, juicy burst of flavor to the dish.

Gently stir the tomatoes into the sautéed onions and peppers. As the tomatoes cook, they'll release their natural juices, creating a delicious, saucy base for the menemen.

Now, let the mixture simmer for a few minutes, allowing the flavors to meld together. You'll start to notice the tomatoes breaking down and the whole thing taking on a lovely, vibrant hue.

The kitchen will be filled with the enticing aroma of the sizzling vegetables.

Once the tomatoes have softened, it's time to crack in the eggs. Gently fold them into the vegetable mixture, creating a hearty, scrambled texture.

Cook until the eggs are just set, being careful not to overcook. The end result should be a flavorful, satisfying dish that's perfect for any time of day.

Advertisement

Step 3. Crack Eggs Into Tomato Mixture

crack eggs into mixture

With the tomatoes softened and their juices released, it's time to crack the eggs directly into the skillet.

Gently crack each egg, one at a time, letting the yolks and whites fall into the hot, fragrant tomato mixture. As the eggs hit the pan, they'll begin to sizzle and cook, slowly transforming into a delectable scramble.

Stir the eggs gently with a spatula, ensuring they cook evenly and incorporate the tomatoes' flavors. You'll want to keep a close eye, as the eggs can go from perfectly cooked to rubbery in the blink of an eye.

Once the eggs have reached your desired doneness, remove the skillet from the heat. The residual heat will continue to cook the eggs, resulting in a soft, creamy texture.

With the eggs now perfectly scrambled into the tomato base, you're well on your way to creating an authentic Turkish Menemen.

Get ready to savor the delightful Mediterranean flavors in every bite!

Advertisement

Step 4. Season With Spices

season with flavorful spices

Season the eggs and tomatoes with the remaining spices. Grab that jar of paprika and give it a generous shake over the pan. The vibrant red hue will add warmth and depth to your dish.

Adding spices not only enhances flavor but can also contribute to a well-rounded diet, which is important for overall health and well-being—especially for those following a balanced nutrition for hair health approach.

Next, reach for the cumin. Just a pinch or two will do – you don't want to overpower the other flavors. Swirl it in, letting the earthy aroma fill the air.

Can't forget the salt and pepper! Start with a light sprinkle, then give it a taste. Add more if needed to balance the sweetness of the tomatoes.

Don't be afraid to really season it up – the spices will bring out the best in your scrambled eggs.

Step 5. Serve Hot Over Crusty Bread

serve hot over bread

Once the eggs and tomatoes are perfectly seasoned, it's time to serve your Turkish Menemen hot over some crusty bread. The aromatic, savory combination is simply irresistible when piled high atop a slice of freshly baked bread.

Grab a sturdy, crusty loaf and tear or slice it into thick pieces. Toast the bread until it's golden brown and crispy on the outside, but still soft on the inside. This provides the perfect base to support the hearty, flavorful Menemen.

Advertisement

Spoon the piping hot eggs and tomatoes generously over the toasted bread. The steaming Menemen will soak into the bread, creating a delightful contrast of textures. The crusty exterior gives way to the tender, absorbent interior, allowing every bite to be a harmonious blend of flavors and sensations.

Serve the Menemen-topped bread immediately, while it's still hot and fresh. The inviting aroma and vibrant colors will have your family or guests eager to dive right in.

Enjoy this authentic Turkish delight together as a satisfying and comforting meal.

Final Thoughts

Ultimately, Turkish Menemen is a delightful and versatile dish that can be enjoyed any time of day. The combination of perfectly cooked eggs, vibrant vegetables, and aromatic spices creates a harmonious and satisfying meal.

Whether served for breakfast, brunch, or even a light dinner, this dish is sure to delight your taste buds.

Advertisement

One of the best things about Menemen is its adaptability. You can customize the recipe to suit your personal preferences, adding or subtracting ingredients as desired.

The beauty of this dish lies in its simplicity, allowing the fresh flavors to shine through. As you savor each bite, you'll be transported to the vibrant markets of Turkey, where this beloved dish was born.

Frequently Asked Questions

What Makes Turkish Menemen Different From Regular Scrambled Eggs?

Scrambled eggs are a simple breakfast dish, but Turkish menemen takes it to the next level. The addition of tomatoes, peppers, and spices gives it a distinct Mediterranean flavor profile that sets it apart from regular scrambled eggs.

Can I Substitute Any Ingredients in the Menemen Recipe?

You can certainly substitute ingredients in a menemen recipe. Feel free to swap out the vegetables, spices, or proteins to suit your tastes and what you have on hand. Just be sure to maintain the overall Mediterranean flavor profile.

How Long Does It Take to Prepare Turkish Menemen?

Preparing Turkish menemen doesn't take long – you can whip it up in about 15-20 minutes. Simply sauté the veggies, crack in some eggs, and you've got a delicious Mediterranean-inspired scramble ready to enjoy.

Advertisement

Is Turkish Menemen Suitable for Vegetarians or Vegans?

You'll be pleased to know that Turkish menemen can be easily adapted for vegetarians and vegans. Just omit the eggs and use extra veggies or plant-based protein instead. It's a flexible dish that can accommodate various dietary needs.

Where Can I Find the Traditional Spices Used in Menemen?

You can typically find the traditional spices used in menemen, such as Aleppo pepper and red pepper flakes, at Middle Eastern or Mediterranean grocery stores. Many well-stocked supermarkets may also carry these spices in their international or specialty sections.

Continue Reading

Affiliate Disclaimer
As an affiliate, we may earn a commission from qualifying purchases. We get commissions for purchases made through links on this website from Amazon and other third parties.

Advertisement

Latest

vietnamese american fusion sandwich delight vietnamese american fusion sandwich delight
Fusion Cuisine41 minutes ago

Banh Mi Burger: Vietnamese Sandwich Meets American Classic

Overflowing with a flavor fusion that blends the savory essence of an American burger with the bright, aromatic notes of...

artisan brewed coffee journey artisan brewed coffee journey
Beverage Deep Dives57 minutes ago

Craft Coffee: From Bean to Cup

Nestled in the rich history and vibrant flavors of craft coffee lies a captivating journey that unveils the art of...

effortless sheet pan dinners effortless sheet pan dinners
One-Pot Wonders1 hour ago

Sheet Pan Dinners: Effortless Meals With Easy Cleanup

Discover the secret to delectable, effortless meals with minimal cleanup - sheet pan dinners.

convenient quality freezer meals convenient quality freezer meals
Kitchen Hacks and Tips4 hours ago

Freezer Meals: Convenience Without Sacrificing Quality

Unlock the secret to effortless, mouthwatering meals with our guide to freezer-friendly recipes that deliver on both convenience and flavor....

optimal car purchase timing optimal car purchase timing
Vetted6 hours ago

14 Best Times to Buy a Car for Maximum Savings in 2024

Discover the optimal times to purchase a car in 2024 for maximum savings—your wallet will thank you when you learn...

unbreakable bond friend tattoos unbreakable bond friend tattoos
Vetted6 hours ago

15 Best Friend Tattoos That Celebrate Your Unbreakable Bond

Knot your friendship with these 15 best friend tattoos that capture your unbreakable bond—discover designs that will leave you both...

must watch hbo series must watch hbo series
Vetted6 hours ago

The 3 Best HBO Shows You Absolutely Need to Watch Right Now

Keep your binge-watching game strong with these must-see HBO shows that will leave you craving more thrilling stories. Discover your...

thrilling survivor seasons ranked thrilling survivor seasons ranked
Vetted6 hours ago

The 6 Best Survivor Seasons That Will Keep You on the Edge of Your Seat

Marvel at the unforgettable twists and jaw-dropping moments in these six Survivor seasons, where alliances shift and strategy reigns supreme—can...

top tvs for 2024 top tvs for 2024
Vetted6 hours ago

15 Best TVs to Buy in 2024: Top Picks for Every Budget and Need

A comprehensive guide to the 15 best TVs of 2024 awaits, showcasing top picks for every budget—discover which one will...

must watch anime recommendations guide must watch anime recommendations guide
Vetted6 hours ago

14 Best Animes You Need to Watch Right Now: A Guide for Every Fan

Discover the top 14 must-watch animes that cater to every fan's taste, and find out which ones will captivate your...

top toaster ovens 2024 top toaster ovens 2024
Vetted6 hours ago

15 Best Toaster Ovens of 2024: Your Ultimate Guide to Perfect Toasting

Navigate the top 15 toaster ovens of 2024 and discover which versatile appliance will elevate your cooking experience to new...

flawless foundations for maturity flawless foundations for maturity
Vetted6 hours ago

15 Best Foundations for Mature Skin: Flawless Looks at Any Age

Get ready to discover the 15 best foundations for mature skin that promise a flawless look; your perfect match awaits!

Trending